B. Welcome Panel
- Lucy Barber
- Jalesa Campbell (Unlicensed)
Owned by Lucy Barber
Last updated: Dec 02, 2015 by Jalesa Campbell (Unlicensed)
The Welcome screen is the first screen that your clients will see when they visit your web scheduler. You can use the Welcome Panel to customize the Welcome screen of your web scheduler. Navigate to the “Scheduler” tab → “Welcome Panel”.
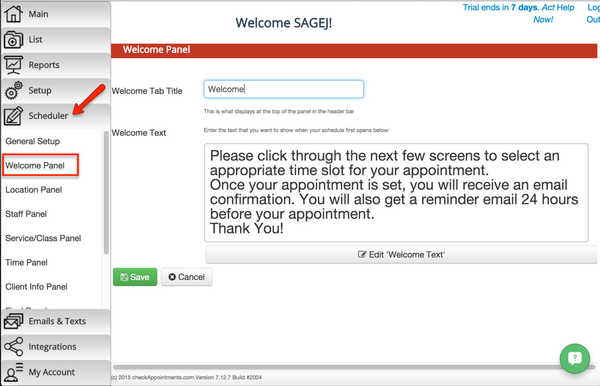
Here you’ll find options to:
Change the Welcome Tab Title
Change the Welcome Text
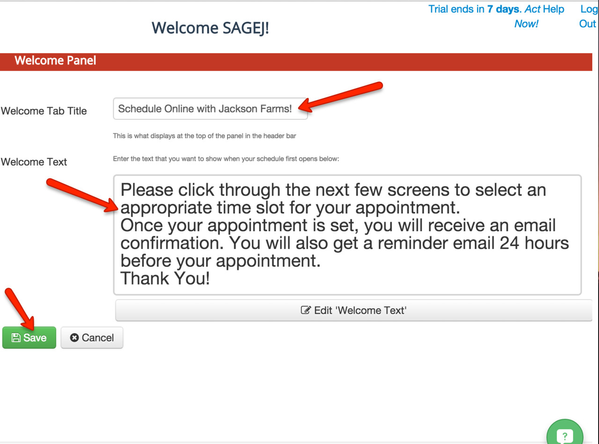
To change the Welcome Tab Title, enter in the title that you would like your clients to see when they first visit your web scheduler.
To change the Welcome Text, enter in the text or information that you would like to provide to your clients when they visit your web scheduler.
To save your changes, click the green “Save” button.
, multiple selections available,