Appointments
- Lucy Barber
- Jalesa Campbell (Unlicensed)
If you couldn't tell by the name, appointments are what checkAppointments is all about. In this section of our documentation, we're getting into the nitty gritty of all things appointments. On this particular page we're going to go through:
- What appointments are in our app
- How appointments are categorized by status
- The difference between appointments for services (where you meet 1-on-1 with clients) and appointments for classes (where you meet with groups of clients at a set time)
On the sub pages of the appointments documentation section, we'll be going through:
- All the ways appointments can be added to your schedule
- How to view the appointments you have coming up as well as the details around those appointments
- The actions you can take on any given appointment (like rescheduling, cancelling, invoicing, etc.)
If you still have questions about how appointments work inside checkAppointments after reading through these pages, feel free to contact our support team or sign up for a general support call with one of our staff members and we can work through all of your questions individually.
An appointment in checkAppointments represents an individual booking made with a client for a particular reason. The reason may either be a service appointment (which is a 1-on-1 booking between a staff person and a client) or it may be a class (which is a group based appointment where multiple clients can register for a time slot).
Once an appointment is added to your schedule, it blocks off your availability so that a client cannot book with you during that time for any other reason. This keeps you from having double bookings.
Each appointment on your schedule is set to a certain duration that's determined by the service or class that the appointment is set for. For instance, if the service that the client booked is set to a duration of 1 hour, then an hour will be blocked off of your schedule. You can adjust the duration of an appointment after it is set by editing the appointment, but by default the appointment time is set by the duration of the service or class.
You'll be able to view appointments by going to either your Main → My Calendar view or your List views. Once you click into an appointment, you'll be able to see more details around the appointment and take certain actions. The appointment detail screen, shown below, tells you the location, staff, reason, date, time, & client that you'll be meeting with:
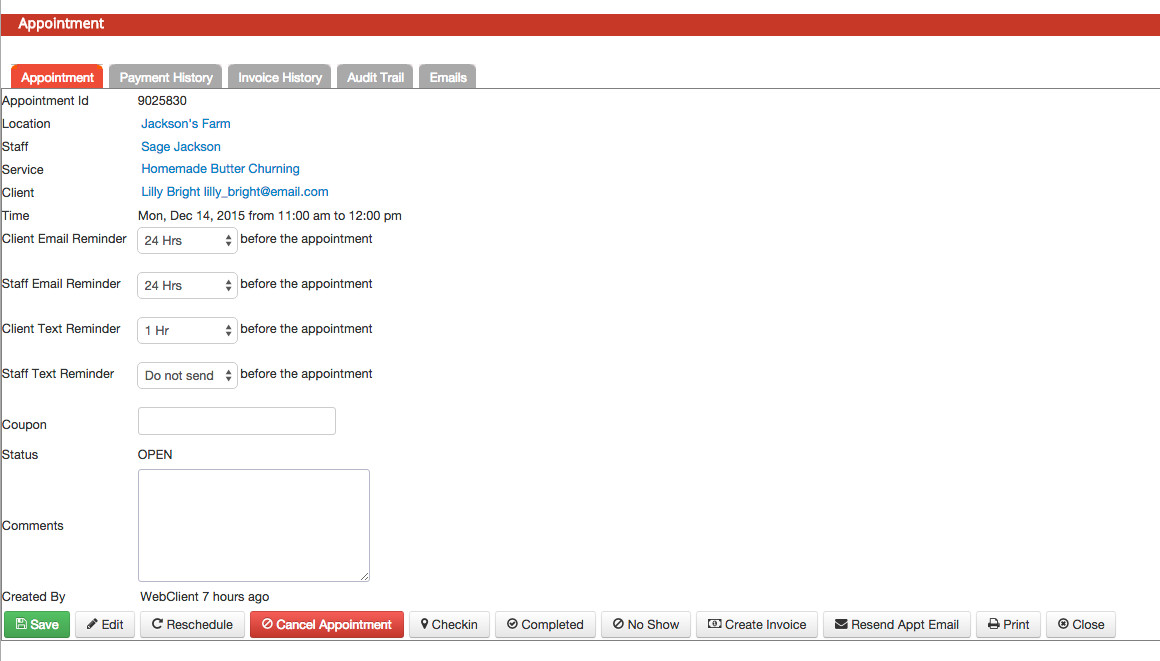
The appointment detail screen also allows you to take different actions around the appointment. We go through all of the things you can do with appointments on other pages of this documentation. Here is a quick list of helpful links:
- How to view appointments
- What's included on the appointment detail page
- Rescheduling an appointment
- Editing an appointment
- Changing an appointment's status
- Tracking changes to an appointment
For now, we hope this section has given you a better idea as to what appointments are. If you have any questions, as always, feel free to contact our support team or sign up for a general support call with one of our staff members and we can work through all of your questions individually.
checkAppointments is built to make appointment management a smooth, flowing process. To do this, we make use of Appointment Statuses.
The status describes where in the entire appointment process (from time of booking to successfully serviced) a client is. There are 5 statuses that an appointment can possibly be listed as that we discuss in this documentation:
- Open Appointments
- Checked In Appointments
- Completed Appointments
- Cancelled Appointments
- No Show Appointments
All of these status can be viewed in separate lists from one another for easy navigating and sorting. Keeping up with appointment statuses gives you a better idea of who you met with on a certain day, which is good for an old memory jog sometimes and for pulling reports from the app.
Open Status Appointments
Open status is what every appointment is listed as initially. As soon as you add an appointment or the client schedules him/herself, the appointment is added to your schedule and in Open status.
Appointments that are listed in Open status can be found in the Open appointments list under Lists → Open Appointments. You can change the status of an Open appointment to Checked In, Completed, No Show, or Cancelled.
When appointments are first opened, clients will receive a New Appointment email and the staff will receive a New Appointment notification. If appointments are re-opened (after being marked as any other status) then clients will receive the Appointment Edited/Changed email.
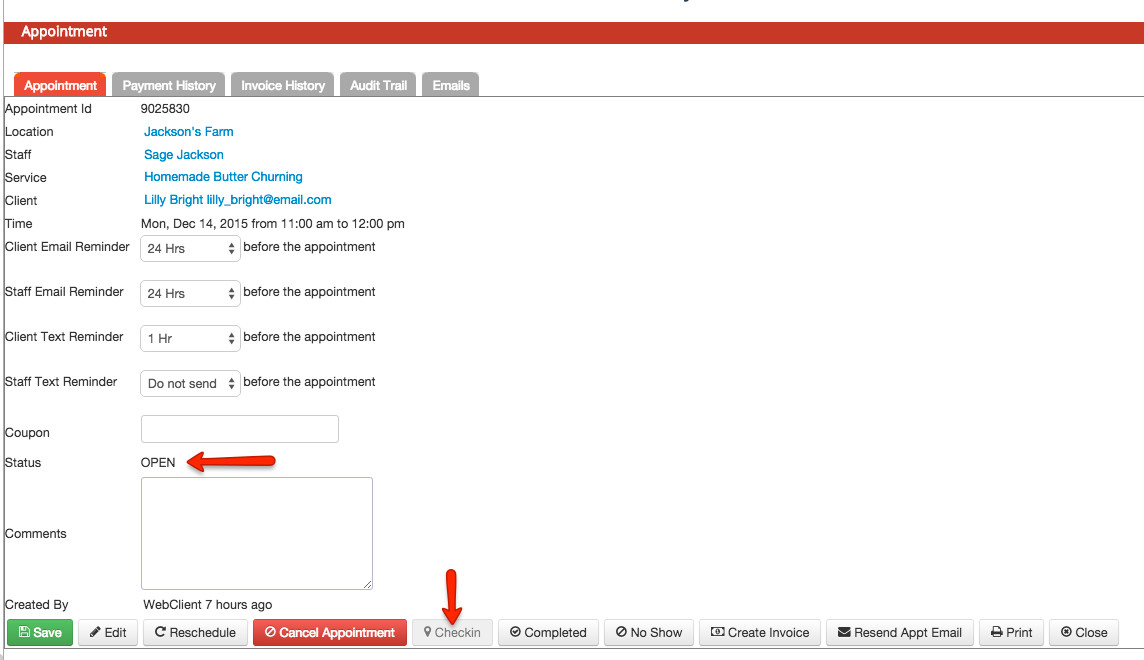
You'll also know if an appointment is in open status because the status will display on the Appointment Detail page:

Checked In Appointments
As clients come in for their appointment, you can mark their appointment as Checked In. Only appointments that are currently in Open Status can be marked as checked in. From Checked In status, you can mark the appointment as "Completed" to check the client out.
To provide a little more color on this one, Checked In is sort of a half way status. It is still technically an Open appointment and thus it's not a status that stands on it's own. You can see whether an open appointment is checked in since on the appointment detail screen, the status will be open and the Checkin button will be disabled:
Completed Appointments
An appointment that's in Completed status means that the client has come in for the service or class and the appointment has been successfully rendered. Appointments can move to "Completed" status from open or checked in status and the completed time will be marked in the audit trail for the appointment.
Usually once appointments are marked as completed, that is the end of the appointment's life cycle. It may, however, be Re-Opened so you can change the status to Cancelled or No Show if you accidentally marked it as Completed by mistake.
As you mark an appointment as completed, you have the option to send out a follow up Thank You email to the client with a note that you can add to it.
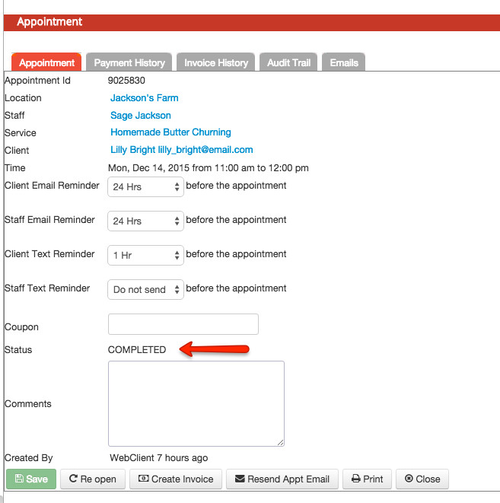
Completed appointments will stay on your Main → My Calendar view and you can find all completed appointments by going to List → Completed Appointments. You can also tell if an appointment is in Completed status from the status listing on the appointment detail page:
Cancelled Appointments
Either a Client or a Staff person can mark an appointment as "Cancelled". A client can do so by logging into the scheduler to manage his/her appointments or by clicking on the link in the New Appointment email they receive or the Appointment Reminder email.
Marking an appointment as Cancelled clears it from your Main → My Calendar view to open that timeslot up for another person looking to schedule with you. All cancelled appointments can be found by going to Lists → Cancelled Appointments. An email is also sent to the client and the staff about the cancelled appointment.
Cancelled appointments can be Re-Opened if a client cancelled in error or if the staff meant to mark them as Completed or No Show.
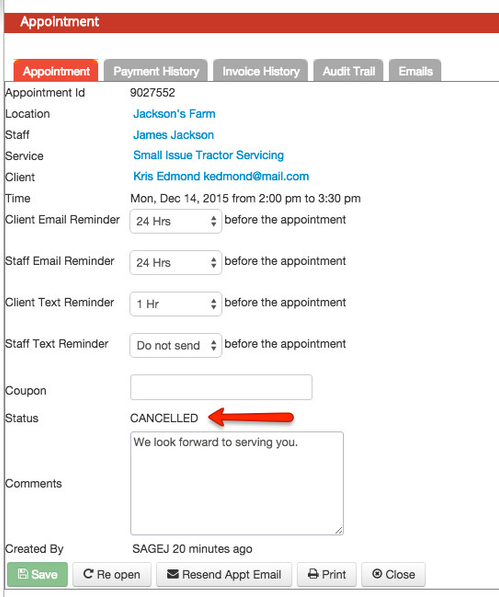
From the Appointment Detail page, you can see if an appointment is in Cancelled by the listing in the status section:
No Show Appointments
It the client does not end up showing up for his/her appointment time, you can mark the appointment as No Show. This does not clear it from your calendar view like a cancelled appointment is, but it does categorize it in a different list than the rest of the appointments.
From No Show status, appointments can be Re-Opened in case the client just arrived late for his/her appointment and you marked it as no show too soon. After re-opening, it can also be marked as Completed or Cancelled in case you incorrectly categorized the appointment as a No Show.
Only staff can mark appointments as no show (clients can mark themselves as no shows). When marking appointments as No Show, you have the option to send the client a No Show email. You could prompt them to re-schedule or you could yell at them for wasting your time (not advised, but it's your world ![]() )
)
You can tell if an appointment is in No Show status form the status label in the Appointment Detail screen:

Hopefully this gives you a better idea of how appointment statuses can help you manage your schedule and keep you organized. In a separate documentation, we go more in depth on how to categorize appointments as different statuses like:
- Checking In appointments
- Marking appointments as completed
- Marking appointments as cancelled
- Marking appointments as no shows
- Re-opening appointments
If you have any questions on using appointment statuses, feel free to contact our support team or sign up for a general support call with one of our staff members and we can work through all of your questions individually.
When a client is booking an appointment with you, he/she can choose between the different services and/or classes that you offer as the reason for their appointment.
Service based appointments are 1-on-1 appointments between a staff person and the client that clients can schedule for any time during which you (the staff) have hours of availability set up. Class based appointments are the individual clients who have reserved a spot in your class session; as such, there may be as many appointments in a given class session as your capacity for that session allows. Every person who registers for a seat in your class represents an individual appointment instance, but all of the class registrants are listed together on the class attendees list.
So the way you get appointment times to display for services is a bit different than for classes. With services, clients can choose from a break down of your availability whereas with classes you put in the specific dates that the class meets on. This is because with a group appointment, everyone has to be on the same page thus the time for the meeting needs to be pre-determined.
We go through how to set up availability for services in depth on our documentation for adding availability for a staff person to take appointments.
We also go through how to set up a class schedule in depth on our class documentation found here.
I hope that this explanation helps you to understand the difference between how service and class appointments are represented in checkAppointments. As always, if you have any questions on it at all, feel free to contact our support team or sign up for a general support call with one of our staff members and we can work through all of your questions individually.