Class Schedule
- Lucy Barber
Once you have added a class, you will want to add in a schedule for when that class is offered. You can either add a one time schedule or you can add a recurring class schedule. On this documentation page, we will cover how to add and edit a one time schedule added for a class. We cover how to add and edit recurring schedules for a class on a separate documentation page.
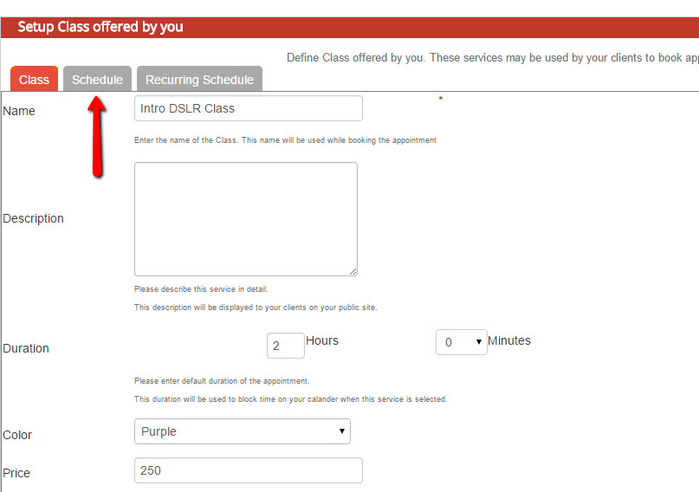
To view, add, or edit a classes schedule, you first have to navigate to it by going to Setup → Class then clicking into the class profile for the class you want to view the schedule for:

Once you click into the class profile, navigate to the "Schedule" tab up top:
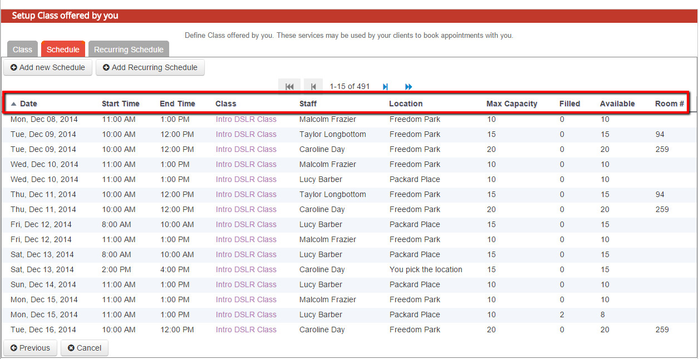
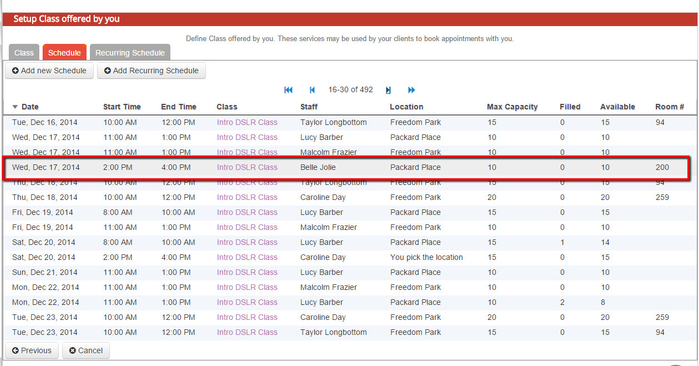
Now that you are in the "Schedule" tab of the class profile, you will see any open class sessions that are being offered for the class. By reading the table for classes you will see the class date, start time, end time, which staff is set to offer it, which location, the max capacity, how many seats are filled, how many seats are available, and the class room number:
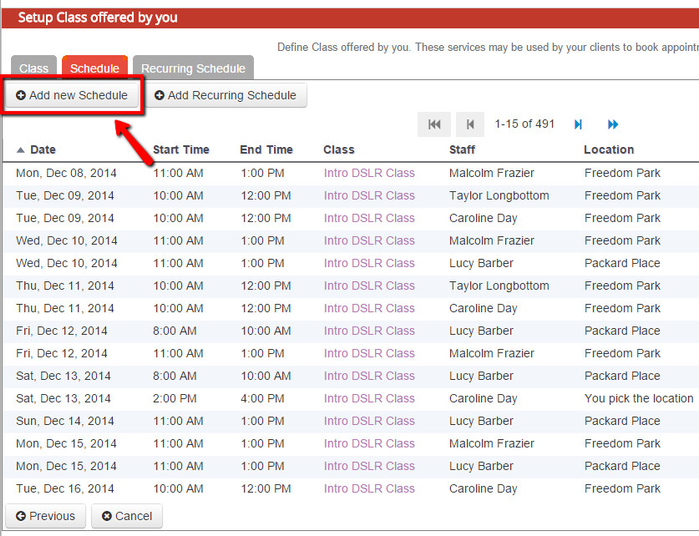
If you have another date and time you want to add for when this class will be offered, you can click the "Add New Schedule" button at the top left of the screen:
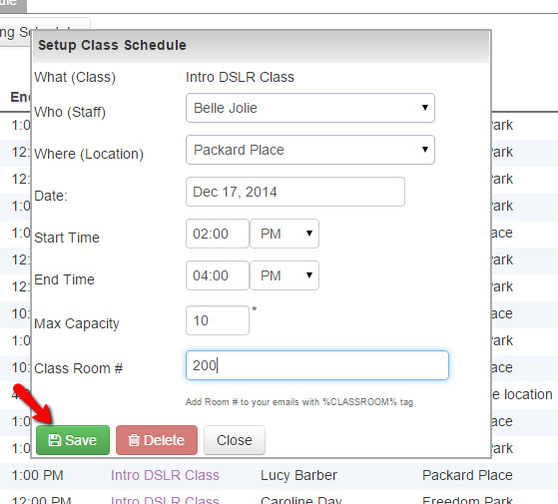
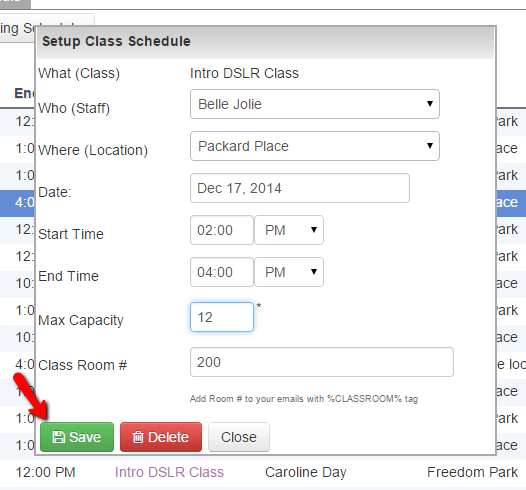
Once you click "Add New Schedule" you'll get a small pop up window in the center of the screen where you can setup the one time class schedule. You'll enter in which of your staff is set to lead the class, which location it will be offered at, the date of the class, the start and end time, how many clients can be in the class, and the classroom number (if applicable). Once you've finished filling in those detail, just press the "Save" button to add the class to your schedule:
Now that you've saved it to your schedule, you will see it in your class schedule list:
Editing a Single Class Session
If there is just one class session that you need to make an adjustment for (maybe you need to change the staff or the location, change the time or up the capacity), you'll first need to navigate to the full schedule for the class that has the session you need to make the adjustment for. To do this, go to Setup → Class then click into the class profile for the class you want to view the schedule for:
Once you click into the class profile, navigate to the "Schedule" tab up top:
Now that you're viewing the class schedule, you can navigate through the list to find the class session you want to make the adjustment for:
Once you've found it, click on it and you will see the "Setup Class Schedule" pop up appear on the screen. From this pop up you can make adjustments to the class schedule (like changing staff, location, date, time, or capacity) or you can delete the class session all together and keep anyone from registering for it. Once you have made the changes you want to make, press "Save" and you'll see the changes update on the class schedule:
If you update something like Date or Time and some folks have already registered for the class, it is best to go to the class list in Lists → Open Classes and download the class roster. Once you download the class roster in Excel format, you can copy the email addresses for the clients and send them all a note about the updated class date or time.