Adding Availability for a Staff Person to take appointments
Each staff person's profile has a tab called "Working Hours". Your working hours define between what hours a client can book an appointment for a service (not a class). Services have a set duration that breaks down your working hours into appointment timeslots. The time in your availability must be greater than or equal to your service's duration (plus any service buffers) in order for appointment timeslots to display to clients who are booking with you.
For instance, if you are a massage therapist and have a “Deep Tissue Massage” service that lasts for 1 hour (60 minutes) and your working hours are set up between 9:00am – 5:00pm, you could have appointments scheduled from:
- 9:00am-10:00am
- 10:00am-11:00am
- 11:00am-12:00pm
- 12:00pm-1:00pm
- 1:00pm-2:00pm
- 2:00pm-3:00pm
- 3:00pm-4:00pm
- 4:00pm-5:00pm
Alternatively, if you have a “Hot Stone Massage” service that is set for a duration of 90 minutes (1 hour & 30 minutes), the appointment time offerings would be:
- 9:00am-10:30am
- 10:30am-12:00pm
- 12:00pm-1:30pm
- 1:30pm-3:00pm
- 3:00pm-4:30pm
No one would be able to book a 90 minute massage after 4:30pm because your day is set to end at 5:00pm. The thing to realize about setting your service durations is that there has to be enough time left in your availability to account for the entire duration of you last appointment.
In this documentation, we will cover how to add hours of availability for yourself or your staff. To do this for yourself you can navigate to My Account → My Account and click on the "Working Hours" tab. To do this for other staff, you can go to Setup → Staff, click on the staff's name that you want to add hours of availability for and click on the "Working Hours" tab:
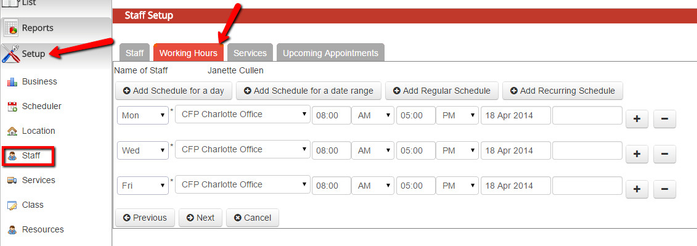
We will go through adding hours for yourself using the four options for adding a schedule:
If you have any questions about adding available working hours for yourself or for your staff, please contact our support team.
If you are only going to be available for service based appointments for a single day, then it is best to use the "Add Schedule for a day" button. This will make it so that the hours of availability that you add only apply to that single date. To do this, navigate to the Working Hours tab of your Staff Profile by going to either Setup > Staff and clicking on your name or going to My Account > My Account and clicking on the "Working Hours" tab.
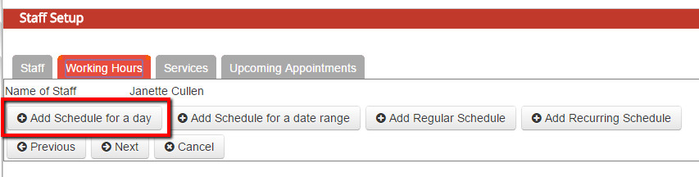
Once you are in the working hours tab, click the button to "Add Schedule for a day":
Once you press the "Add Schedule for a day" button, you will get the "Add Schedule" window where you can customize the date you are adding availability for, which location you'll be available at, and the start and end times of the day through which you'll accept service based appointments. Once you have added these options, click the "Add" button to add the day to your schedule:

Once you've added the single day of availability to your schedule, you will see it appear in a table view underneath your Working Hours tab:
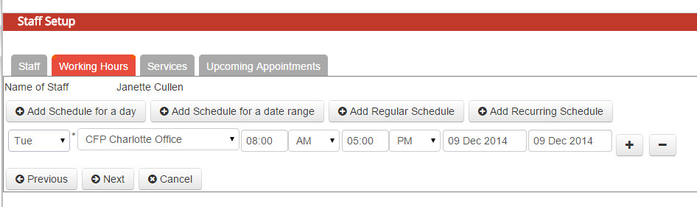
Reading this left to right, I will see that staff member Janette Cullen is available on Tuesdays at CFP Charlotte Office location between 8:00am and 5:00pm starting on December 9th and ending December 9th.
If you are going to be available for service based appointments for multiple days between two dates, then it is best to use the "Add Schedule for a date range" button. This is great, for example, if you are going to be available on Mondays and Wednesdays between January 1st, 2015 - January 31st, 2015 to take appointments, but your schedule either ends or changes after January 31st.
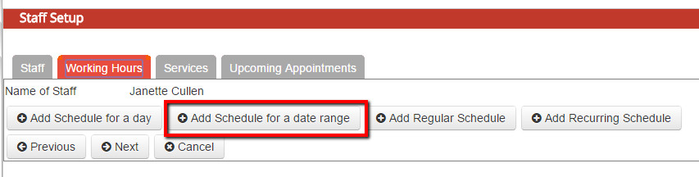
To add this type of schedule, navigate to the Working Hours tab of your Staff Profile by going to either Setup > Staff and clicking on your name or going to My Account > My Account and clicking on the "Working Hours" tab. Once you are in the working hours tab, click the button to "Add Schedule for a date range":
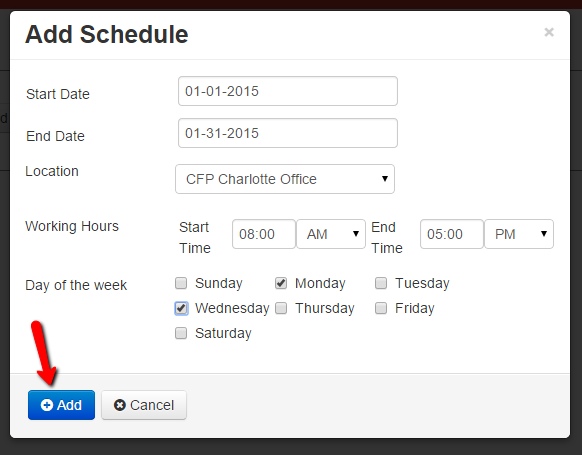
From here, you can customize the start and end date for your range of availability as well as what hours you are available during that range and on which days. Once you've finished filling in that criteria, click the "Add" button to add the availability to your schedule:
The availability will now appear as a table underneath your working hours tab:
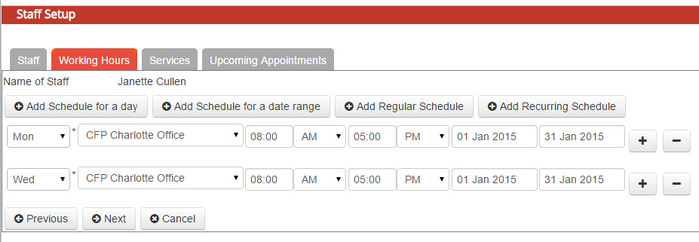
Reading this table left to right I will see that staff member Janette Cullen is available on Mondays and Wednesdays at CFP Charlotte Office between 8:00am - 5:00pm starting on January 1st and ending on January 31st. All Mondays and Wednesdays between these two dates will be open for clients to book services.
If you are going to be available for service based appointments on a regular basis with no end date to your availability, then it is best to use the "Add Regular Schedule" button. This is great, for example, if you are available to take appointments Monday - Friday each week.
To add this type of schedule, navigate to the Working Hours tab of your Staff Profile by going to either Setup > Staff and clicking on your name or going to My Account > My Account and clicking on the "Working Hours" tab. Once you are in the working hours tab, click the button to "Add Regular Schedule":

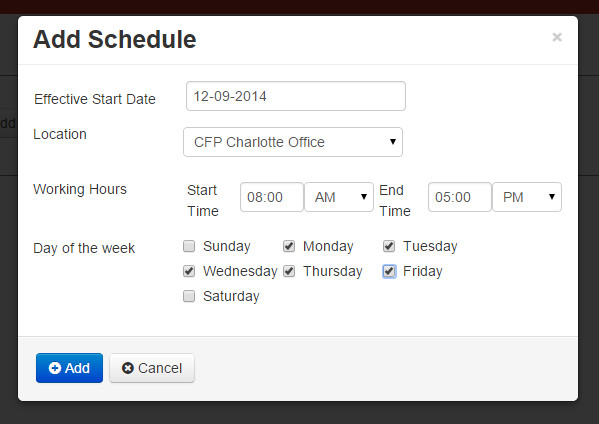
This will bring up the "Add Schedule" window where you can customize what date your regular schedule becomes effective, which location you'll be available at, the start and end time of your availability and which days those hours are applied to. After you've filled in the criteria for your regular schedule, click the "Add" button in the bottom left:
The regular availability you added will now appear as a table underneath your working hours tab:
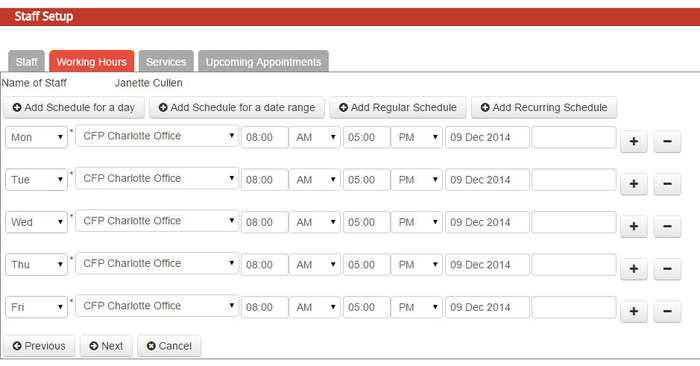
Reading this table left to right, I can see that staff member Janette Cullen is available Monday, Tuesday, Wednesday, Thursday, & Friday at the CFP Charlotte Office location between 8:00am-5:00pm starting on December 9th and extending indefinitely into the future. All Mondays-Fridays after December 9th will be opened up on Janette's schedule for clients to book service based appointments.
If you have a schedule that shifts week to week between locations, you may want to use the "Add Recurring Schedule" button. This is great if you are, for instance, available at one location on the first and third weekends of the month but available at a different location on the second and fourth weekends of the month.
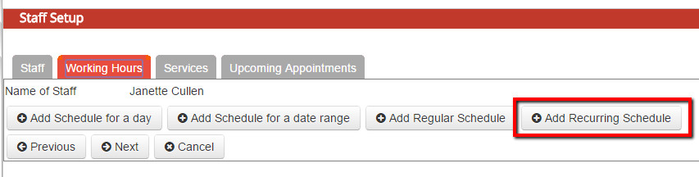
To add this type of schedule, navigate to the Working Hours tab of your Staff Profile by going to either Setup > Staff and clicking on your name or going to My Account > My Account and clicking on the "Working Hours" tab. Once you are in the working hours tab, click the button to "Add Recurring Schedule":
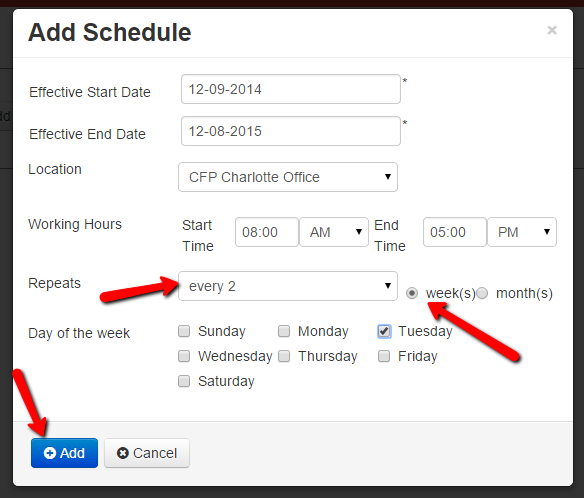
This will bring up the "Add Schedule" window where you can enter in the requirements for adding your recurring schedule. First you will enter in the start and end date for your repeating schedule as well as the location and hours of the day that you're available. Then, depending on what kind of pattern your schedule takes, you will want to switch between selecting that it repeats on a weekly or a monthly basis. If I wanted to create a schedule where I was available every other Tuesday at a certain location I would select that I wanted the schedule to be applied every 2 weeks on Tuesday and then click "Add" to add the availability to my working hours:
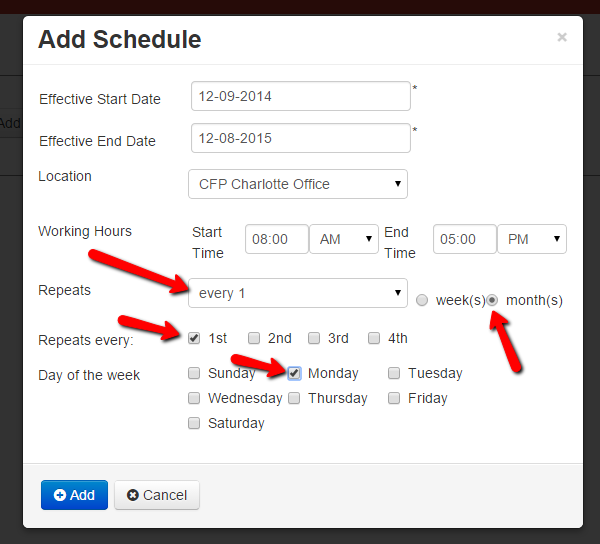
Alternatively, I could also add a schedule where I am available on the 1st Monday of every month and then click "Add":
Once you press Add on the recurring schedule window, you will see the Working Hours table fill in with a bunch of single day timeslots that extend through the end date of the recurring schedule you added:
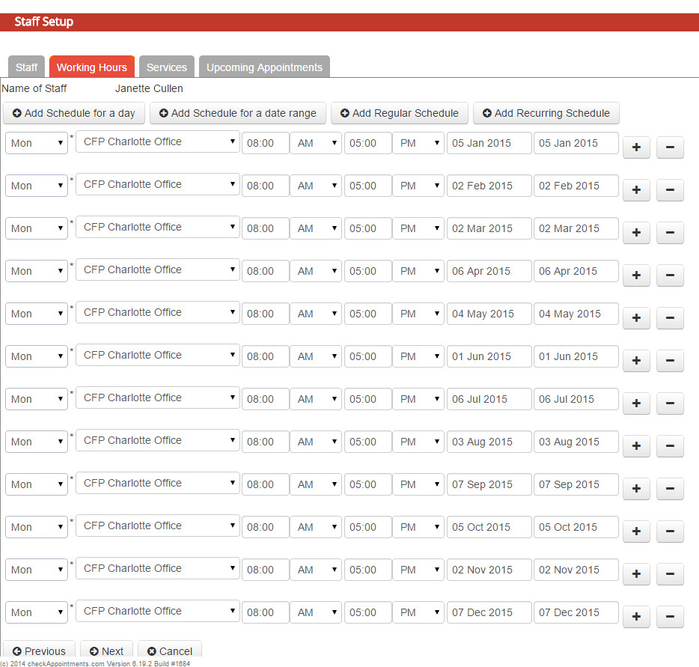
If I read the table above from left to right, I will see I am available on Monday at CFP Charlotte Office location between 8:00am - 5:00pm on January 5th 2015 (the first Monday in January). I then can read the next row and see the same times apply for February 2nd, the first Monday in February.