Book One Time Appointment
- Lucy Barber
While most of checkAppointments users use the online scheduling system to let clients book and manage their own appointments, staff can always add appointments to their schedule by logging into checkAppointments back office application.
In this documentation, we'll go through how staff can:
- Add 1-on-1 service appointments through Book One Time Appointment
- Add clients to a class through Book One Time Appointments
- Add 1-on-1 service appointments through the My Calendar or Staff Schedule view
If necessary, you can set up appointments for clients on a repeating basis. We go over how to do this in our documentation on recurring appointments.
If you still have questions about how to add one time appointments on checkAppointments after reading through this page, feel free to contact our support team or sign up for a general support call with one of our staff members and we can work through all of your questions individually.
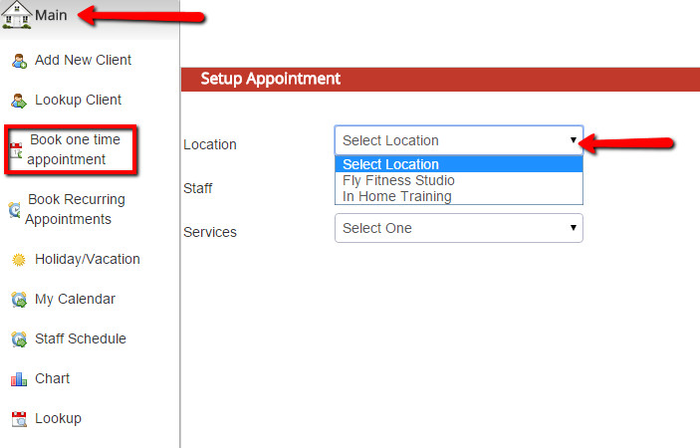
If you are looking to add an appointment for a 1-on-1 appointment for one of the services you have on your account, you can use the Book One Time Appointment screen to do so. The Book One Time Appointment flow will take into account what available appointment times you have to offer. You can find it by going to Main → Book One Time Appointment. Once there, you will start by selecting the Location where the appointment will be held:
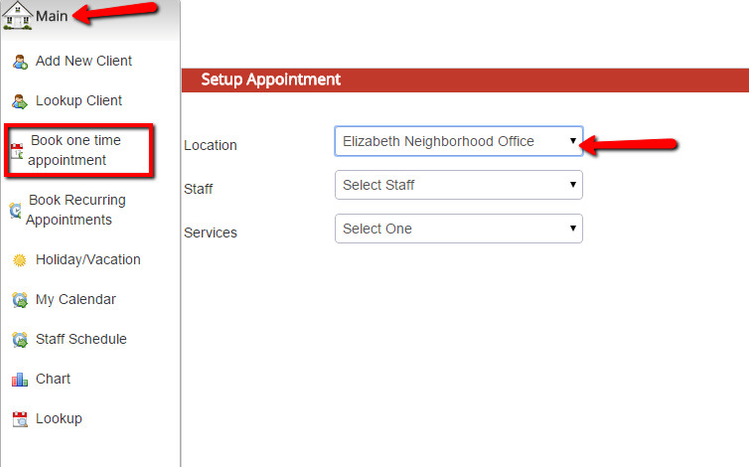
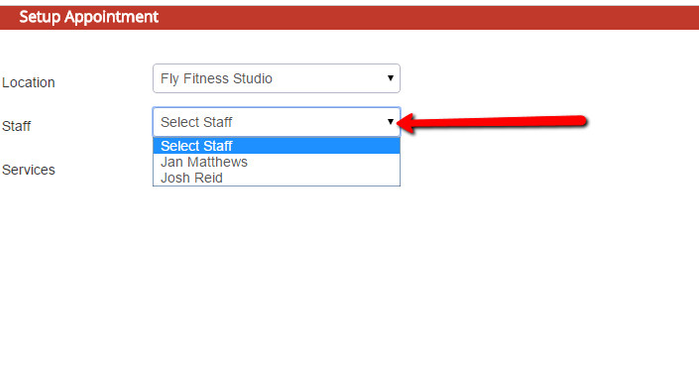
If you only have one location on your account, the location will be preselected for you. After you've selected the location, checkAppointments will filter the staff to show you only the staff that are available at that location:
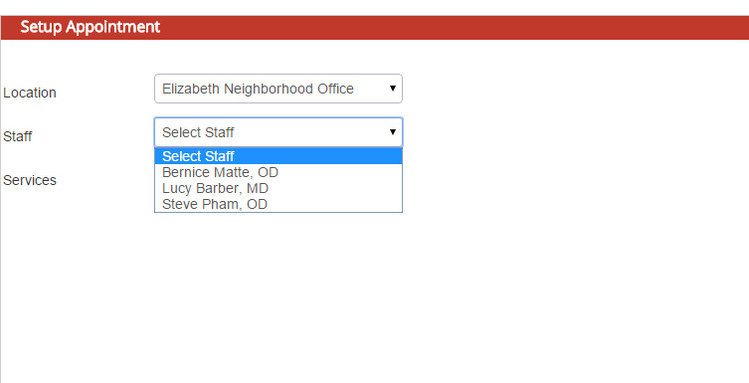
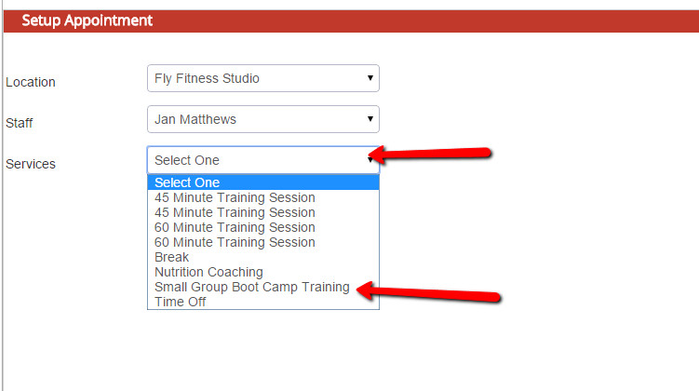
Click the staff dropdown to select who you want to set the appointment with from the available staff. After that, you'll see the services/classes that the staff offers appear in the services dropdown. Since this part of the documentation relates to booking a one time appointment for services, I will select a service from the dropdown menu:
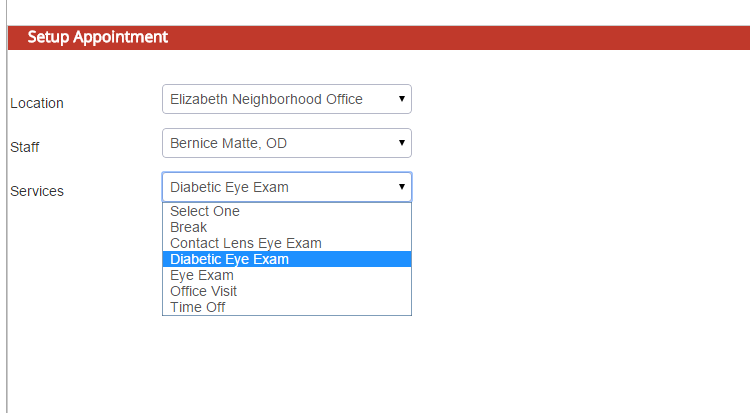
After selecting the proper service for the appointment, you will see a calendar appear with the available dates that the staff person has at the location selected to offer the service you selected:
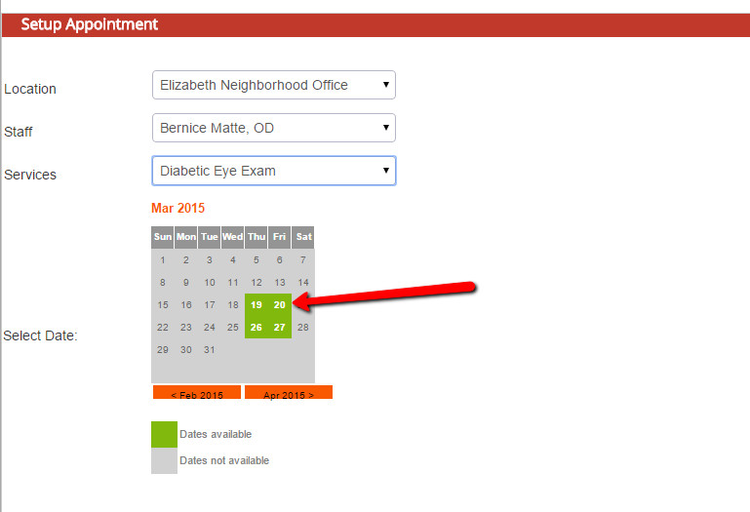
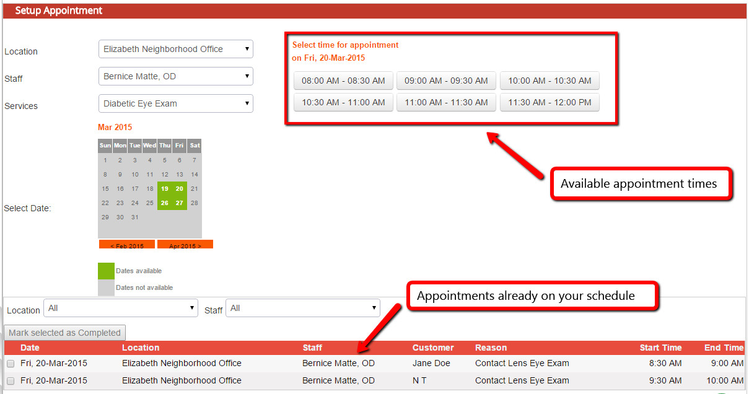
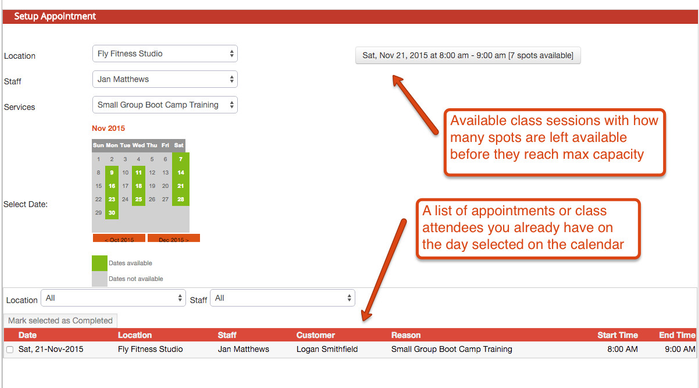
Click on the date you want to make the appointment for and you will see the available appointment times appear on the right hand side as well as all the other appointments you have on that day appear at the bottom:
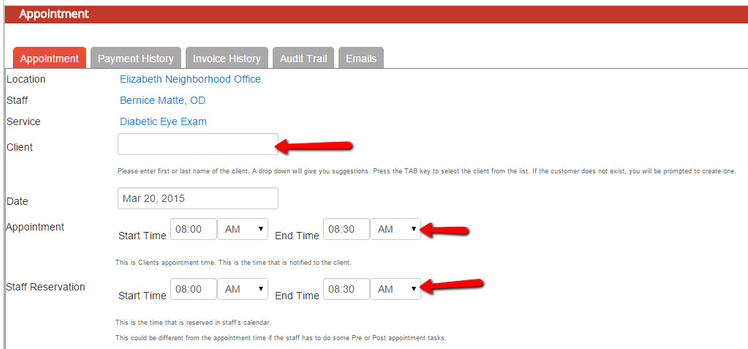
Choose the appointment time you want to set for the booking and you'll enter into the Appointment Detail screen. The appointment detail screen will let you set the client for the appointment as well as make any adjustments to the start and end time of the appointment:
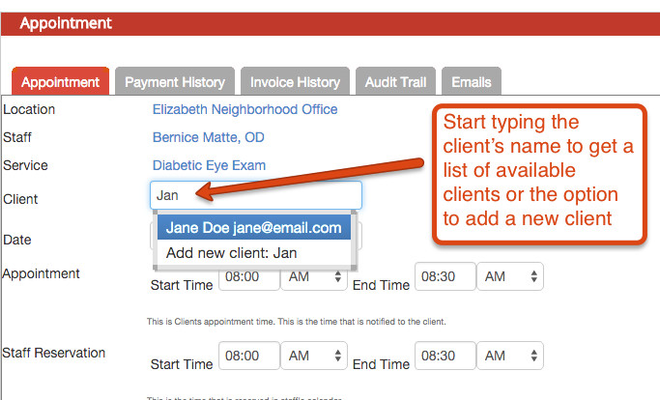
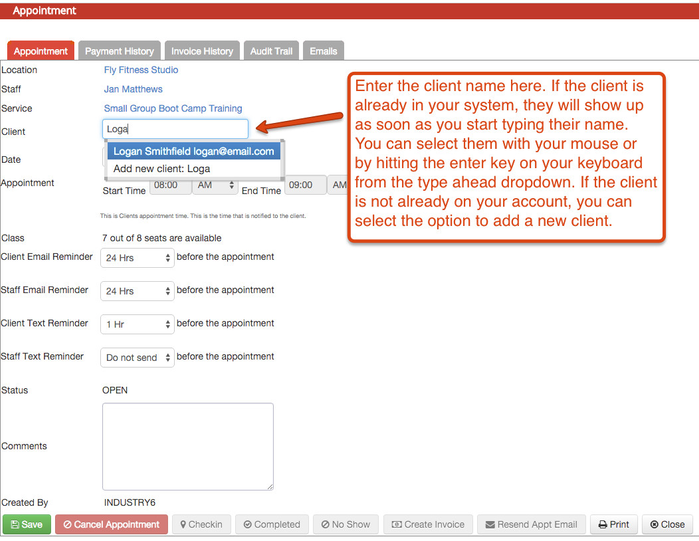
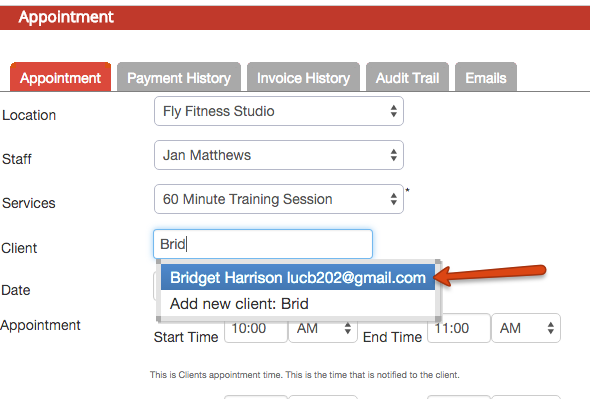
If the client is already in your system, he/she will show up as soon as you start typing their name. You can select them with your mouse or by hitting the "enter" key on your keyboard from the type ahead dropdown:
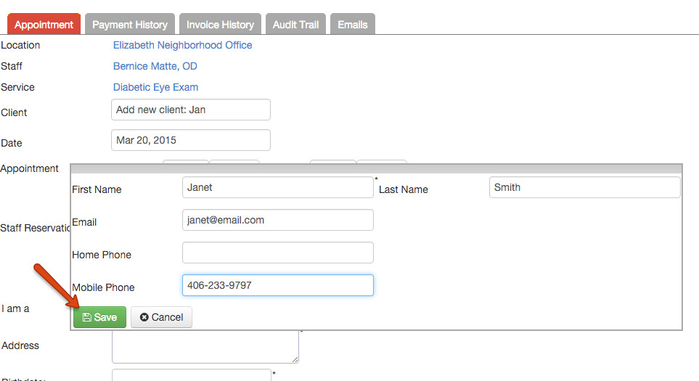
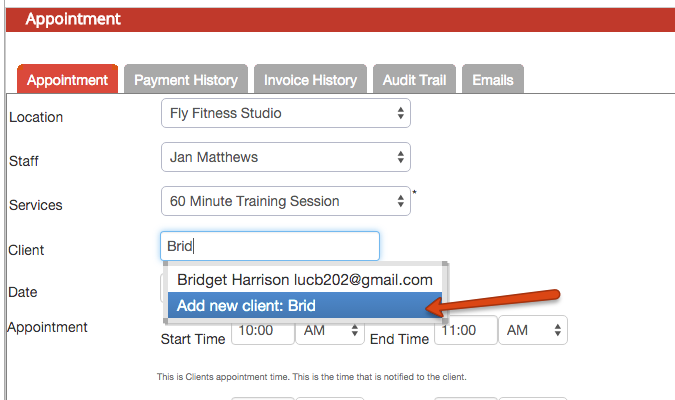
If the client is not already on your account, you can select the option to "Add new client" that shows in the dropdown as well:
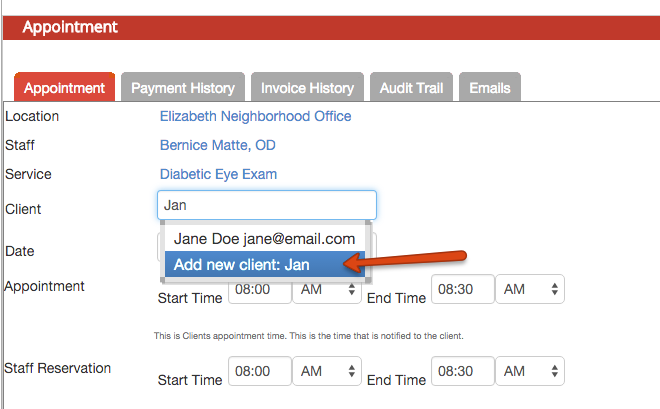
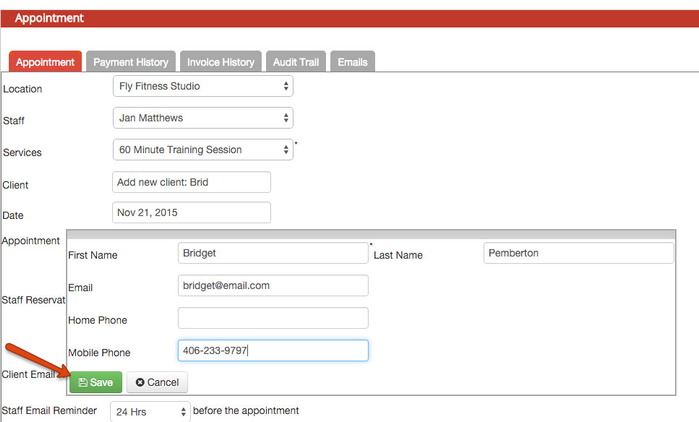
Once you select to "Add new client" you'll get a short add new client form where you can enter in the new client's name, email, and phone number. You can edit the client's full profile later to add additional details:
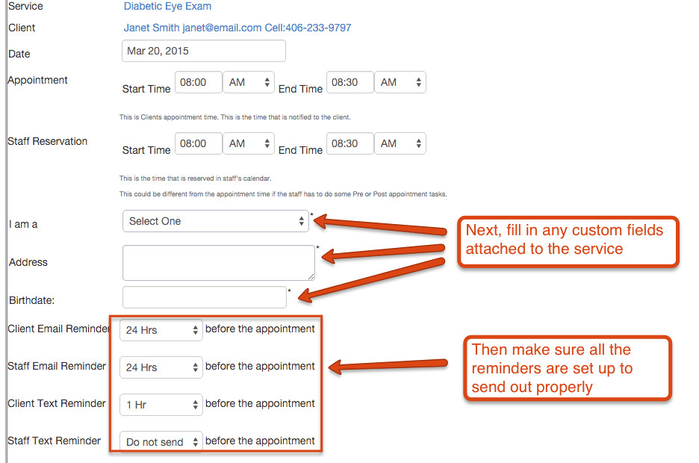
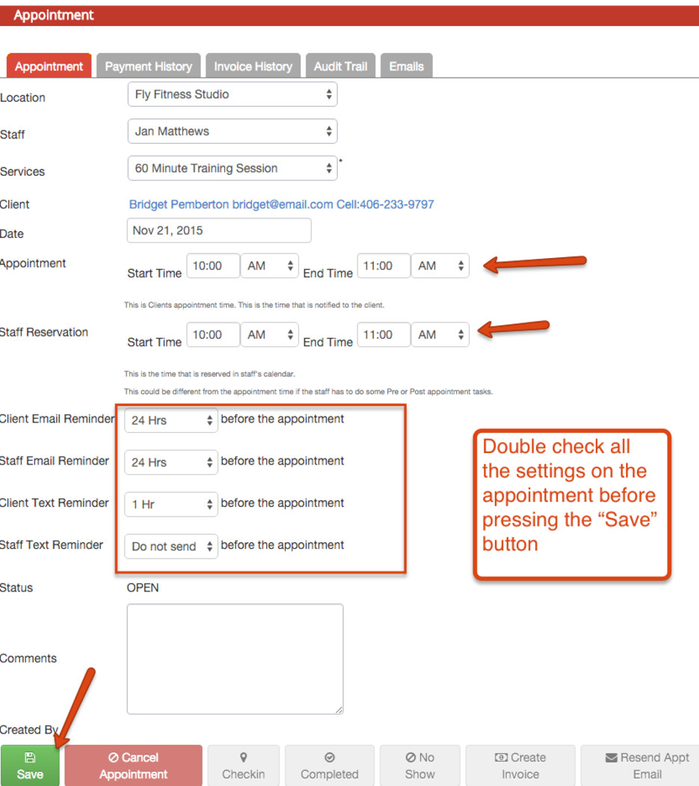
Once I've entered in the client and checked to make sure the appointment times are correct, I can scroll down the appointment screen and fill in any custom fields that are attached to the service I'm setting the appointment for as well as double check that the reminders are set to the proper times:
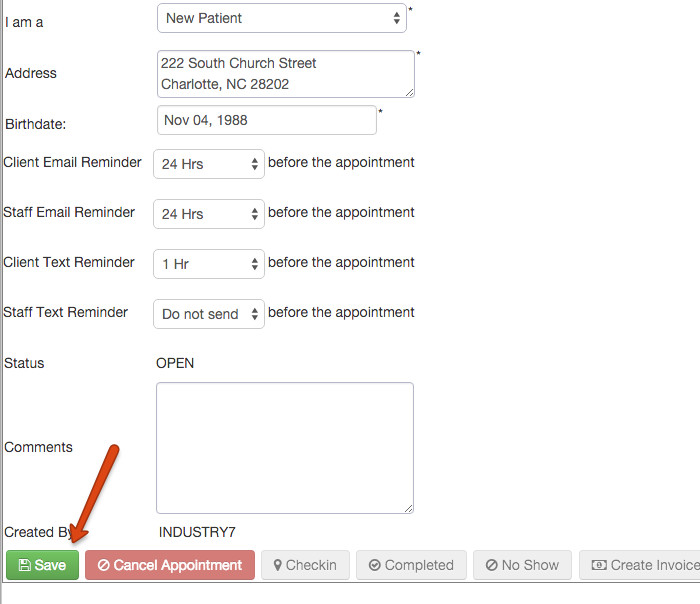
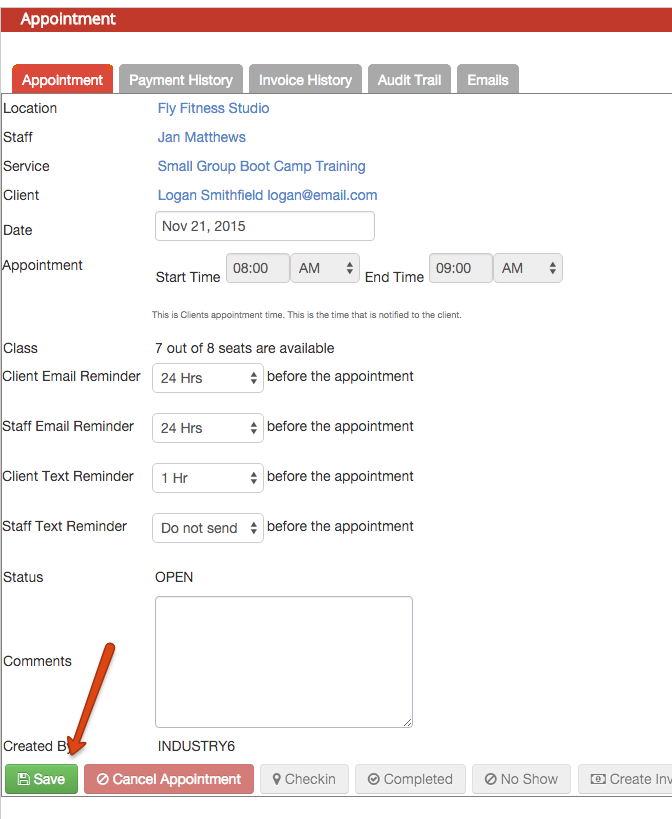
Scrolling all the way to the bottom of the appointment detail page, you'll see a place where you can enter any comments when setting up the appointment and press "Save" to commit the appointment to your schedule:
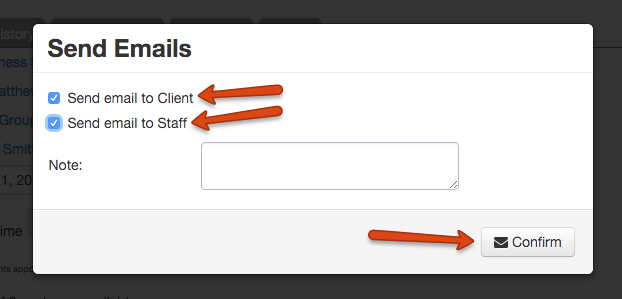
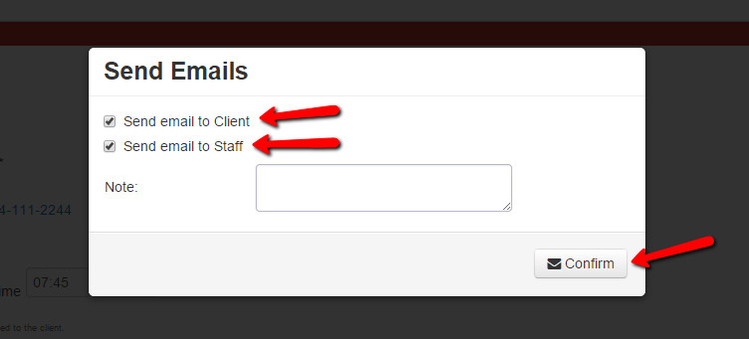
Now you'll get a prompt with whether you want to send an email out to the client and/or the staff about this appointment:
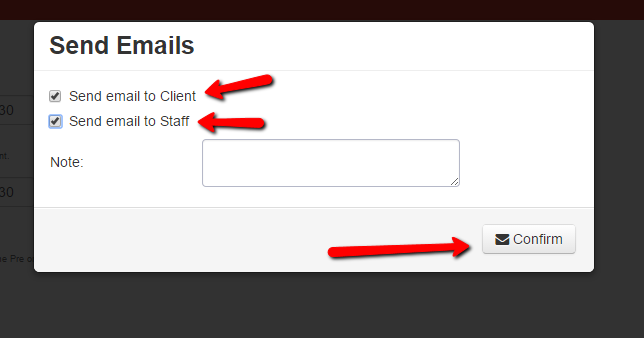
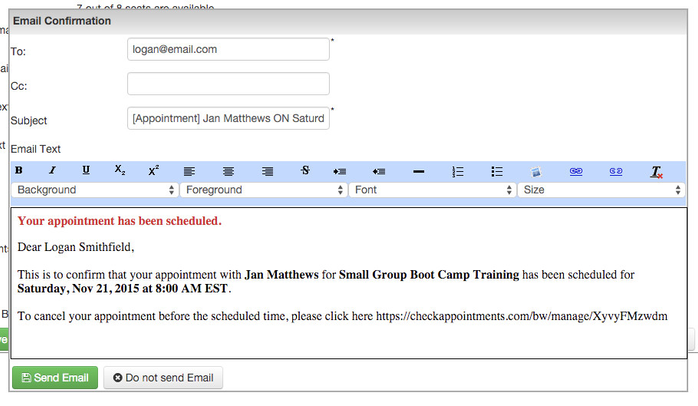
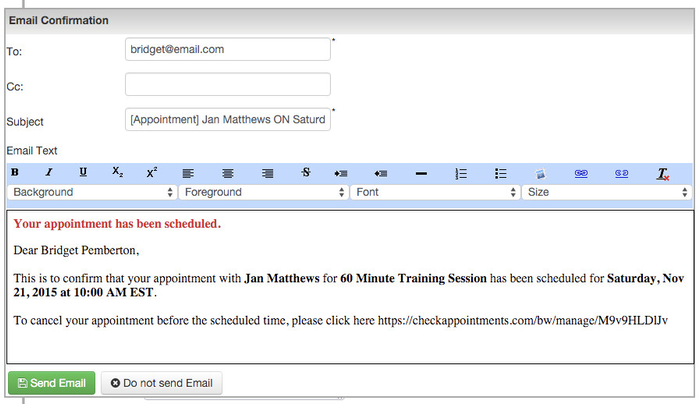
Select who you want to send the emails to and hit "Confirm". This will take you back to the book one time appointment screen and, if you selected to send out emails, will provide you with the email editor to change the text of the email that you're sending out to the client:
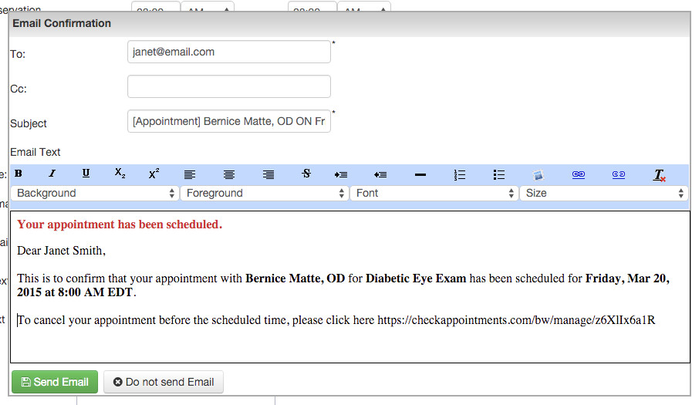
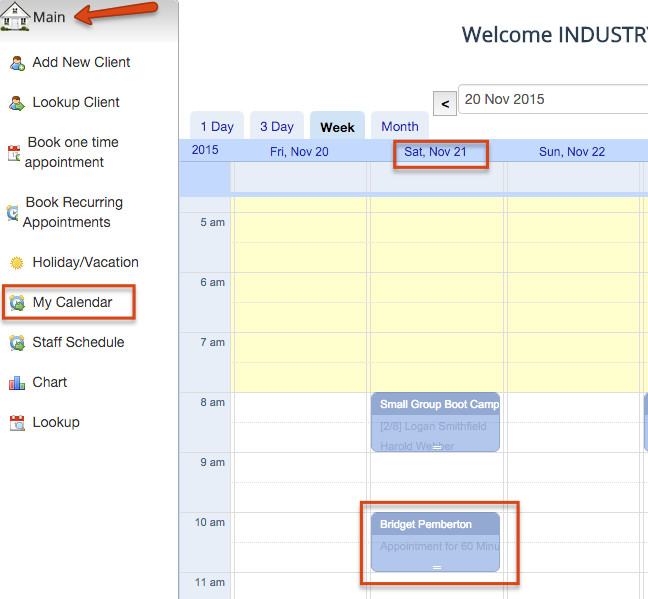
After you send the email, you will see the appointment on your Main → My Calendar screen and the appointment time will be blocked off from booking for any other clients trying to book. You can learn more about viewing appointments on our documentation available here.
Once you have your class schedule setup, you can add clients to individual class sessions by using the Main → Book One Time Appointment screen. Clients can always book themselves into a class on your web scheduler, but if someone does call you and wants to join a class that you have open, you can login to checkAppointments back office application in order to add them to the class session they want to attend.
To do this, go to Main → Book One Time Appointment and select the location where the class will be held at (note: if you only have one location, this will be preselected for you):
Once you've selected the location, choose the staff that is going to be leading the class the client wants to join (again, if you only have one staff set up with hours of availability at the location you've selected, the staff will be preselected for you):
Finally, select the class from the services drop down:
Once you've selected the class you will see a calendar appear where the dates in green represent days where a class session has been set up on the class's schedule. Select the date for the class the client would like to join:

Once you've selected the date, you will see the times that the class is being offered on that date appear on the right hand side along with any other appointments you have that day appear at the bottom of the screen. The times that the class is being offered will also show you how many seats are left available in any given session. Click on the session you want to enlist the client in:
After you click on the session you want to enlist the client into, you'll enter into the appointment screen where you can set up which client you're assigning to the appointment and make sure that any custom field info is set up correctly:
Once you've entered the client and checked to make sure that any custom information fields and the reminders are set properly, you can click save to commit the appointment to your schedule:
If you are setting the appointment for an new client, you will first be prompted to create an account for the client before you can save the appointment. In this example, however, I have added the appointment for an existing client on the account and so I will just get prompted with whether I want to send the client an email about the appointment:
If you select that you want to send an email to the client, you'll have a chance to edit the email before sending it out:
Once you've sent out the email, you'll be able to see the client in the class list if you navigate to Main → My Calendar and view the day that you just scheduled the client for:
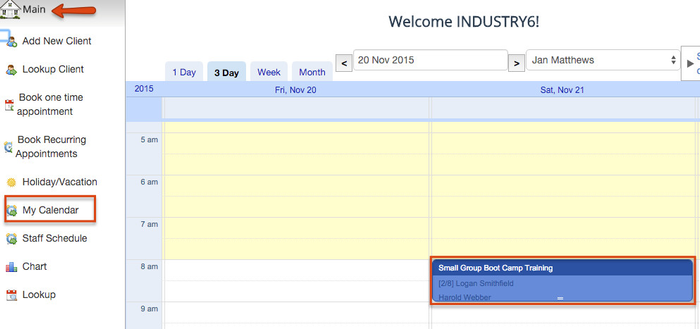
At this point the appointment is all set up and the client is on the attendees list for the class session. As the class time rolls around, every client in the class will have individual emails sent to them to reminder them of their upcoming appointment for the class session. We discuss more about how to manage class attendees and view class lists on our documentation on classes and viewing appointments.
If you have any other questions about adding a client for a one time class session, feel free to contact our support team to get them answered. We also offer 1-on-1 support calls where we can go in depth on the questions you may have. You can book those support calls here.
You can also use your Main → My Calendar or Main → Staff Schedule views to add bookings to your schedule for service based appointments. This is nice to use when you:
- Know the exact date and time that you want to have the appointment on and don't need to view your availability (which the service appt book one time option lets you do) - or -
- You want to add an appointment to your schedule outside of the times that you have hours of availability set up for
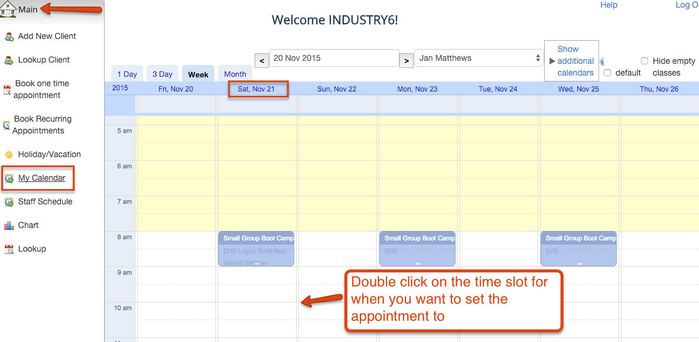
To do this, just go to either Main → My Calendar or Main → Staff Schedule and navigate to the date that you want to add an appointment for. In this example, I'm going to be adding an appointment for 10:00am on Saturday, November 21st, 2015 which is outside of my set working hours. From the My Calendar or Staff Schedule screen, I'll navigate to November 21st and double click at the 10:00am time slot:
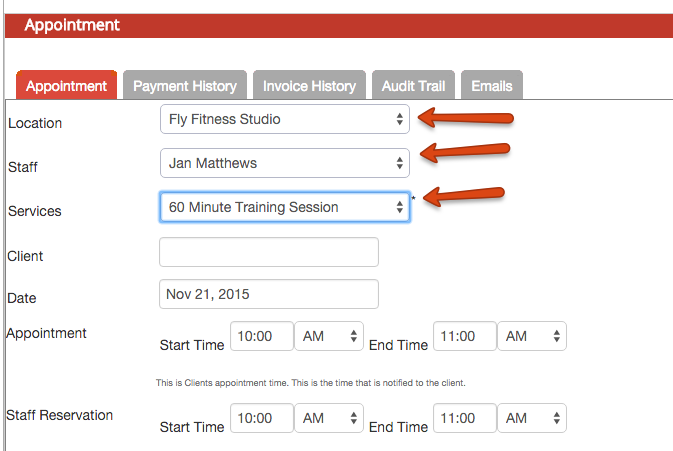
This will take you into the set up appointment screen where you can select the location, staff & service you want to have for the appointment:
Once you've set the location, staff, & service, you can enter in which client the appointment is being set for. If the client is already on your account he/she will appear in the type ahead drop down. You can select them from the type ahead drop down by click on their name with your mouse or by hitting the "enter" key on your keyboard:
If the client is not already on your account, you can select the option to "Add new client" that shows in the dropdown as well:
Once you select to "Add new client" you'll get a short add new client form where you can enter in the new client's name, email, and phone number. You can edit the client's full profile later to add additional details:
Once you've selected the client or entered a new client, scroll through the rest of the appointment screen to confirm that the appointment date, time, and reminder hours are all set properly before hitting the "Save" button at the bottom:
That will prompt me with whether or not I want to send out emails to the client and/or staff about the new booking. I can select who I want to send emails to and click Confirm:
If I selected to send an email to the client, then once I hit confirm, I'll have a chance to edit the email before it gets sent out:
After sending the email, I'll be back on the Main → My Calendar screen where I can see the appointment I just added:
At this point in time, you can only add service based appointments through your My Calendar or Staff Schedule screens. In order to add a client to a class session, you will need to use either the Main → Book One Time Appointment flow or double click on the class session from your My Calendar view to enter the class attendees list to add an attendee through there.
While this example shows how to add an appointment for a service through My Calendar, you can do the same thing on Staff Schedule by just double clicking on the time slot you want to add the appointment for.
Hopefully this gives you a better idea of how to use the calendar views to add appointments to your schedule. If you have other questions about how to use the calendars or how to get an appointment on your schedule, please don't hesitate to contact our support team to get them answered. You can also sign up for a 1-on-1 general support call where we can get on a screenshare together to walk through how to use any piece of the software. We're here to help so please use any of these resources at any time!