Client created appointments
- Lucy Barber
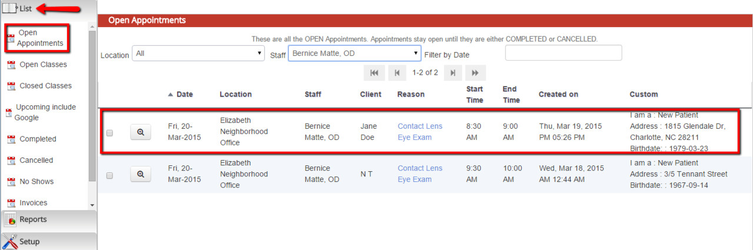
Appointments will be added to your schedule if clients book themselves using the scheduler found on your mini website or that you embed on your own website. The staff person who the appointment was set with will receive an email notification about the new appointment and when you login to checkAppointments you'll be able to view & manage the appointment from your Calendar or List views.
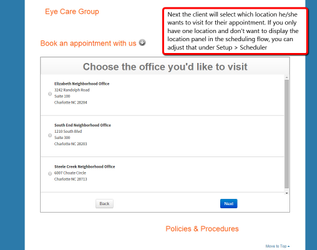
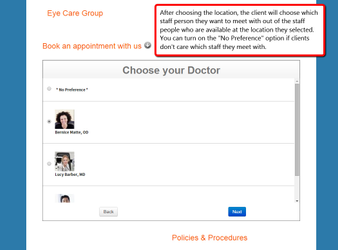
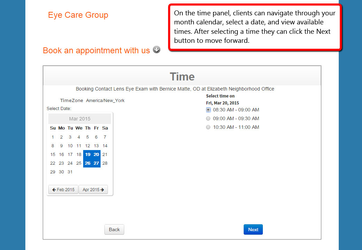
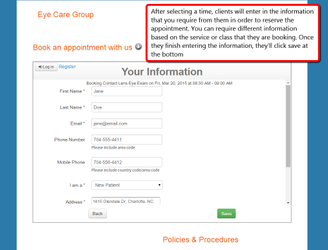
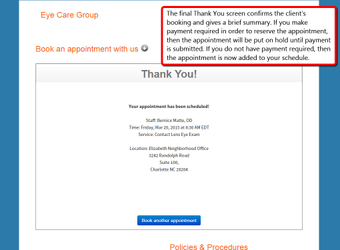
Clients will click through your scheduler to choose a location, staff, and a service or class that they want to schedule. You can always customize your scheduler's flow to include or not include the selection of a staff or location for the appointment. After choosing the reason, the client will then select a date and a time for their appointment. On the last page they will enter in their information and, based on what intake fields you have configured, a client profile will be created for them in your account where you can see all their appointments and details. If clients come back through the scheduler and make a second appointment at any time, that appointment will be added to the same client profile as the first one was created under.
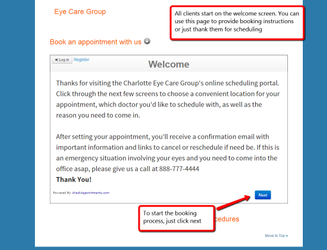
The flow for how a client will create his/her own appointment is shown in the gallery below. Click on the image to maximize it and see the scheduling steps that clients have to go through:
Client Scheduling Flow |
|||||||
|---|---|---|---|---|---|---|---|
|
|
|

|
|
|
|
|
|
|
|
|
|
|
|
|
|