Marking Appointments as No Show
- Lucy Barber
If a client has a scheduled appointment but does not end up showing up for that appointment, you can mark the appointment as a "No Show". This will change the status of the appointment to No Show. The appointment will still appear on your Main → My Calendar view, but it will filter into the status specific list and report (i.e. the List → No Shows list and the Reports → No Show Appointments report).
You can mark an appointment as a no show and get it to filter into the respective list from either the:
We'll go through both of these methods in this documentation. If you have questions after reading through it about marking appointments as No Shows or generally about categorizing appointments by status, please reach out to our Support Team or book a time for a 1-on-1 support call where we can get on a screenshare together and walk through your questions individually.
If you are looking to mark an appointment as a no show individually, it's best to do it from the Appointment detail screen for the appointment. If you are looking to mark a lot of appointments as no show in bulk, you can use the Open Appointments list view.
So, going the individual route, you'll first want to navigate to the appointment: (NOTE: In this example, I'm going to find the open appointment that I'm marking as no show from my Main → My Calendar view, but I could have also found it from the List → Open Appointments screen, the Main → Staff Schedule view, or by going to the Upcoming Appointments tab on the client's profile. For more details on how to find appointments, read our documentation on Viewing Appointments.)
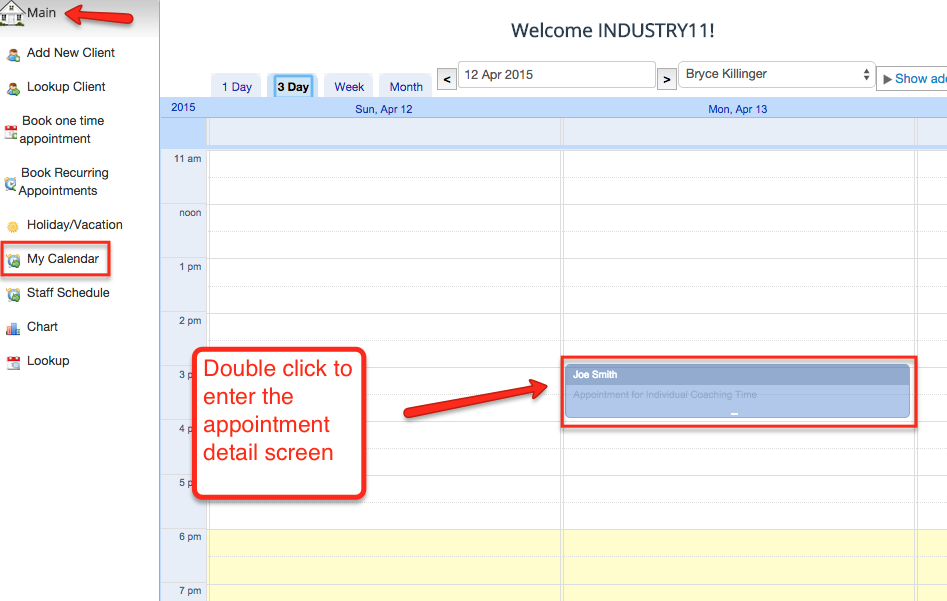
If this is a service-based appointment (where the staff meets 1-on-1 with the client) then I will go right into the appointment detail screen. If it is a class based appointment, then I will go into the class list first and then will have to select the client from the class attendees list who didn't show. In this example, I've selected a service based appointment so I'll go right into their appointment detail page.
From the appointment detail page, scroll to the bottom and click the button to mark the appointment as "No Show":
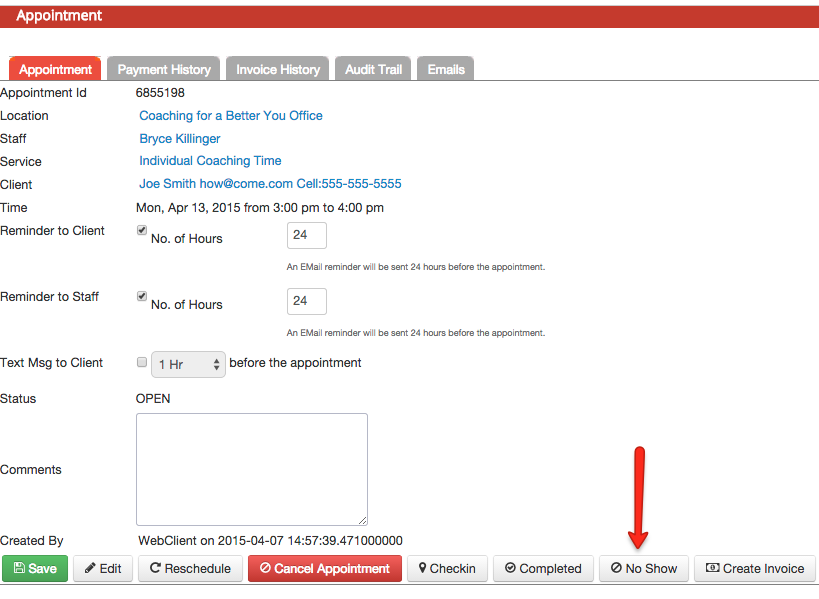
This will prompt you with whether or not you want to send an email out to the client about the appointment being marked as a no show. Select whether or not you do want to send the email and click the Confirm button:
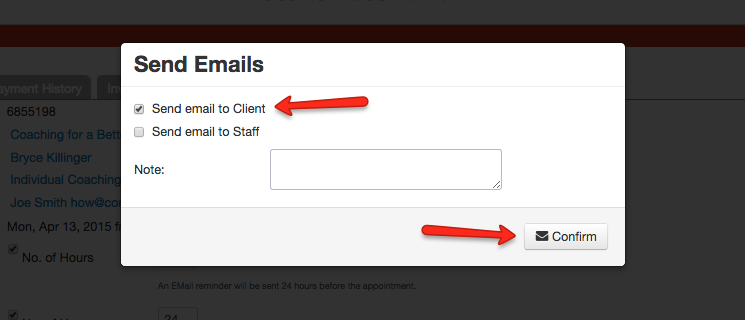
If you selected that you wanted to send an email out to the client, then you'll have a chance to edit the email before pressing the final "Send". This is one of the benefits of marking the appointments as no show individually. If you mark them as no show in bulk from the Open Appointments list, you'll have a chance to add a note to your No Show appointment email, but not edit or view the whole thing.
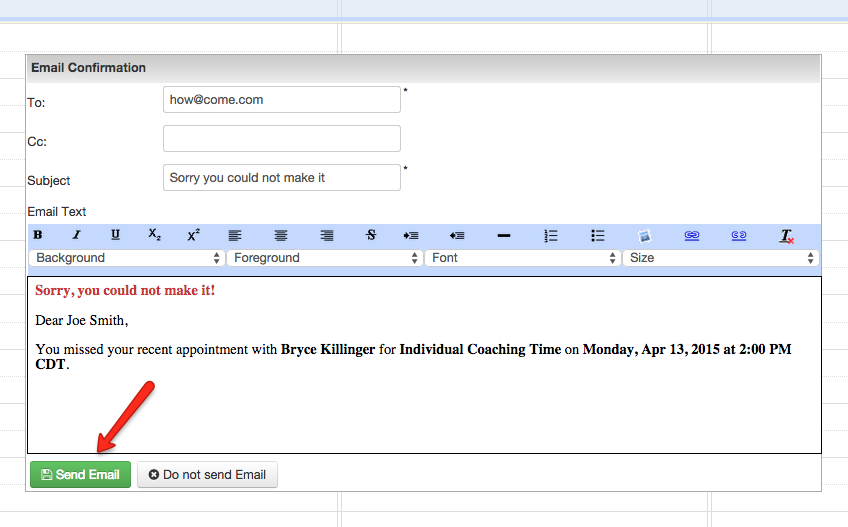
At this point, the appointment's status has officially been updated to "No Show" and you will be able to find it either on your My Calendar view or your List → No Shows screen. If you have any questions about marking appointments as no show individually, don't hesitate to reach out to our support team to ask them. If you would prefer to get on the phone with one of our support representatives and potentially launch a screenshare to take a more in depth look at your account, you can also book a time for a 1-on-1 support call.
Again, if this individual marking appointments as no show is too tedious because you have a whole bunch of appointments you have to mark as No Shows, you can always use the option described below to mark appointments as no show in bulk.
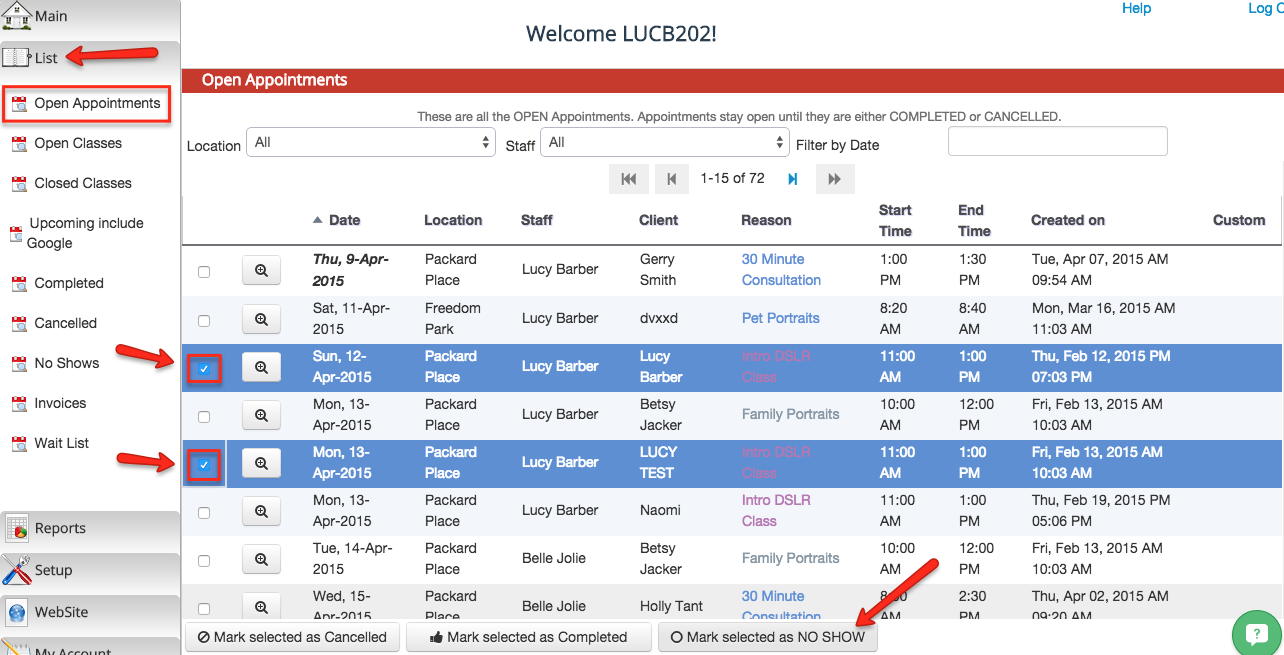
If you need to mark multiple appointments as no shows, it may be most efficient for you to do so through the List → Open Appointments view. This will allow you to check off the appointments that were no shows and mark them as no shows in bulk.
To do this, navigate to the List → Open Appointments, select the appointments you want to mark as no shows and then click the button to "Mark selected as NO SHOW":
Once you click the Mark selected as NO SHOW button, you'll get a prompt asking if you want to send an email out to the client. This will send out the Appointment