Creating Invoices for Appointments
- Lucy Barber
- Jalesa Campbell (Unlicensed)
If you would like to keep track of clients' payments for their appointments, you are able to by creating invoices. This documentation will walk you through the steps of how of creating an invoice for an appointment.
First, find the appointment that you would like to create an invoice for. You can do this by either going to the "Main" menu tab > My Calendar > and finding your appointment by date or by going to the "List" menu tab > Open Appointments > and finding your appointment from there by filtering for a certain location, staff member, or date.
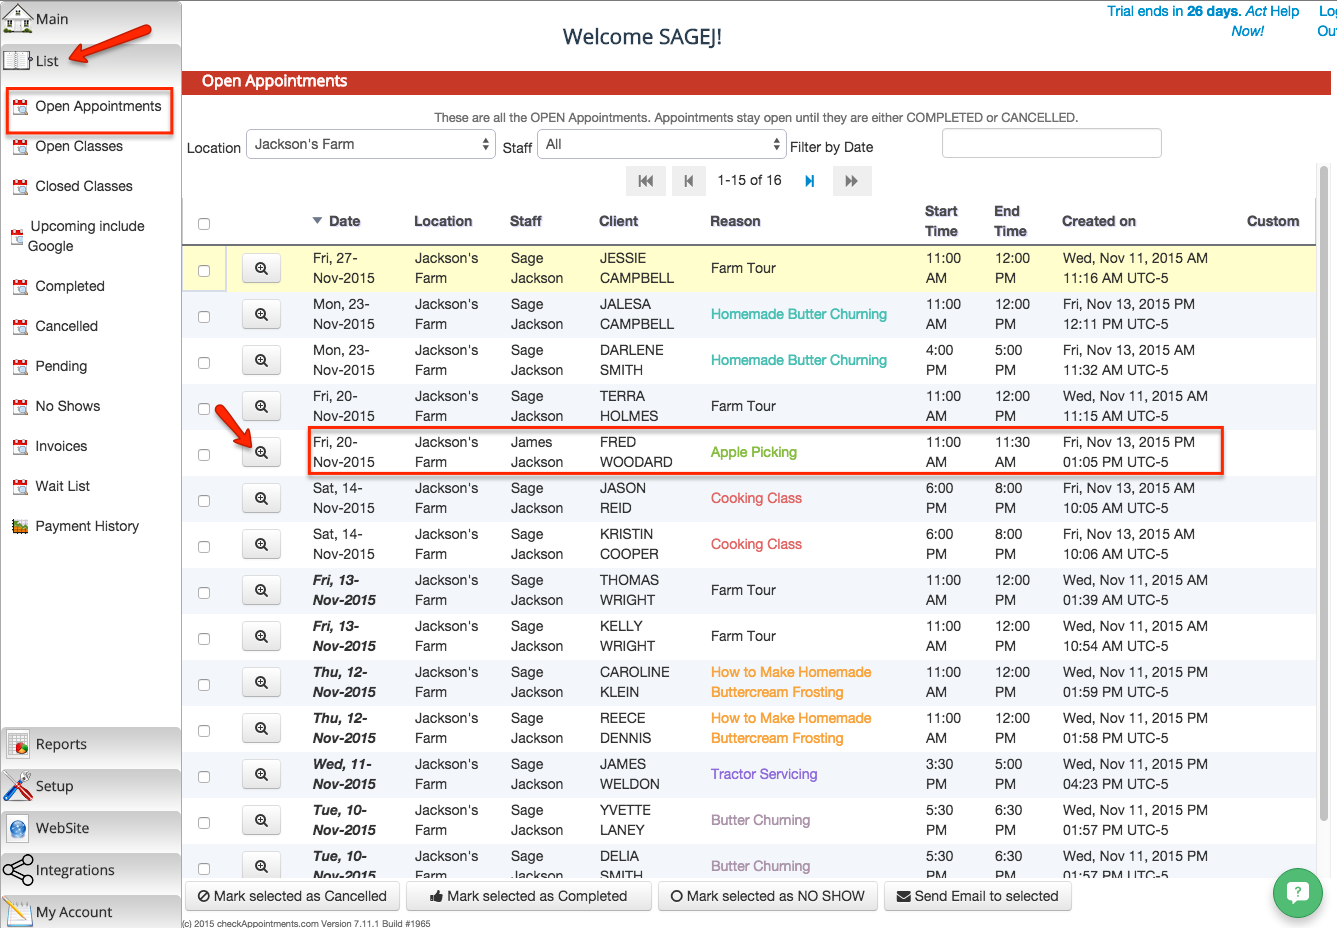
I am going to find the appointment through the "List" menu tab > Open Appointments link. From here you can also sort the appointments by the Date, Location, Staff, Client, Reason, Start Time, End Time, Created On, and or Custom label.
I am going to create an invoice for Fred Woodard's appointment that is scheduled for our Apple Picking service on Friday, November 20, 2015 at 11:00 a.m.
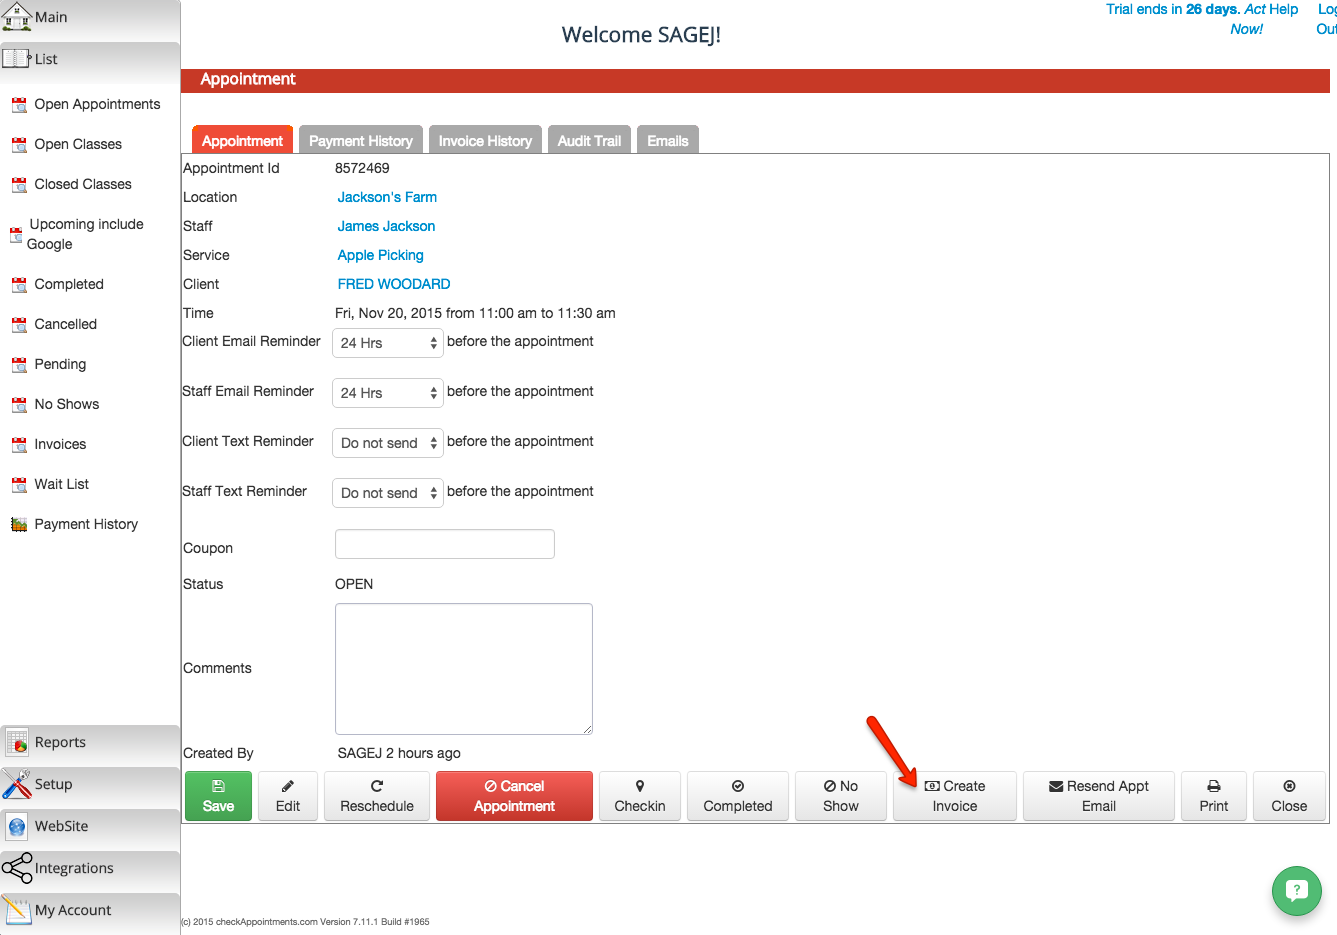
On the Appointment Details screen, you can click on the "Create Invoice" button to build an invoice for the client.
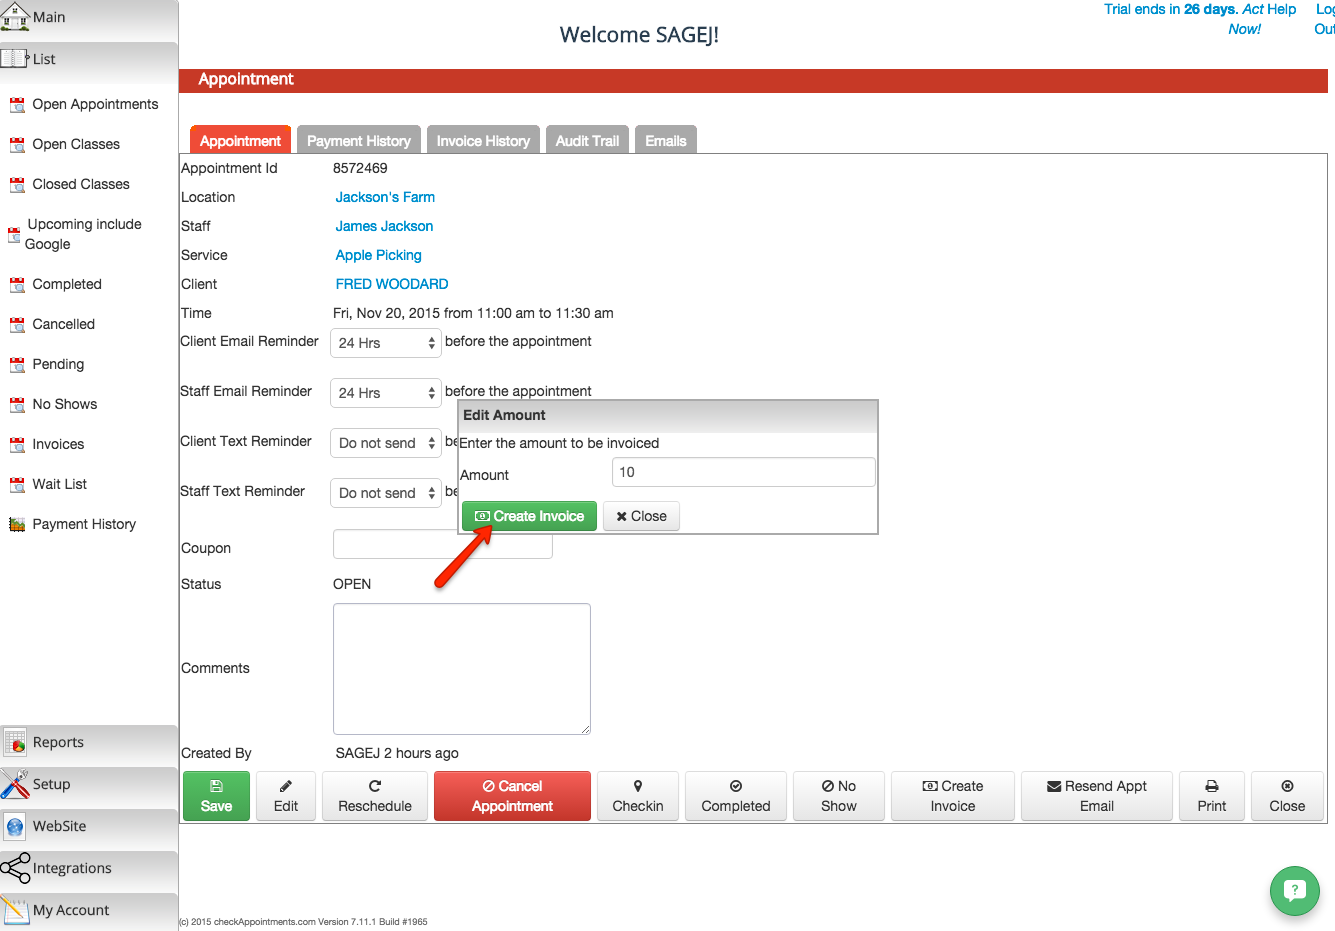
Next, you'll be prompted to edit the amount to be invoiced for the client. The cost of our Apple Picking service is $10.00 so I'll be creating an invoice for this amount. After you've edited the amount, click the "Create Invoice" button.
You'll now be taken to the invoice page where you will see the amount entered as a Charge for the appointment.
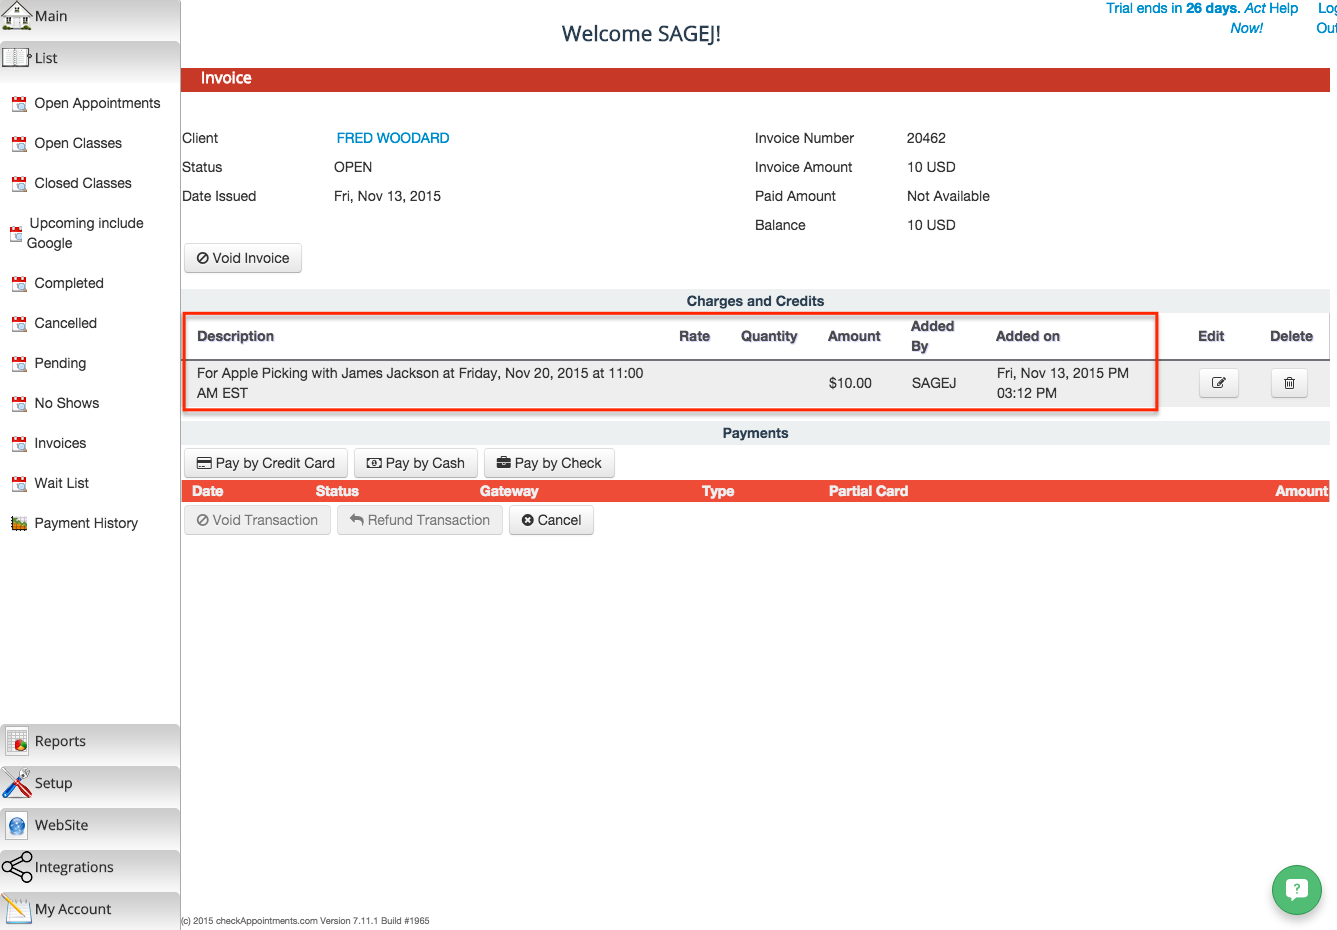
And this is how you can create an invoice for an appointment. To learn more about making payments on an invoice, you can check out our documentation on entering in cash or check payments on an invoice.