Marking appointments as Completed
- Lucy Barber
After a client has come in for his or her appointment, you will want to mark the appointment as completed so that you can have all of your appointment history categorized in the proper lists for you and your clients. In this documentation, we'll go through how to categorize an appointment as completed.
There are several ways to mark appointments as completed. We will cover how to:
- Individually mark appointments as completed on the appointment detail screen
- Mark appointments as completed on your Open Appointments list
- Set up Auto Complete for appointments
- Mark appointments as completed through your client's profile
- Marking a "No Show" or "Cancelled" appointment as Completed
If after reading this documentation you have questions about appointment statuses or why you should mark appointments as completed at all, feel free to reach out and ask them of our support team. You can also always book a time for a 1-on-1 support call with one of our support team members through our scheduler. We're here to help so please use us as resources!
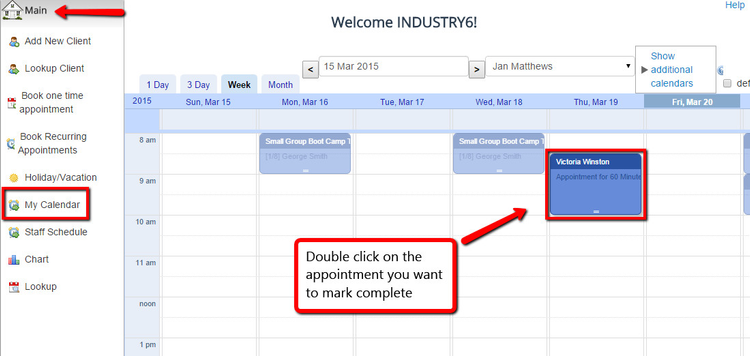
If you just want to mark a single appointment as completed, you can do that by going to the appointment detail page. First, navigate to you Main → My Calendar view and double click on the appointment that you want to mark as completed:
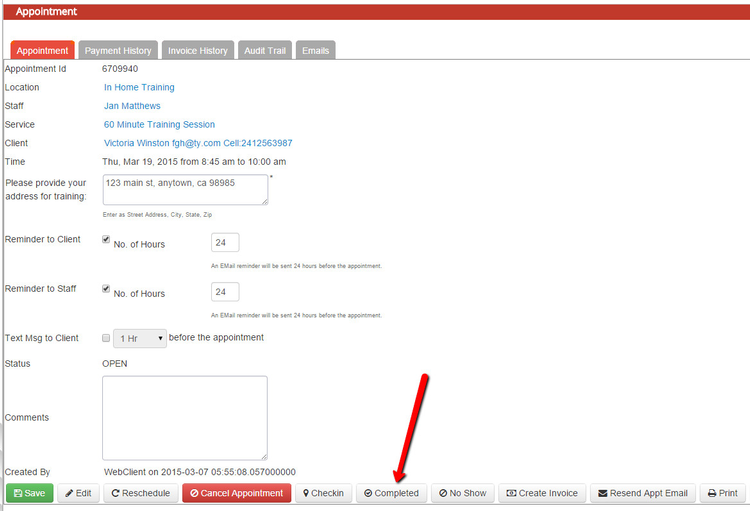
Once you've double clicked on the appointment, you will enter into the appointment detail page. Scroll down to the bottom of the appointment detail page and click the "Completed" button:
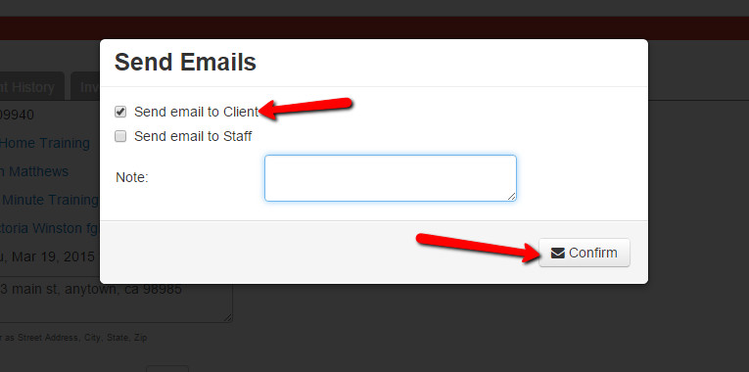
After clicking the Completed button, you'll be prompted with whether you want to send out an email to the client about the completed appointment (there is no email that gets sent out to the staff about completing appointments). You can also enter in a completed appointment note which will be pushed into the completed appointment email template:
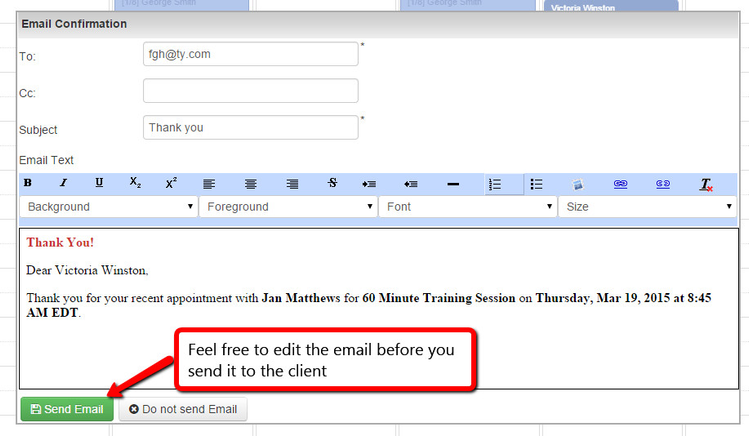
Once you press "Confirm", if you have elected to send an email to the client about the completed appointment, you will have a chance to edit the email that gets sent out before it sends:
Now the appointment will have the status of "Completed" on it and you'll be able to find it in your List → Completed Appointments view. It will also stay on your My Calendar view, but if you want to see it among all the other appointments you've marked completed, it's best to just look at the list view. It will also come out if you run the Completed Appointments report over the time frame that includes the appointment date.
If you have any questions about how to mark appointments as completed on a case by case basis, feel free to ask them of our support team or book a time for a 1-on-1 support call with one of our staff.
You can use your Open Appointments list to mark a lot of appointments as completed all at once. This can save you a ton of time if you are coming into the app after a long day of appointments and just want to mark them all completed at once.
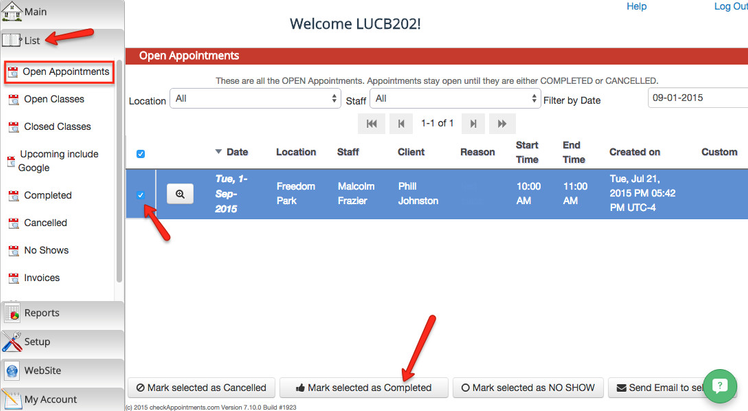
To do mark appointments as completed in bulk, go to List → Open Appointments and select the appointments you want to mark as completed:
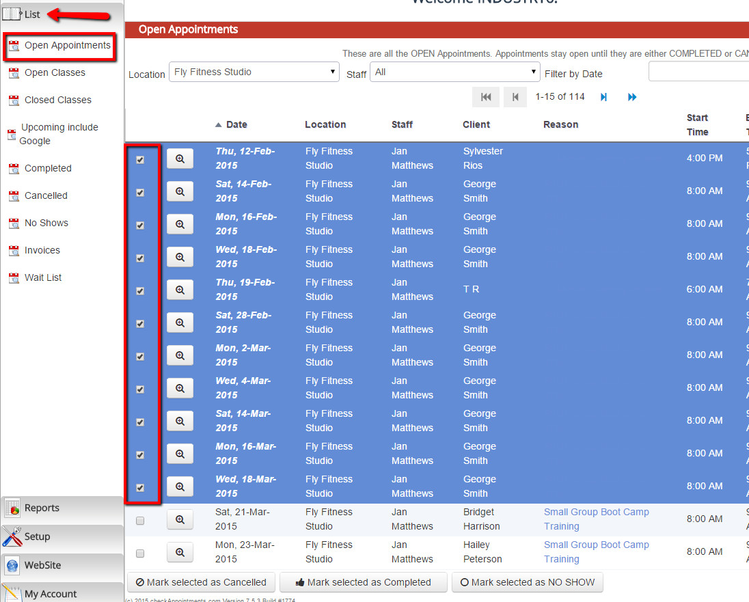
Once you've selected the appointments, click the button to "Mark selected as Completed" at the bottom of the Open Appointments list:

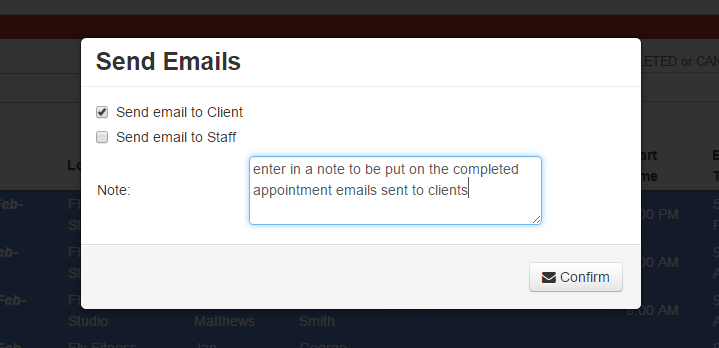
After clicking the button to mark them as completed, you'll have the option to select whether or not you want to send out a follow up thank you email about the completed appointment. You can select whether you want to send this email to the selected clients and enter in a completed appointment note to be included on the emails:
Once you've clicked confirm from the send emails modal, all the selected appointments will now be categorized under List → Completed Appointments.
If you have any questions about how to mark appointments as completed in bulk, feel free to ask them of our support team or book a time for a 1-on-1 support call with one of our staff.
As appointment dates and times come to pass, you'll want to move them from your open appointments list to either your No Show list or Completed Appointments list. You can do this manually for each appointment by going into the detailed appointment view and using the buttons at the bottom of the page, but you can also set the appointments up to be automatically moved to the completed appointment list x # of days after the appointment date passes.
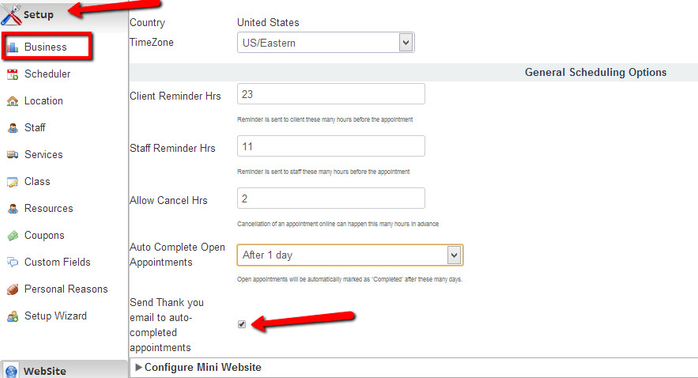
To turn on auto complete, go to Setup → Business and under "General Scheduling Options" switch the Auto Complete Open Appointments from the default selection of "Manually Complete Open Appointments" to the time frame you want them marked completed by:

If you want to send the Thank you follow up email to any auto completed appointments, make sure to check the checkbox underneath the Auto Complete Open Appointments drop down:
Remember to press "Save" after making any of the changes to the Setup → Business screen!
If you have any questions about how to set up appointment auto complete, feel free to ask them of our support team or book a time for a 1-on-1 support call with one of our staff.
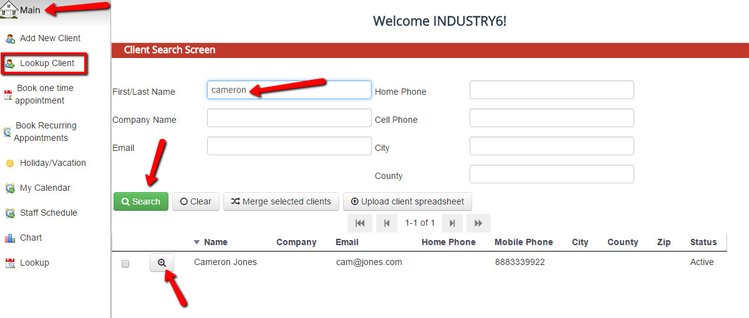
You can also navigate to an individual client's upcoming appointments list and mark the appointments as completed through there. To do this, go to Main → Look Up Client and search for the client you want to mark appointments as completed for. Once you've found the client, click the magnifying glass to the left of his/her name in order to enter the individual's client profile:
On the client's profile, click on the "Upcoming Appts" tab:

Under the upcoming appointments tab, select the appointments that you want to mark as completed by clicking on the checkboxes to the left of them and selecting the "Mark selected as completed" button at the top:

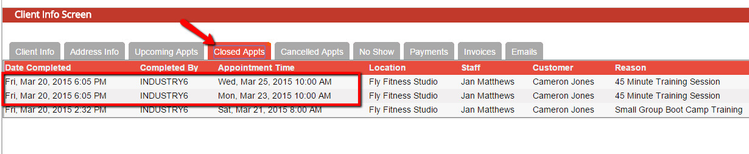
After selecting that you want to mark them as completed, you'll have the option to decide if you want to send out an appointment follow up/thank you email to the client. You can also enter in a completed appointment note to be included on the emails. Once you press confirm form this pop up, you'll be able to see all of the appointments you just marked completed under the "Closed Appts" tab:
If you have any questions about how to complete appointment from a client's profile, feel free to ask them of our support team or book a time for a 1-on-1 support call with one of our staff.
Sometimes you may accidentally mark an appointment as No Show or Cancelled when you meant to mark it as Completed. You can change the status of an appointment to Completed by following these steps.
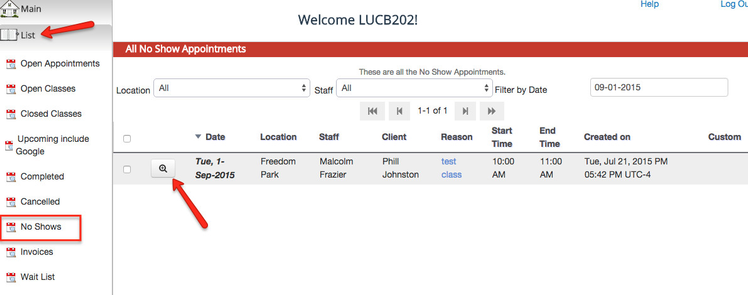
First, find the appointment through your List view. If the appointment is currently listed as "Cancelled" you'll want to look at your Lists > Cancelled Appointments view. If the appointment is currently listed as "No Show" you'll want to look at your Lists > No Show Appointments view.
Once on the proper list, click the magnifying glass icon to the left of the appointment to enter into the appointment detail screen:
Once on the appointment screen, click the button at the bottom to "Re-Open" the appointment:
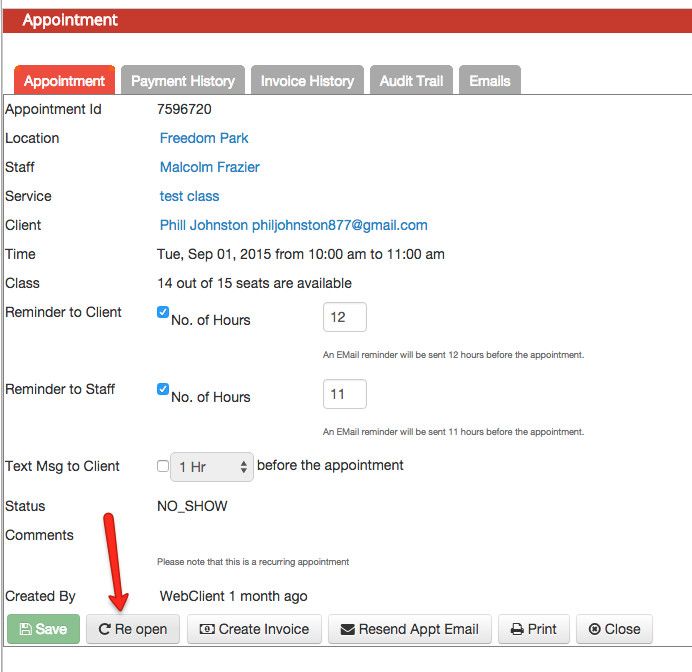
When re-opening it, you'll be prompted with whether you want to email the client about the status change. Most likely, you do not since this is more for internal tracking. You'll still just need to deselect the send email to client checkbox on the popup and press confirm in order to move the appointment back into Open status.
Once the appointment is Re-Opened (and thus back in "Open" status) you'll be able to find it on your Lists > Open Appointments view. Go ahead and select the checkbox to the left of the appointment and click the button to "Mark selected as Completed":