Adding a Waitlist for a Service
- Lucy Barber
- Jalesa Campbell (Unlicensed)
Please note: this feature is only available in Business accounts. Check out which account type you have by either going to My Account → Change Plan or by checking on our Pricing page.
If you are a Business account holder, you can add the option for clients to join a waitlist for any service they are trying to book if all the service times have been reserved. In this documentation, we will walk through how:
- The waitlist feature works
- To turn waitlist registrants into appointments
- To customize the waitlist messaging
If you have any questions about using the waitlist, please reach out to us through our support portal.
As you know from reading our documentation on Services, your services have a set duration that breaks down your working hours into appointment timeslots. The time in your availability must be greater than or equal to your service's duration in order for appointment timeslots to display to clients who are booking with you.
For instance, if you are a massage therapist and have a “Deep Tissue Massage” service that lasts for 1 hour (60 minutes) and your working hours are set up between 9:00am – 5:00pm, you could have appointments scheduled from:
- 9:00am-10:00am
- 10:00am-11:00am
- 11:00am-12:00pm
- 12:00pm-1:00pm
- 1:00pm-2:00pm
- 2:00pm-3:00pm
- 3:00pm-4:00pm
- 4:00pm-5:00pm
Alternatively, if you have a “Hot Stone Massage” service that is set for a duration of 90 minutes (1 hour & 30 minutes), the appointment time offerings would be:
- 9:00am-10:30am
- 10:30am-12:00pm
- 12:00pm-1:30pm
- 1:30pm-3:00pm
- 3:00pm-4:30pm
No one would be able to book a 90 minute massage after 4:30pm because your day is set to end at 5:00pm. The thing to realize about setting your service durations is that there has to be enough time left in your availability to account for the entire duration of you last appointment.
With the waitlist feature, once all the available appointments for a service on a given day are reserved, then clients can join the wait list to be notified for when a time becomes available on that day.
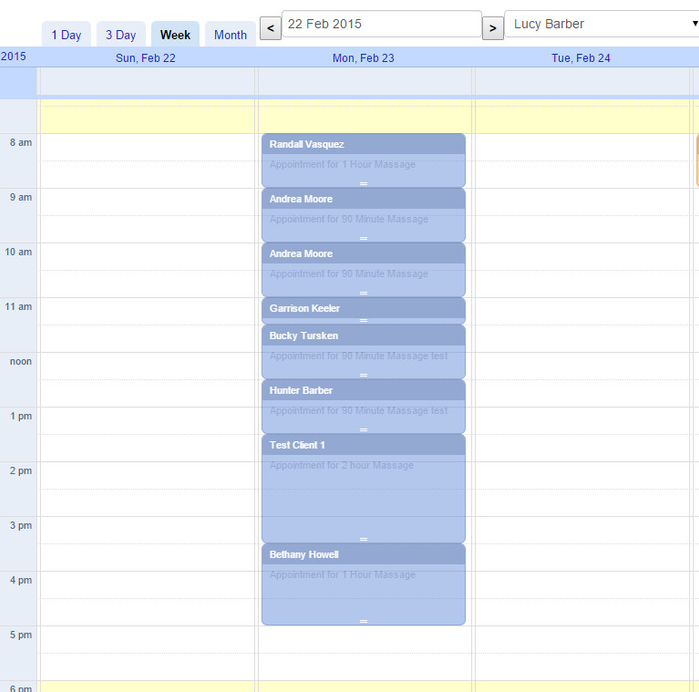
Let's say you are a massage therapist that offers a 1 hour long massage service. You have set up your working hours so that you are available Monday - Friday from 8:00am - 5:00pm. Your availability for Monday, February 23rd, 2015, gets all booked up by other clients, but you want to allow any clients who are interested in getting a massage on the 23rd to sign up for a waiting list to be notified if any spots become available.
To do this you navigate to the Service Profile by going to Setup → Services and clicking on the Service for which you want to turn on the wait list feature for (in this case that would be the "1 Hour Massage"):

Once in the Service Profile, scroll down toward the bottom and check off the "Allow Wait List" checkbox:
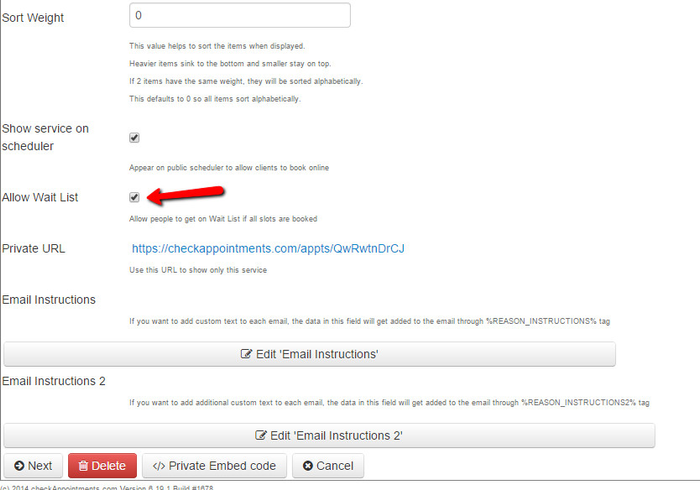
From there, hit the next button at the bottom of the Services page to tab over to the "Staff" tab to save your changes.
The staff person is all booked up with appointments between 8:00am and 5:00pm on Monday, February 23rd:
Once she's completely booked, the next client that goes on to try and book an appointment with on February 23rd will not see available time slots but instead will see the message shown in the image below:
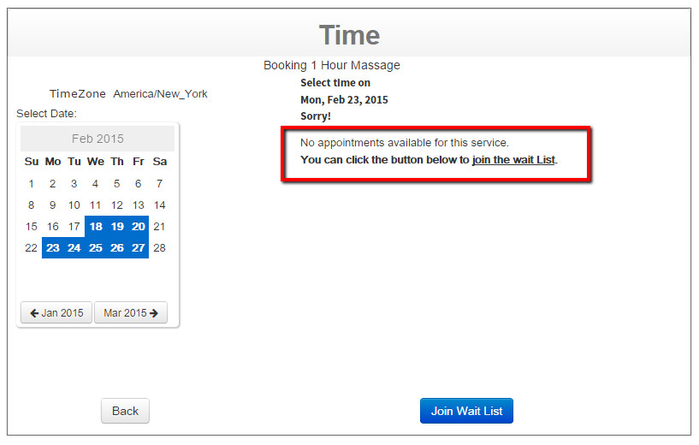
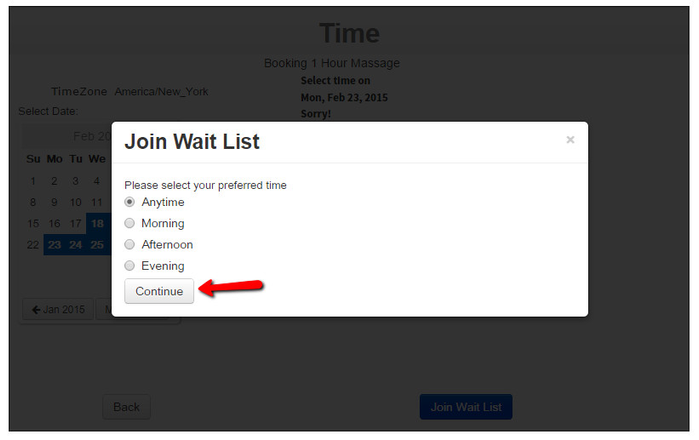
When clients click "Join Wait List" they'll be asked what time of the day they would want an appointment on the day they are joining the wait list for. Once they select the time, they'll press the Continue button at the bottom of the pop up:
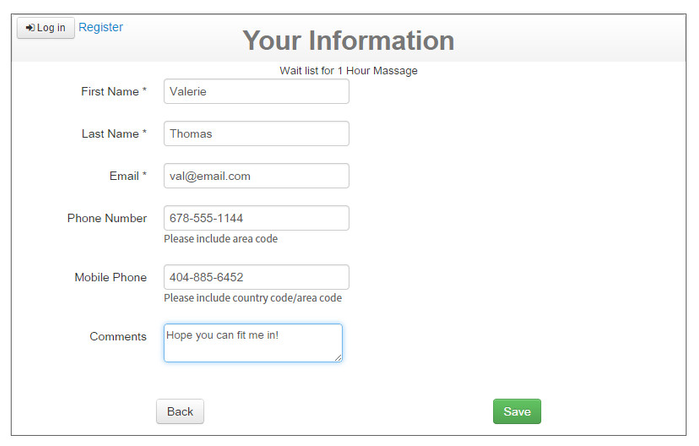
Once they press continue, they will go to the Your Information screen where they will enter in the information you require of them:
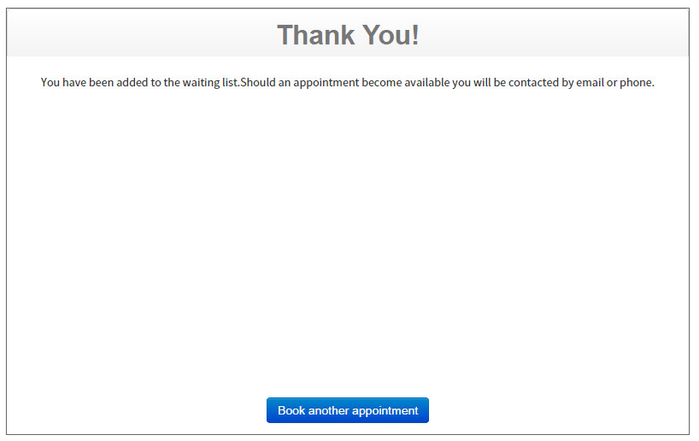
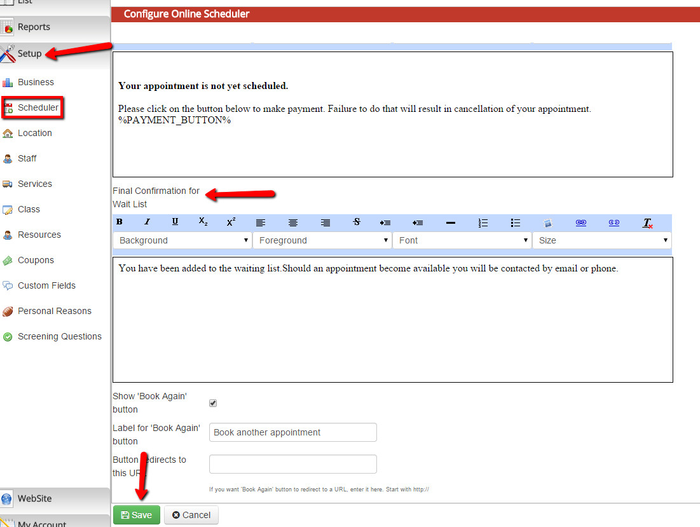
After pressing save, they will get the confirmation screen which has a custom message that you can change by going to Setup > Scheduler > Final Panel:
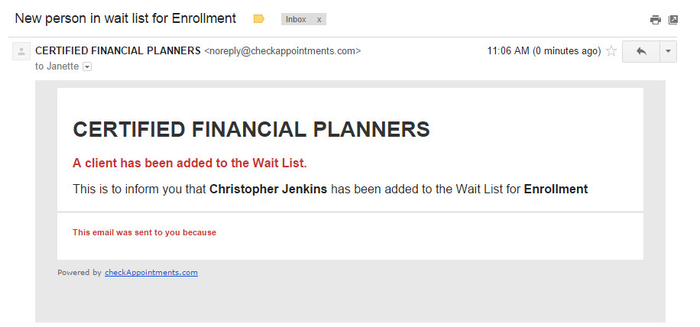
Your client will receive an email that he/she was added to the waitlist. You will also receive an email that the client was added to the waitlist:
We go through how to customize the messages that your clients see as well as how to turn waitlist registrants into appointments in other sections of this documentation. Click the links to go to those specific sections.
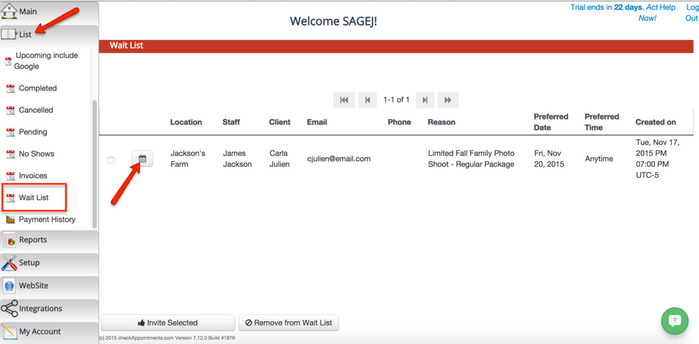
Once clients have added their name to your waitlist for a service, you can see all those clients under Lists → Waitlists. To make an appointment for the service that the client joined the waitlist for, click on the "Calendar" icon next to the client's name:
This will take you to the Appointment Details screen with the Location, Staff, Service, Client Name, & Date pre-filled. Fill in the appointment start and end time fields with the appropriate time for when the appointment will be scheduled. After filling in the appointment time, press "Save" at the bottom of the screen:
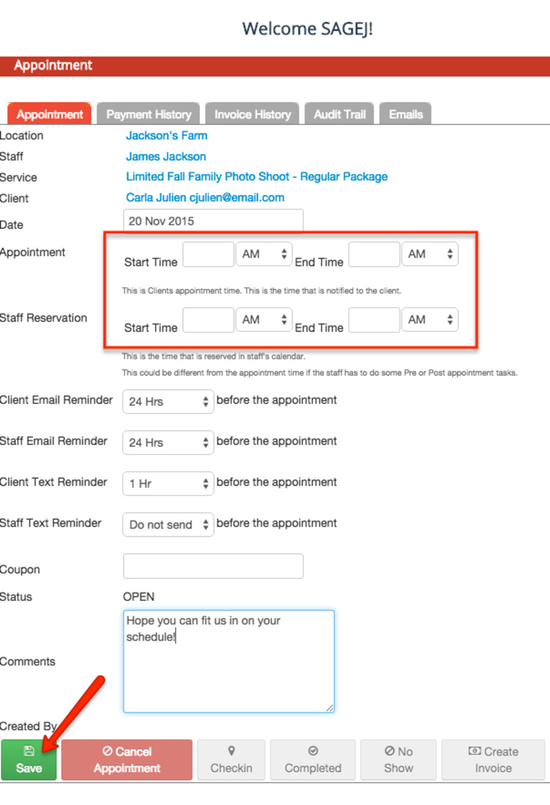
Now the appointment will be on your calendar and the registrant will clear from your wait list.
You could also open up more time on your schedule, go to the List > Wait List screen, check off the people you want to notify that more time has opened up, and click the "Invite Selected" button.
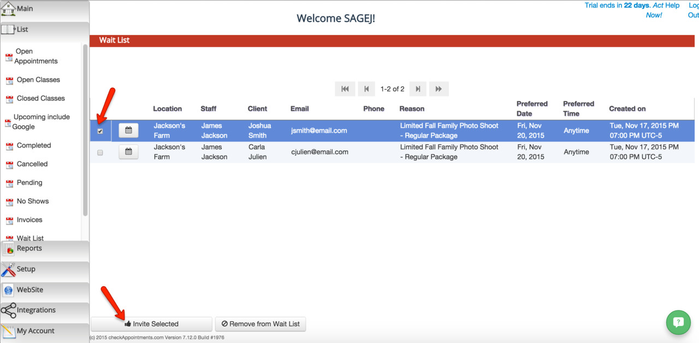
Alternatively, if you aren't opening up more time and want to remove them from your waiting list, you can also check the registrants off and click the "Remove from Wait List" button.
The waitlist feature has 3 custom messages that get applied to it. The first one is the message that the clients see on the Time Panel before they enter in their information to register for the waitlist. To customize this message, go to Setup → Scheduler and expand the Time panel. At the bottom of the Time Panel menu, you will see a section for "Wait List text":
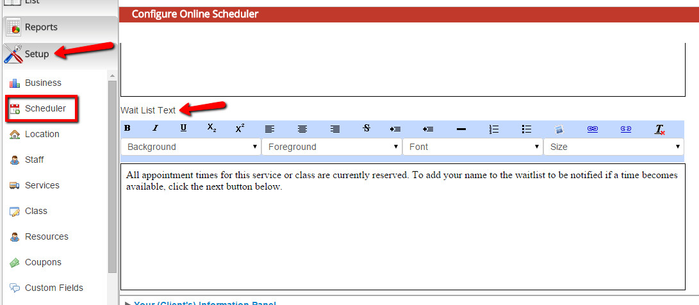
You can customize the language here and press "Save" at the bottom of the screen to change what your clients will see when being prompted ot join the waitlist.
You can also customize the confirmation message that the clients see after they save their information. This is also in Setup → Scheduler underneath the "Final Panel". After editing the message, press the "Save" button at the bottom fo the screen to commit your changes:
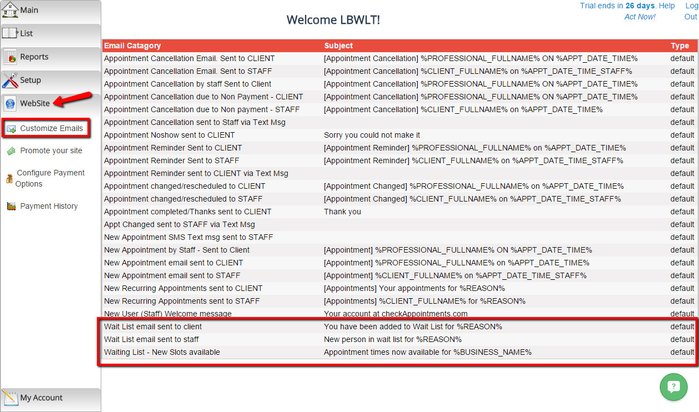
The last piece of messaging that goes out is the emails to the staff and the client that someone has joined the waitlist. You can edit these by going to Website → Customize Emails and clicking on the Waitlist Email templates: