Uploading a Client List
If you have a long list of existing clients you want to import into your checkAppointments account, you can use our bulk upload feature to get all your clients in in one go instead of adding each client individually.
How to upload a client list
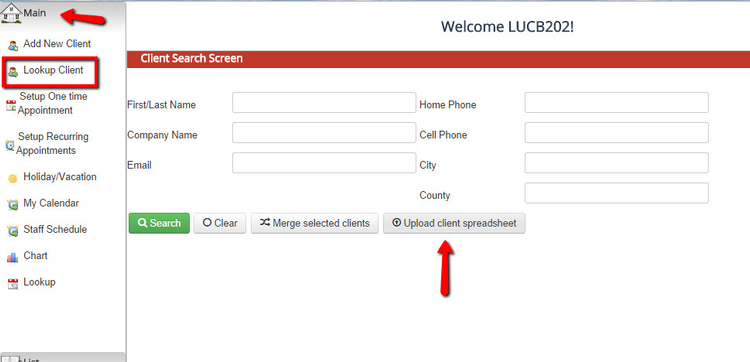
First, go to Main → Lookup Client and press "Upload Client Spreadsheet":
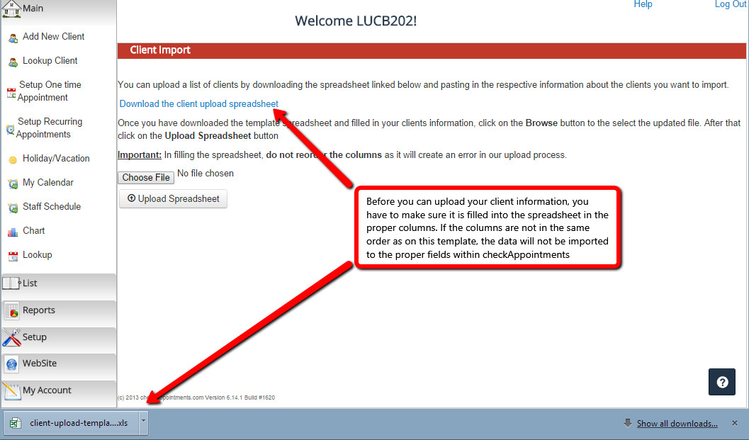
When you're on the Client Import screen, go ahead and download the client upload spreadsheet template. You'll want to take your existing client profile information and put it on this spreadsheet in order to import it. If you import a spreadsheet of client information that is not organized in the same column format as the spreadsheet template linked on this page, the data will not map to the proper fields within the checkAppointments client profile:
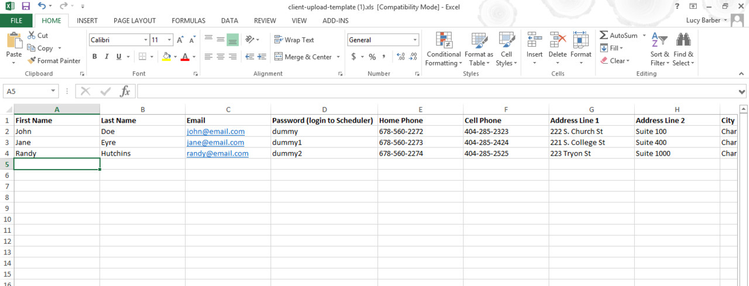
Next, open up the downloaded spreadsheet and begin plugging in your clients' information in the proper columns:
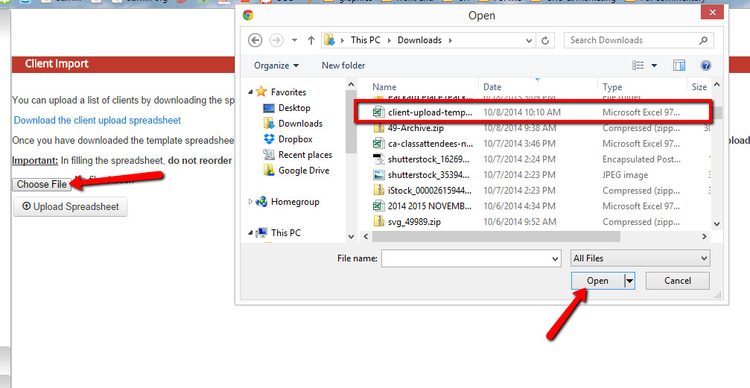
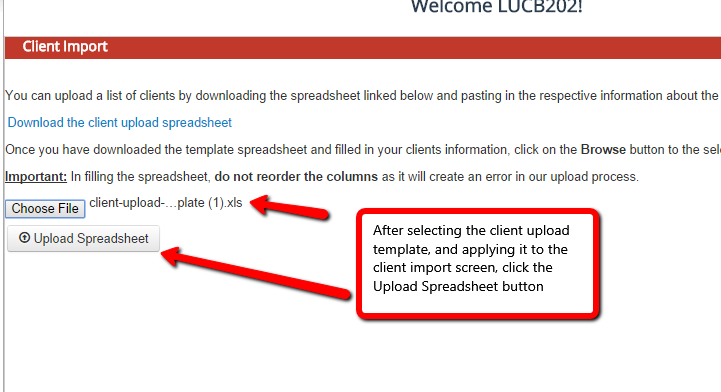
Once you've finished adding your clients information save the spreadsheet on your computer and go back to checkAppointments. Click the Browse/Choose File button in the client import page and find the spreadsheet you just saved on your computer to open within checkAppointments:
After selecting the file to upload, press the "Upload Spreadsheet" button which will take you into the approval screen:
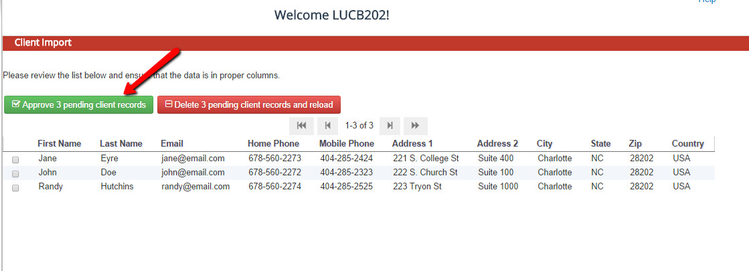
Finally, make sure that the client import looks like all information has been mapped to the proper fields. If they have, just click "Approve". If the haven't, pressing "Delete" will take you back to the client import screen and you can reselect the file to import:
After approving the pending client records, all the clients you imported will be available through the client search. If you uploaded their profile with a password, the client will now be able to log into your scheduler using the password you uploaded to their profile.
