Merging Clients
- Lucy Barber
Client records are made for a client either when you, as a checkAppointments user, add the client through Main→Add New Client or when the client makes an appointment for him/herself a client record is also created and attached to the appointment. So long as all the fields on these records match one another, only 1 client record will be created and all appointments and payment history will attach itself to that record.
More than likely, however, at least some of your clients will end up typing in something slightly different each time they make an appointment which will create more than 1 record for that client. If this is the case, you can merge the duplicate clients through our Lookup Client screen. Here's how:
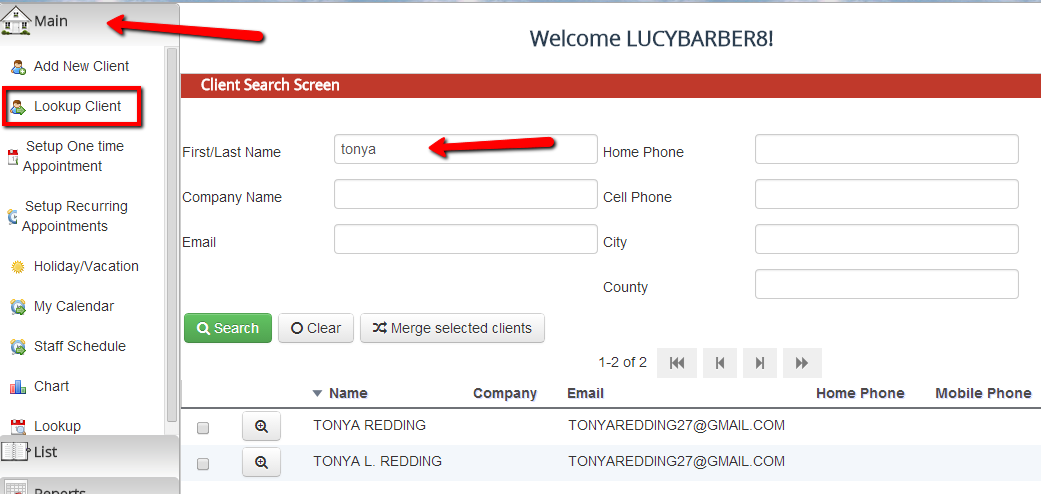
First, go to Main→Lookup Client and either click Search to get your full client list or search for one of the client records you know are duplicated:
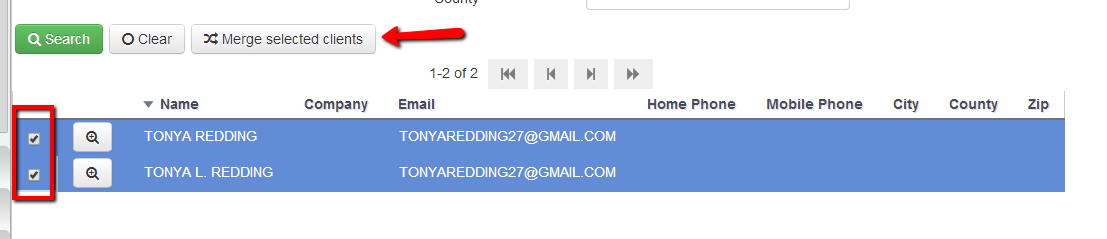
Next, use the check boxes to the left of the client name to select the records you want to merge and hit the button marked "Merge selected clients":
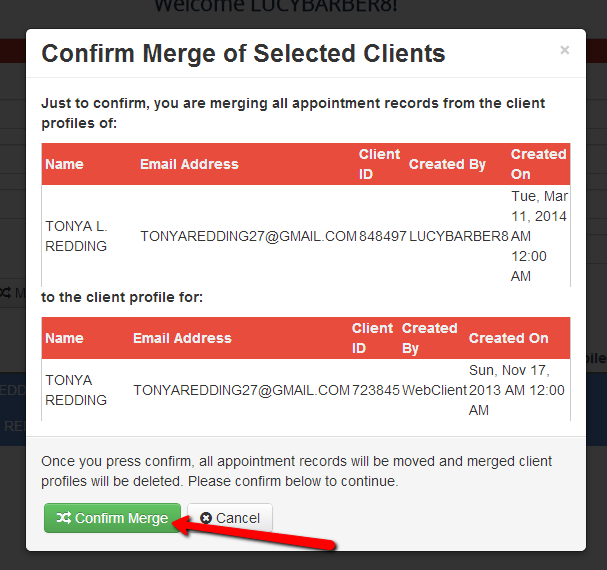
With merging client records, you are copying all appointments from one or more client record(s) to a single client record. After the appointments have been merged to the single client record, the merged client profiles will be deleted from the account and only the parent one with all the appointments and payment history will remain. Once you press the "Merge selected clients" button, you will get the merge client pop up box which will let you select which record you want to merge to:
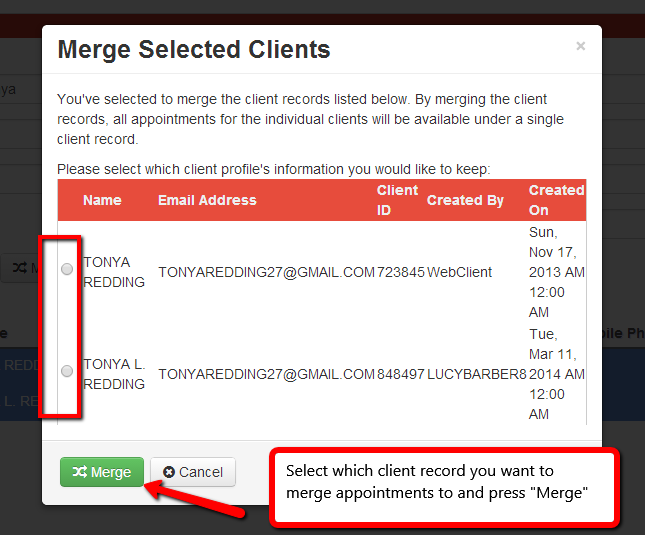
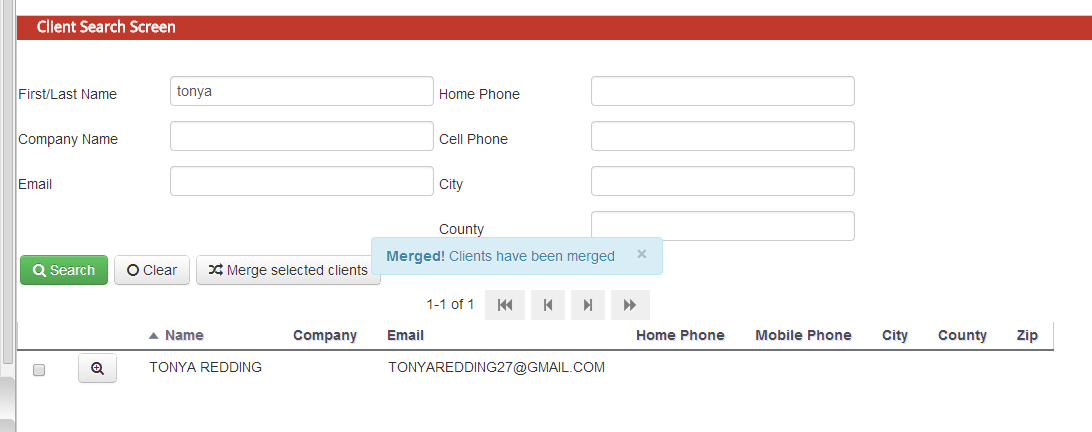
After you press merge, you will get a confirmation message which will confirm the actions you are taking. Press confirm on that box and you'll see all client records merge to the parent: