So you have created your custom field form and attached it to either a service or a class.
Your completed custom field form looks like this:
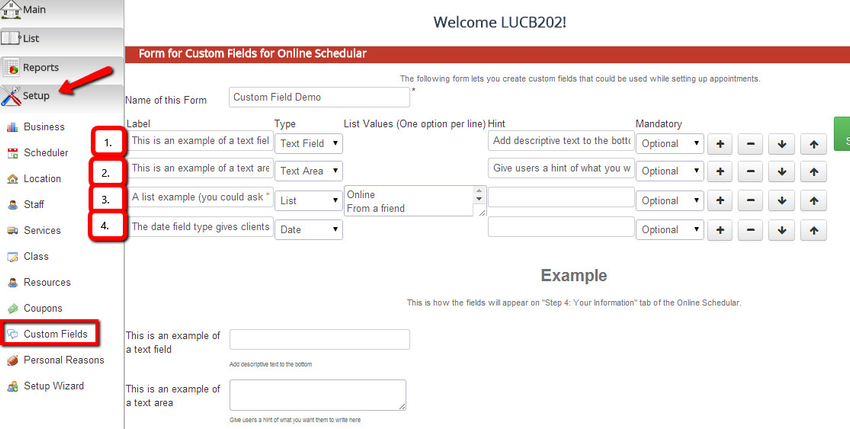
Please note the numbers next to each label.
So if you want to display either the label or the Value/Answer for any of the custom fields on the form, you will use the tag %CUSTOM_FIELD_LABEL#% or %CUSTOM_FIELD_ANSWER#% where the # is the order it appears on the form.
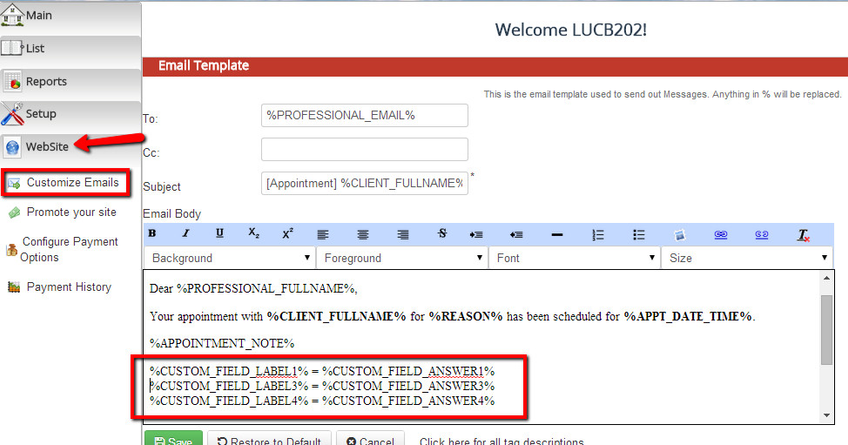
I could, for instance, go down to Website → Customize Emails and click to edit the "New Appointment Email Sent to Staff". From that email, I could add that I wanted to display just custom fields 1, 3, & 4 in the email I receive about a new booking:
I could also add this to Setup → Scheduler → Final Panel to display to the client immediately after booking:
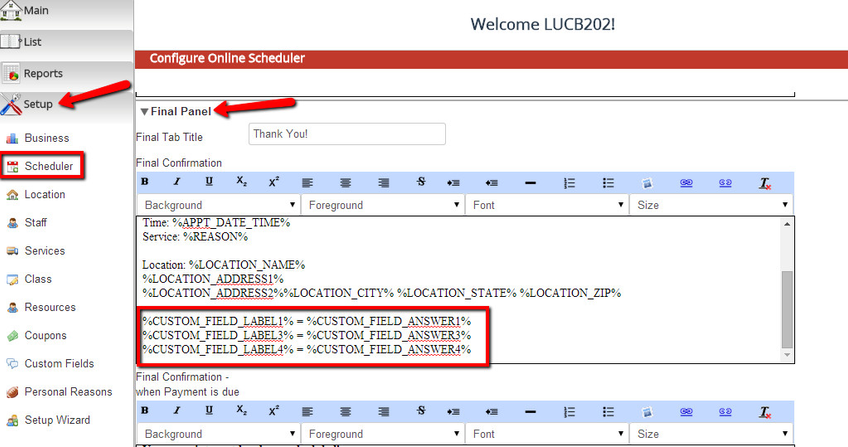
This will make it display once a client has finished booking and has selected a class or service that has that custom field arranged. If the class or service does not have the custom field arranged, they will see nothing on the confirmation screen.