"Scheduler" is the term we give to the booking widget that faces your clients. It's automatically embedded on your mini-website but you can take it and embed it on your own website or Facebook page as well. This tutorial will walk you through the basics of the scheduler, but see the child pages underneath the topic for further instruction.
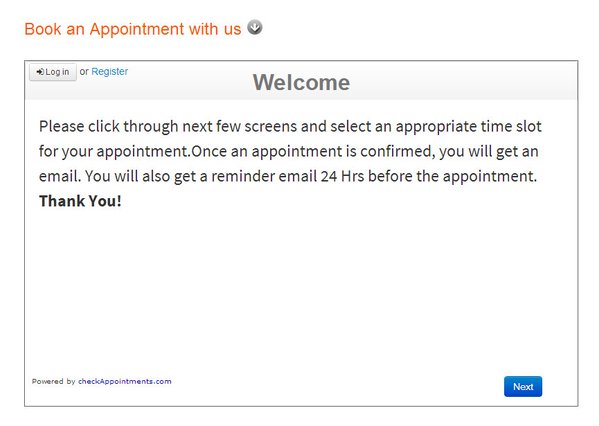
The Scheduler looks like:
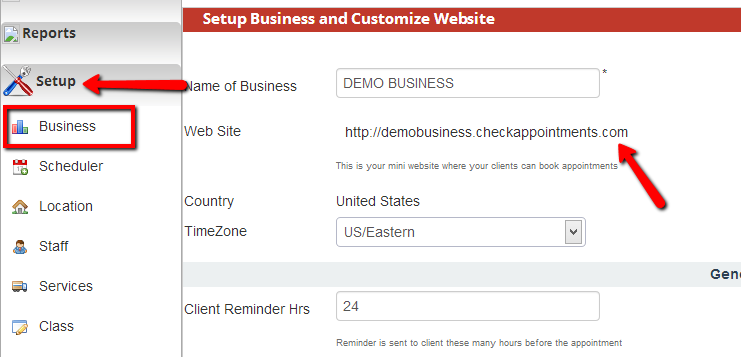
It can be found on your mini website which is available if you go to Setup->Business and click the link next to "Web Site":
Whenever you make changes to your scheduler, I recommend going to Setup->Business and clicking on this url to see how the changes affected the scheduler. Just make sure to refresh your mini web site before testing so that the changes take effect.
Finding your scheduler in order to customize it:
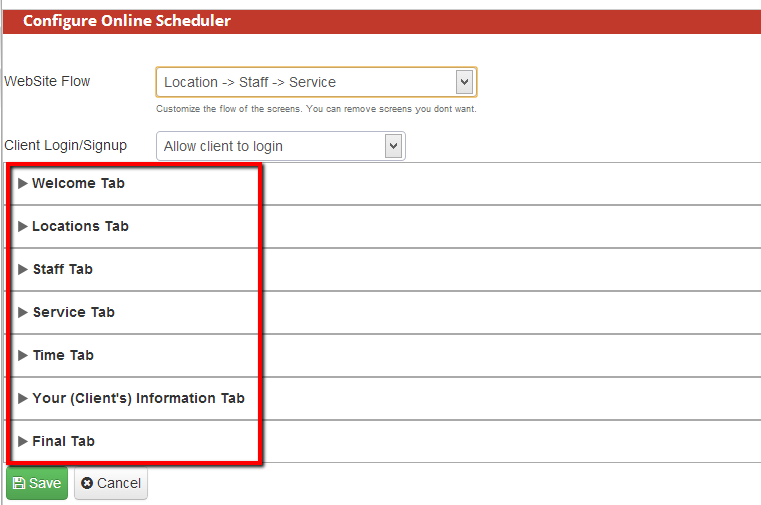
The scheduler can be found and configured by going to Setup->Scheduler:

Panels in the Scheduler:
There are a total of 7 panels in the scheduler: the Welcome tab, the Locations tab, the Staff tab, the Service tab, the Time tab, Your Client's Information tab, and the Final tab:
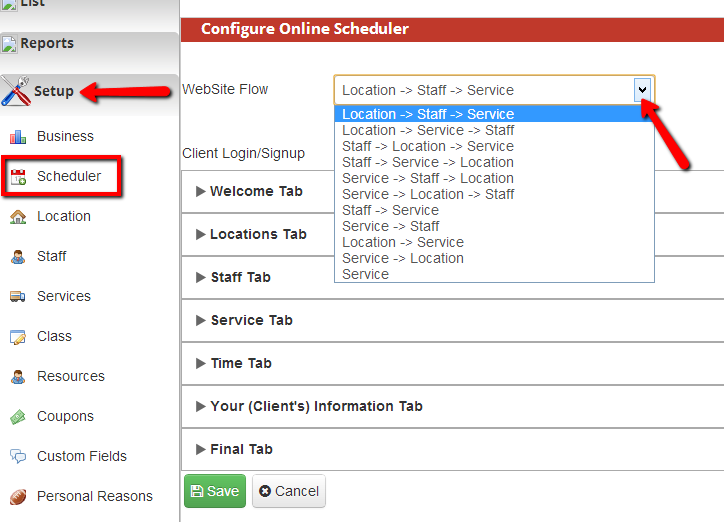
These tabs can be made to display in any order by selecting the Website Flow drop down at the top of the scheduler screen: