...
Then select the "Add New Class" button
...
:
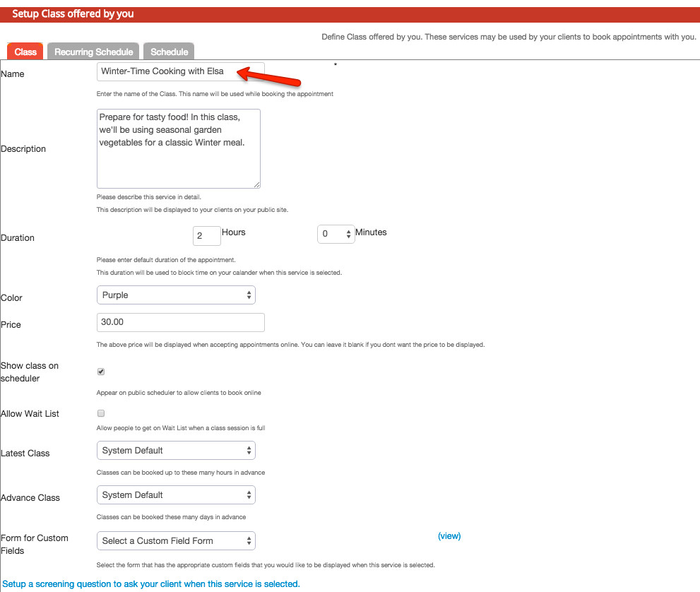
From here you can do the following:
- Type the name of the Class (*This is required)
- Add a Class Description
- Choose the Duration of the Class
- Color code your Class by choosing a color (The color that you choose will be shown "My calendar" under the "Main" tab)
- Enter in the Price of the class if you have a Price that you'd like to set
- Choose whether or not to show the Class on your Scheduler by either selecting or deselecting the Y/N checkbox
- Choose whether or not to allow people to join a Wait List once a Class Session is full by either selecting or deselecting the Y/N checkbox
- Choose the number of hours in advance that this class can be booked by clients through the "Latest Class" dropdown
- Choose the number of days in advance that this class can be booked by clients through the "Advance Class" dropdown
- Select a Custom Field Form through the "Form for Custom Fields" dropdown if you have a Custom Field Form that you'd like to add
- Add a Screening Question to ask clients when they choose this particular Class
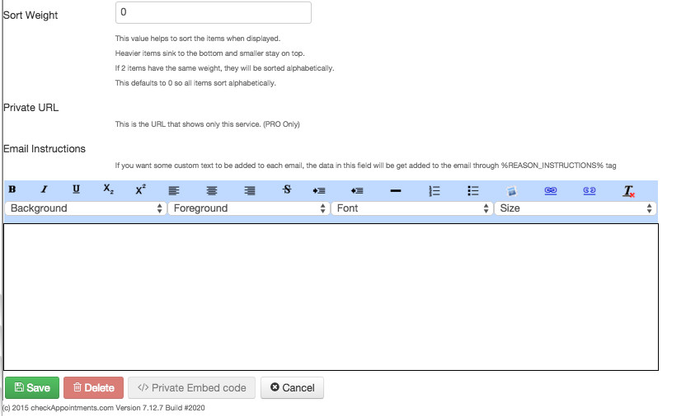
Continued below:
- Choose a weight for the class to have it displayed in a certain order rather than alphabetically by default
- If you are a checkAppointments Professional user, you will be able to add a Private URL for the class which will allow clients to be able to book directly for the Class without seeing the additional Classes & Services you offer through your Scheduler
- Add Email Instructions if you have additional instructions for your clients that will be added to an email through the %REASON_INSTRUCTIONS% tag
Once you've added and edited the information for your class, click the "Save" button and your class will be added under the "Setup" tab > "Class" option.


