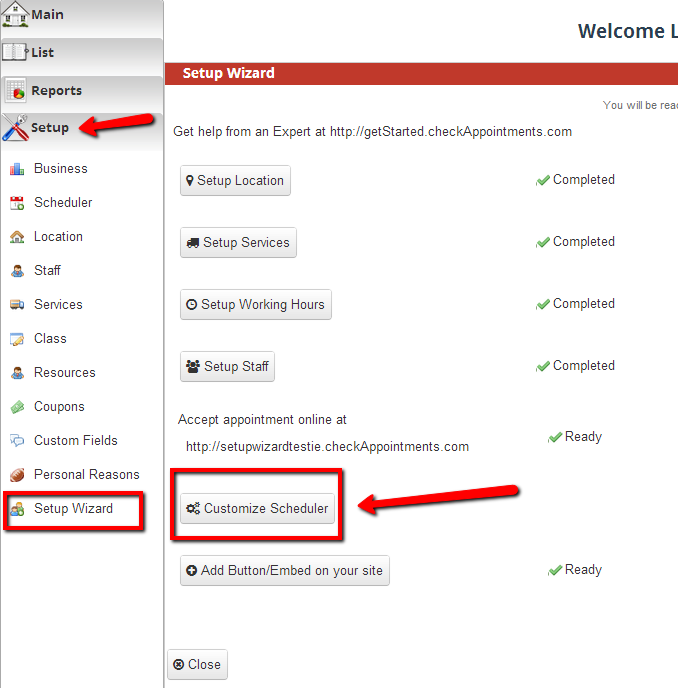
From the Setup Wizard"Scheduler" Tab, you'll also have the option to customize your scheduler. Your scheduler is what your clients go through to book appointments with you. This documentation will take you through how to customize those screens. This tutorial is also available as a video.
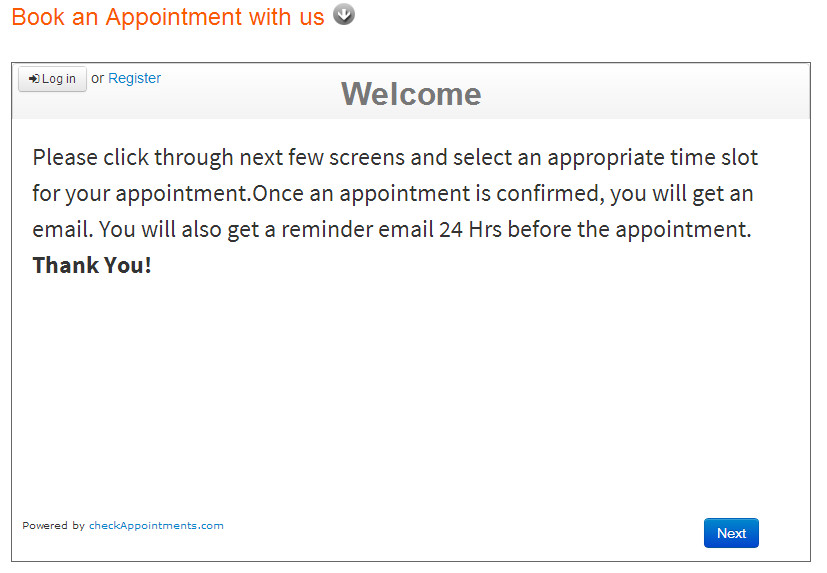
Here is a view of what the scheduler looks like on the client facing side:
And here is what the collapsed view of the Scheduler Configuration screen looks like. We will be describing each of these components in detail in the sections below.
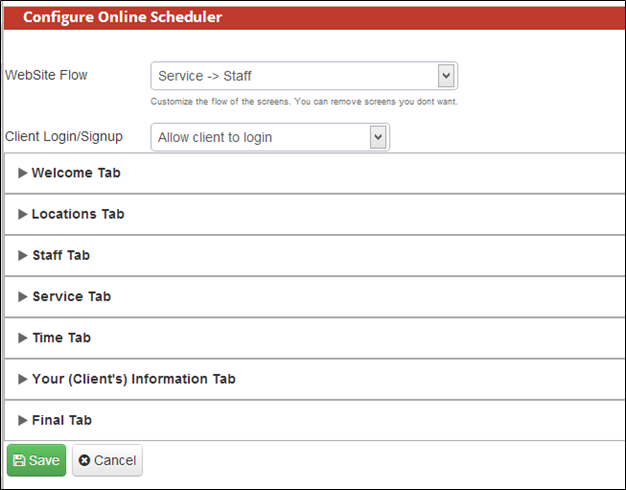

The top section of the Scheduler called "Website Flow" is to determine the display flow for the panels. You can select to have the Location, Staff, and Service display in any order you’d like or opt to not have either or both the Location and/or Staff panels to display at all. The webflow options include:
...
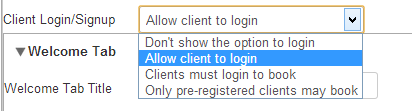
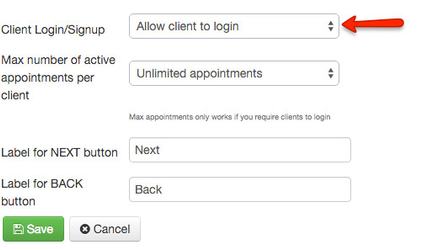
The other drop down in the top mid portion of the Scheduler menu is the drop down to allow clients to login. If you let clients login, they will have access to their upcoming appointments to cancel and reschedule if need be. The options in this drop down are 1) Don't show the option to login, 2) Allow client to login 3) Clients must login in order to book and 4) Only pre-registered clients may book:
Customizing the scheduler is done through a set of 7 tab panels at to the bottom left of the Setup->Scheduler menu"Scheduler->General Setup" Menu. These panels include:
...