| Anchor | ||||
|---|---|---|---|---|
|
As a quick example, if you work as a farm staff member and have a “Late Fall Family Photo Shoot - Regular Package" service at one farm location, and this service lasts for 1 hour (60 minutes) and while your working hours are from 9:00am - 5:00pm, then you appointment times would appear as follows:
- 9:00am-10:00am
- 10:00am-11:00am
- 11:00am-12:00pm
- 12:00pm-1:00pm
- 1:00pm-2:00pm
- 2:00pm-3:00pm
- 3:00pm-4:00pm
- 4:00pm-5:00pm
Alternatively, if you have a “Homemade Ice Cream” service that is set for a duration of 90 minutes (1 hour & 30 minutes) at a different farm location, and your working hours from 9:00am - 5:00pm as well, the appointment time offerings would be:
- 9:00am-10:30am
- 10:30am-12:00pm
- 12:00pm-1:30pm
- 1:30pm-3:00pm
- 3:00pm-4:30pm
No one could schedule for the "Homemade Ice Cream" with you after 4:30pm because your hours of availability run from 9:00am - 5:00pm, and there wouldn't be enough time left in your availability to account for the entire duration of your last appointment. This is a factor to consider when setting up your working hours.
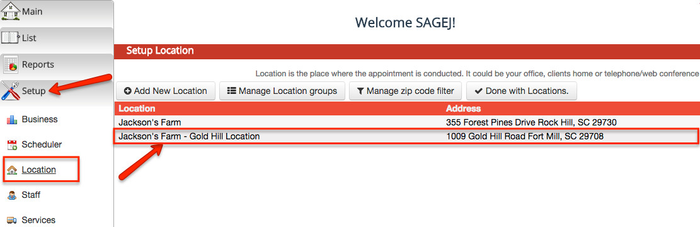
In this documentation, we will cover how to add hours of availability at a location for yourself and for a staff member. To do this for yourself you can navigate to Setup → Location → choose a location → and then click on the "Working Hours" tab. To do this for other staff, you can go to Setup → Staff, select a staff member's name → and then click on the "Working Hours" tab.
In this documentation, we will walk through 4 options for adding availability for yourself and staff members, and these options include:
- Adding a Schedule for a Day
- Adding a Schedule for a Date Range
- Adding a Regular Schedule
- Adding a Recurring Schedule
To add availability for yourself for a single day at a particular location, first navigate to Setup → Location → choose a location → and then click on the "Working Hours" tab.
|

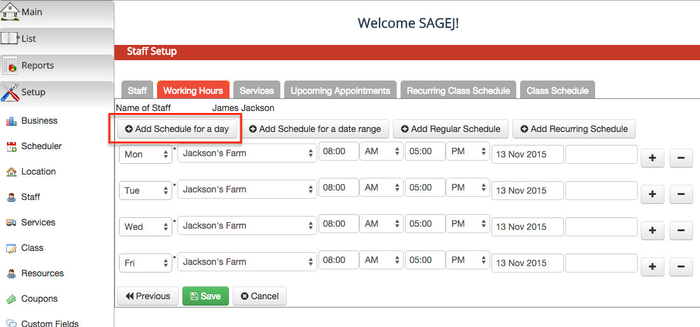
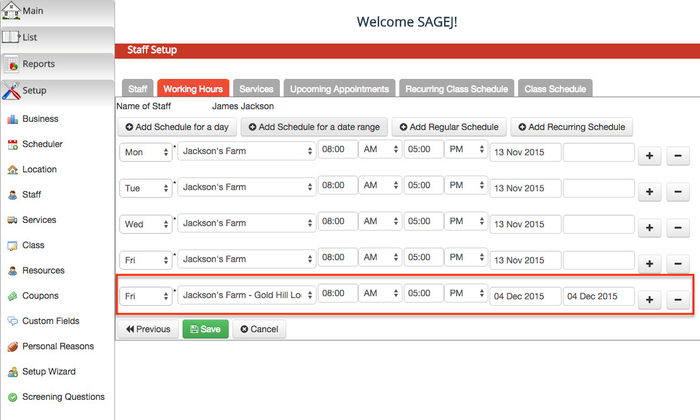
After you've clicked on the "Working Hours" tab, click on the "Add Schedule for a day" button and this will bring up the "Add Schedule" window.
Once you're on the "Add Schedule" window, you can add the Date that you'd like to add Working Hours for, the Location, and lastly your Start and End Times. I am choosing to add Working Hours for the "Jackson's Farm - Gold Hill Location" in addition to the Working Hours that I already have set up for the "Jackson's Farm" location which is in Rock Hill, SC.
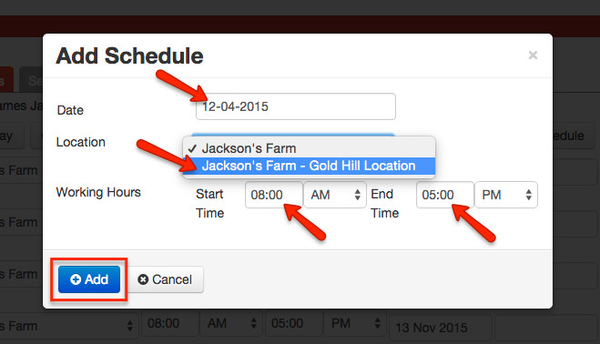
Once you've selected the appropriate information, click the "Add" button and this will take you back to the Staff Setup screen under the Working Hours tab. You'll now be able to see the availability you've added for a single day.
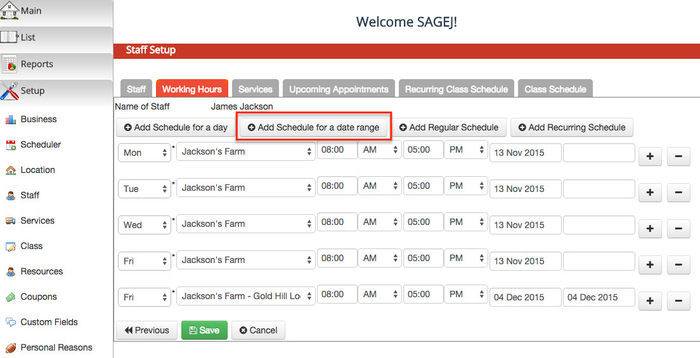
To add a Schedule for a Date Range at a location for yourself, click on the "Add Schedule for a Date Range" button and this will bring up the "Add Schedule" screen again.
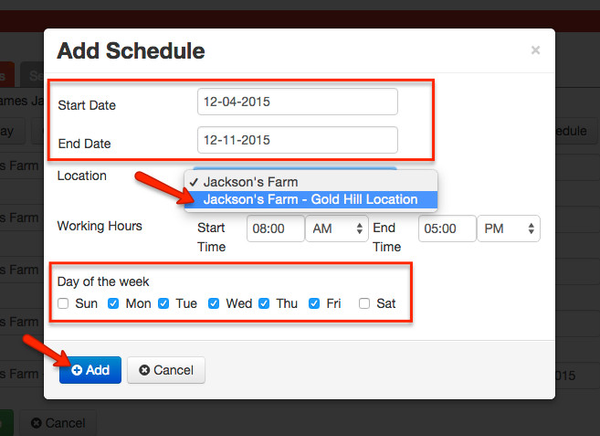
Once you're on the "Add Schedule" screen, you'll need to choose your Start and End Dates, the Location, your Working Hours, and lastly the Day(s) of the week that you plan to be available at the Location. I've chosen to add Working Hours for Friday, December 4, 2015 - Friday, December 11, 2015. On Monday, Tuesday, Wednesday, Thursday, and Friday of that week, I plan to be available from 8:00am - 5:00pm. Once you've selected the appropriate information click the "Add" button.
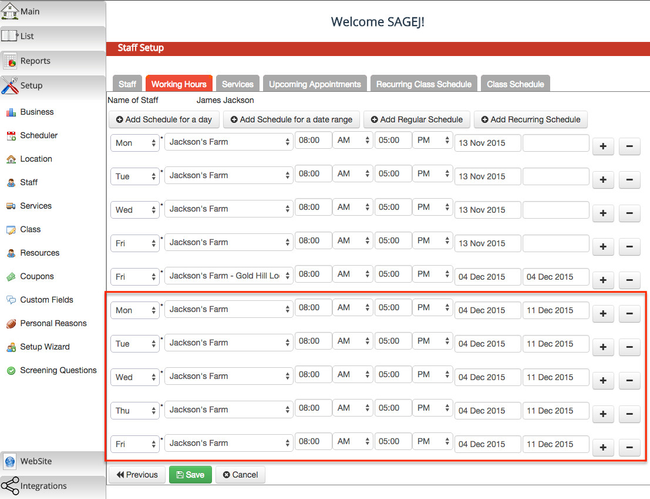
You'll now be redirected to the Staff Setup screen under the Working Hours tab where you'll be able to see the new schedule you've created for a certain date range.
To add a Regular Schedule for a particular location, click on the "Add Regular Schedule" button, and you will see the "Add Schedule" screen.

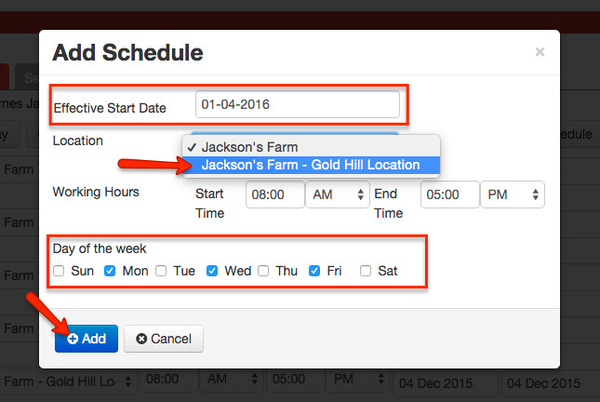
Once you're on the "Add Schedule" screen, you'll be able to choose the Effective Start Date for which your Regular Schedule will begin, the Location, your Working Hours, and lastly the Day(s) of the Week that you plan to be available. Once you've selected the appropriate information, click the "Add" button.
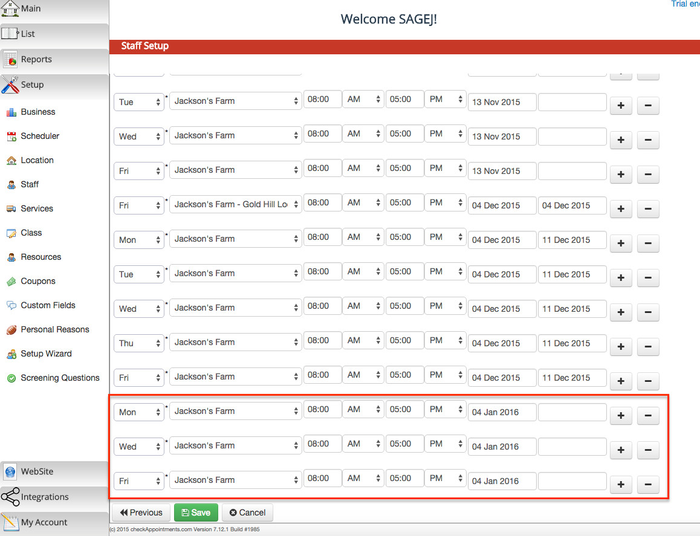
You'll now be able to see the Regular Schedule you have added back on the Staff Setup screen under the Working Hours tab.
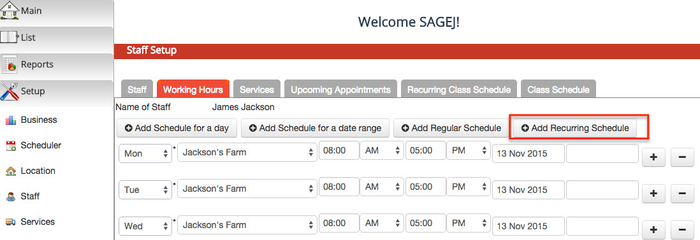
To add a Recurring Schedule for a location, click on the "Add Recurring Schedule" button and this will take you to the "Add Schedule" screen again.
Once you're on the "Add Schedule" screen, you'll be able to choose the Effective Start and End Dates, Location, your Working Hours, and the Day(s) of the Week for which you plan to have availability. After you've selected the appropriate information, click on the "Add" button. You'll now be redirected to the Staff Setup screen under the Working Hours tab
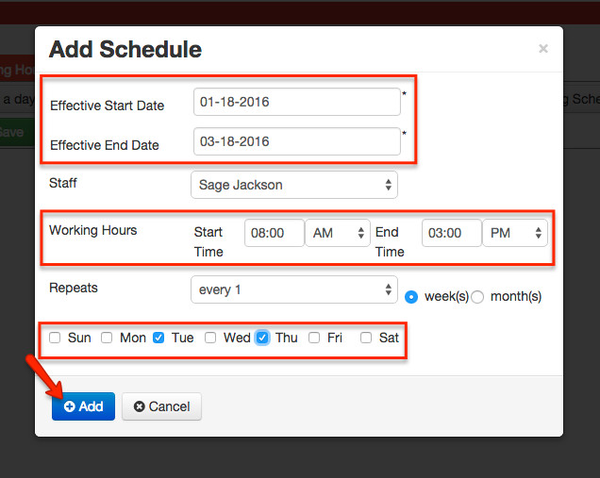
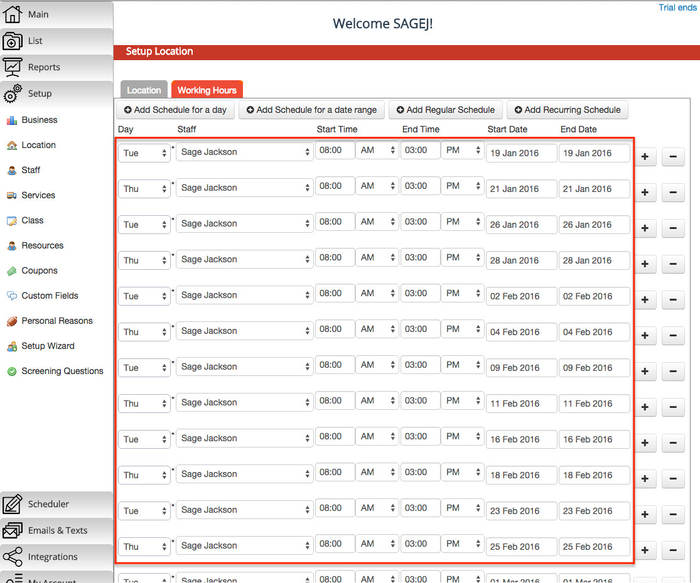
You should now be able to see the Recurring Schedule you have added. As you can see, I have set up a Recurring Schedule from January 18, 2016 to March 18, 2016 for Tuesdays and Thursdays from 8:00am - 3:00pm.