Resources
Before I jump into how the Resources panel is used, I'm going to take a second to explain what we mean by Resources as it can be a broad term. In checkAppointments, "Resources" refers more specifically to shared resources within a business or office space that if one staff person is using for an appointment, another staff person can't use.
For example, a physician's office may only have one MRI machine or a massage parlor may only have one of their rooms with a shower that's needed to rinse the exfoliants off after a seaweed wrap.
For this tutorial, I'm going to use the example that a photography studio has only one room set aside, with the appropriate backdrops, etc., for clients who want professional headshots (full disclosure, I'm not a photographer and I'm not sure that studios really work this way - meaning with rooms set aside - but hopefully you can follow me down this line of thinking regardless of its potential improbability).
Here we go:
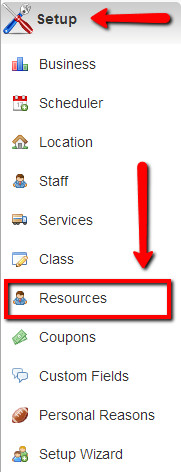
You're logged into checkAppointments and you want to add this studio resource. First, navigate to it by going to the Setup drop down menu and clicking on Resources
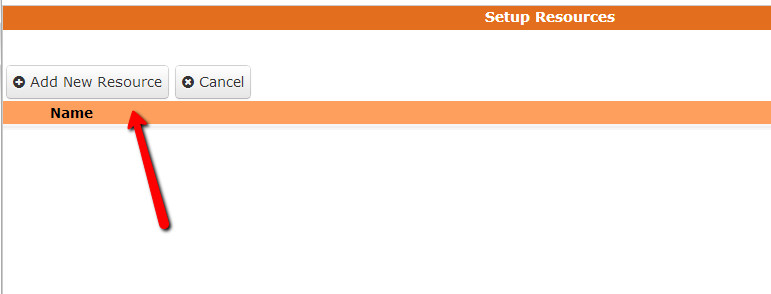
Once you've clicked on Resources you'll be directed to the Setup Resources screen. Now I, as my amateurish photographer self, want to add this professional studio room as my resource. To start I'll click the Add New Resource button:
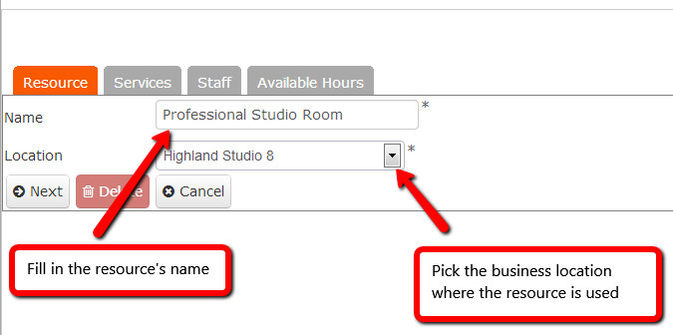
Then I'll be directed to a series of four tabs to fill in the additional information around the resource. Starting with the "Resource" tab itself, I'll fill in the name of the room or studio and select which of my business locations it's located in
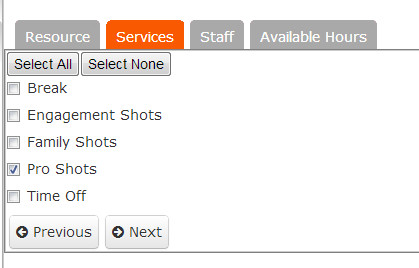
After filling in those fields, I'll hit next and match the resource to the services it is used for. In this example we're saying it is only used for professional shots, but in other cases a resource could easily be used for multiple services.
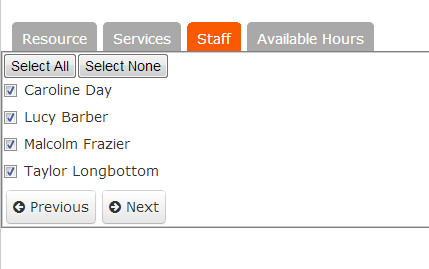
I'll then click next to select which staff members can have access to the resource.
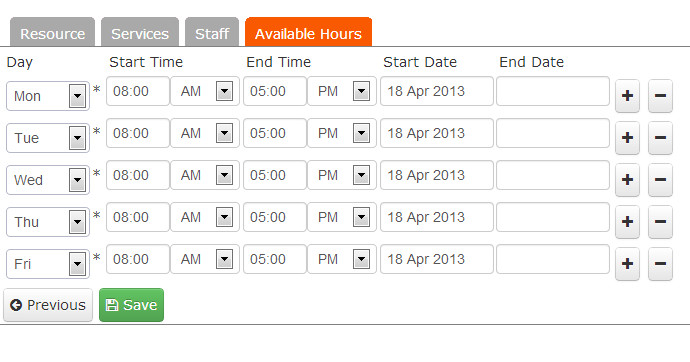
And finally what hours during the Location's "Working Hours" (which can be set under Setup->Location->Select Location->Working Hours) the resource is available for.
Once I hit the "Save" button after the Available hours tab is filled in, the resource will be listed in the Setup Resources screen. Now, if a client comes to book a Pro Shots photo shoot with Taylor Longbottom for April 29th at 11:00am, another client will not have the option to book a Pro Shots photo shoot with Malcolm Frazier at 11:00am on April 29th. They will be able to at 10 or noon (or however long you have set the service to last), but the next client booking will not have the ability to double book on a time a shared resource is already being used regardless of choosing a different staff member who may have an opening in his/her schedule at the time.
If you use the Resources option, go ahead and check out how it works in the Scheduler after you hit save. Give us any feedback you may have for improving it at support@checkappointments.com