Client Scheduler Login
You account's scheduler can be configured to allow clients to register and login when making appointments. The benefits for clients to register on your scheduler are:
- They can easily access all of their appointments they've made at your business with the email address they've register under and
- They can book new appointments and not have to re-enter their information on the Your Information panel
Below is a step by step guide on both registering/logging in and how clients can view their appointments.
As a note: you can disable the client Log in/Register functionality. Read our instructions on how to do so here.
Read the text in the red boxes within the screenshots below for details:
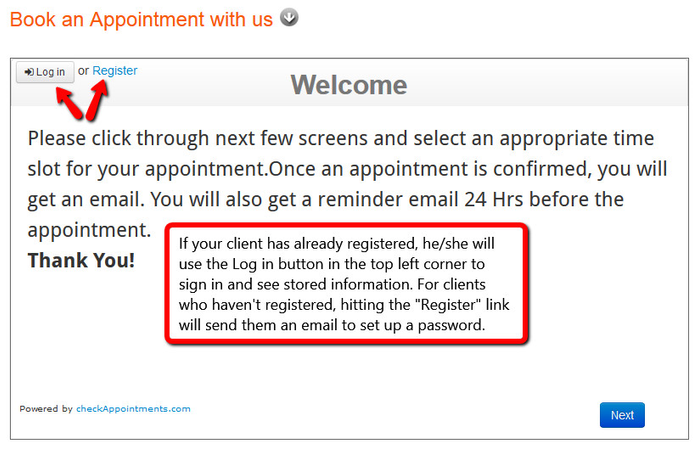
If your client is not yet registered:
Before we jump into the step by step, let me explain what it means for your client to be "registered". Any existing clients that you can access through Main>Lookup Client>Search are considered to be registered with you. However, because this functionality is new they may not realize they are registered or know their password.
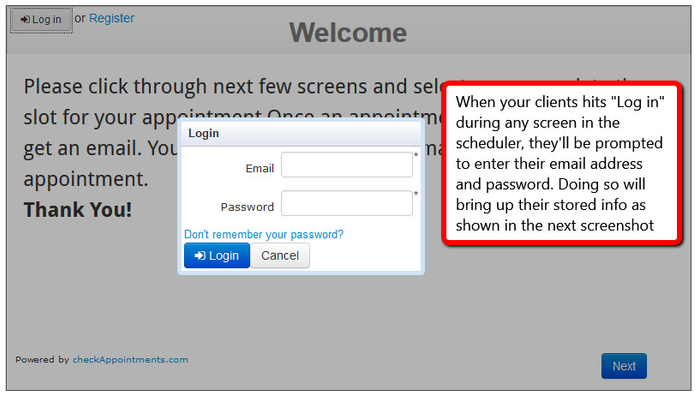
Not to worry. Skip on down to the section "If your client is already registered" beneath this one. Within the Log in prompt you'll see a link labeled "Don't remember your password?" If registered clients click on that link, they will be sent a generate password link via email.
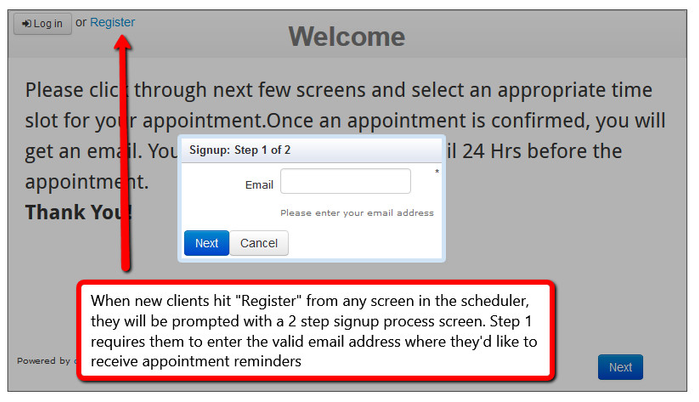
Now, onto the topic at hand. If new clients are booking appointments with you through the system and want to register ahead of time, here are the steps they should follow:
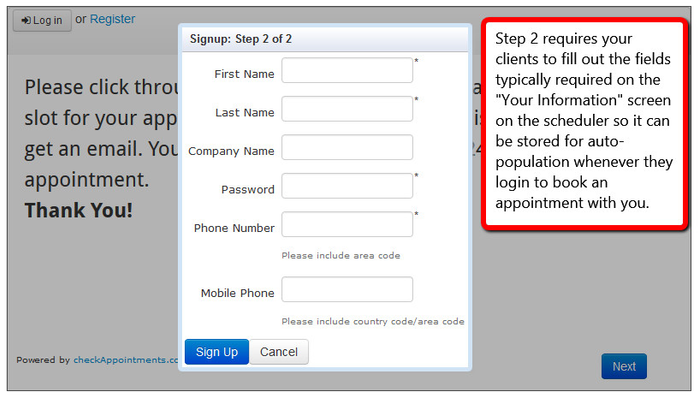
Once the new client completes step 2, they are automatically logged in and you will see them on your client list. See the section below to understand what your clients see once they're logged in.
If your client is already registered:
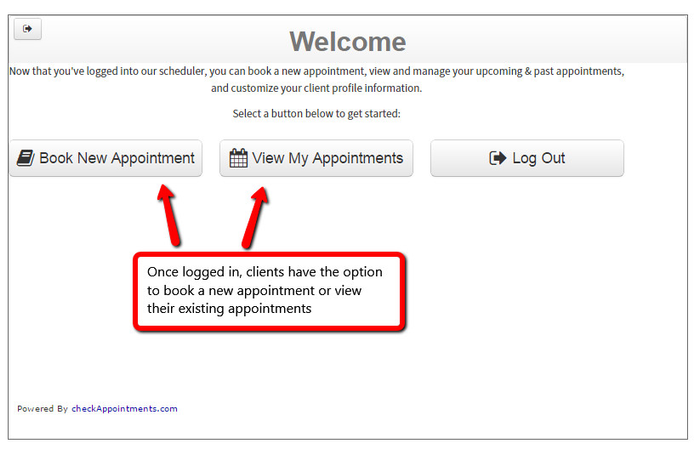
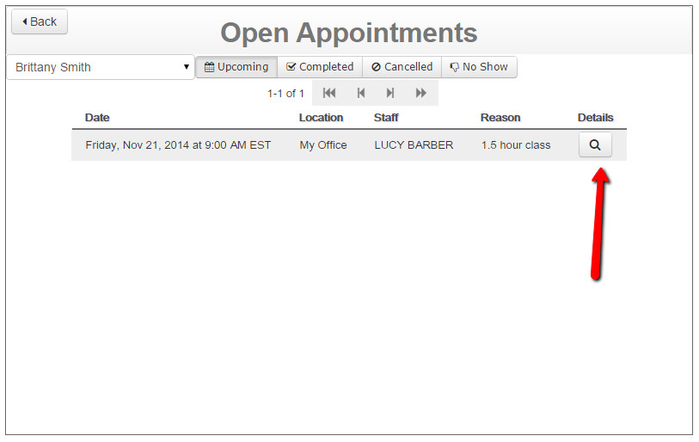
After hitting "View My Appointments" clients can click to see their upcoming, completed, cancelled, or no show appointments. They can click to view more details about any of those appointments:
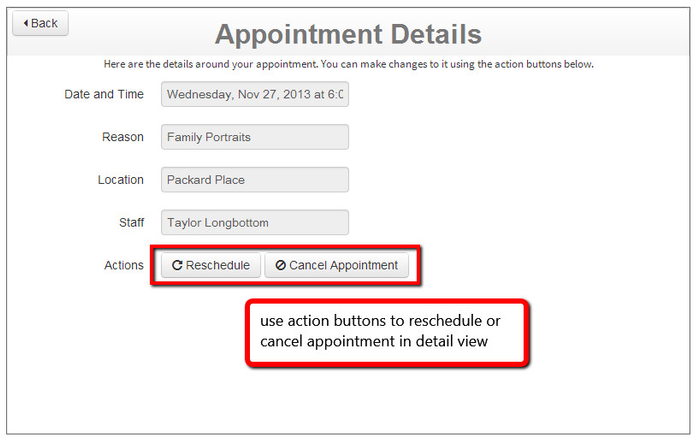
If they are viewing the details of an upcoming appointment, they have the option to cancel or reschedule that appointment:
The other benefit to clients for logging in is all their info is stored by the time they reach the "Your Information" page so they don't have to type everything in in order to save a new appointment that they're booking:

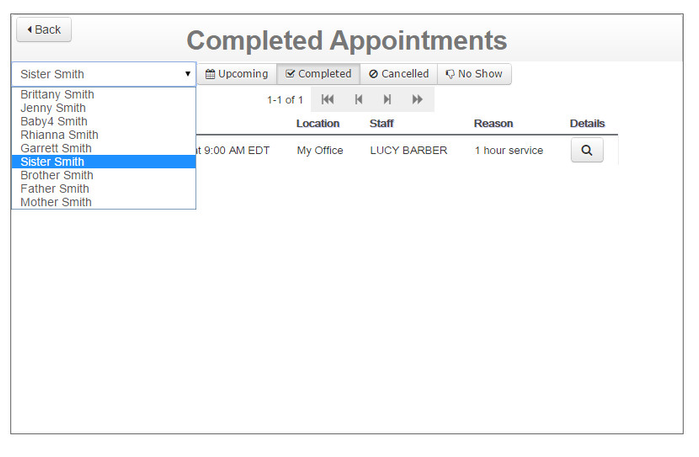
Lastly, if clients have registered multiple names under one email address (say a mom has used her email address to register for both of her kids tutoring lessons), she can use the name dropdown available in the View My Appointments Screen to switch between registered family members:
We hope this tutorial gives you a good idea of not only the new functionality where clients can access upcoming appointments, but also an overview of what it means for your client to register or login at all.
Have feedback? Did we miss something with this release? Let us know at support@checkappointments.com