9. Linking PayPal to your account
If you want to setup your checkAppointments account to accept payments through PayPal, follow the steps below.
First, open up two tabs and make sure you are logged into both PayPal and checkAppointments.
In checkAppointments, go to Website→Configure Payment Options and click on the PayPal option:
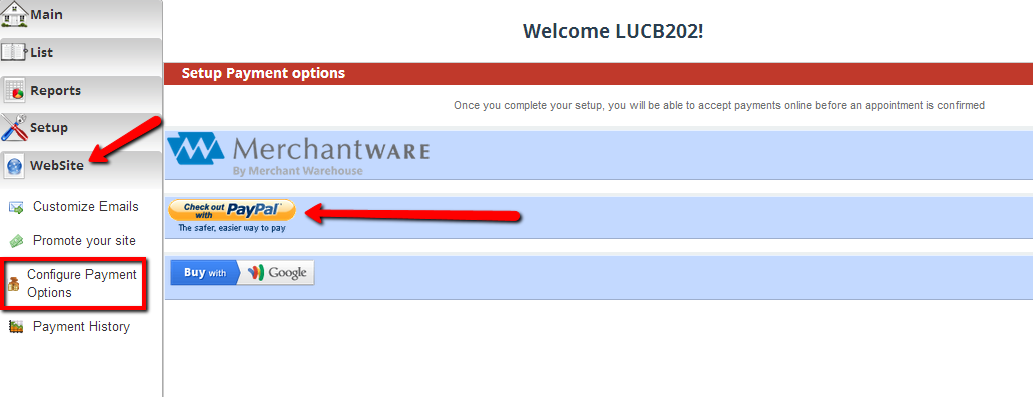
You'll notice in the Setup PayPal screen, it will tell you to first, "Signup for a PayPal Business Account" so that you can have a Merchant Account Id to put into checkAppointments. Now, if you've been accepting payments through PayPal for your business already then you should already have this setup. If not, then make sure to do that in PayPal before going forward.
Next, in PayPal we're going to go find our Merchant Account ID so we can put it into the box in checkAppointments:

After signing into PayPal, hit the "Cog" icon in the top right corner to go to your profile page:

After hitting the "cog" icon, you'll be directed to your Profile's Account settings. You'll see your address information on the top left and beneath that your "Account Options". One of the items listed in your account options should be your Merchant ID:
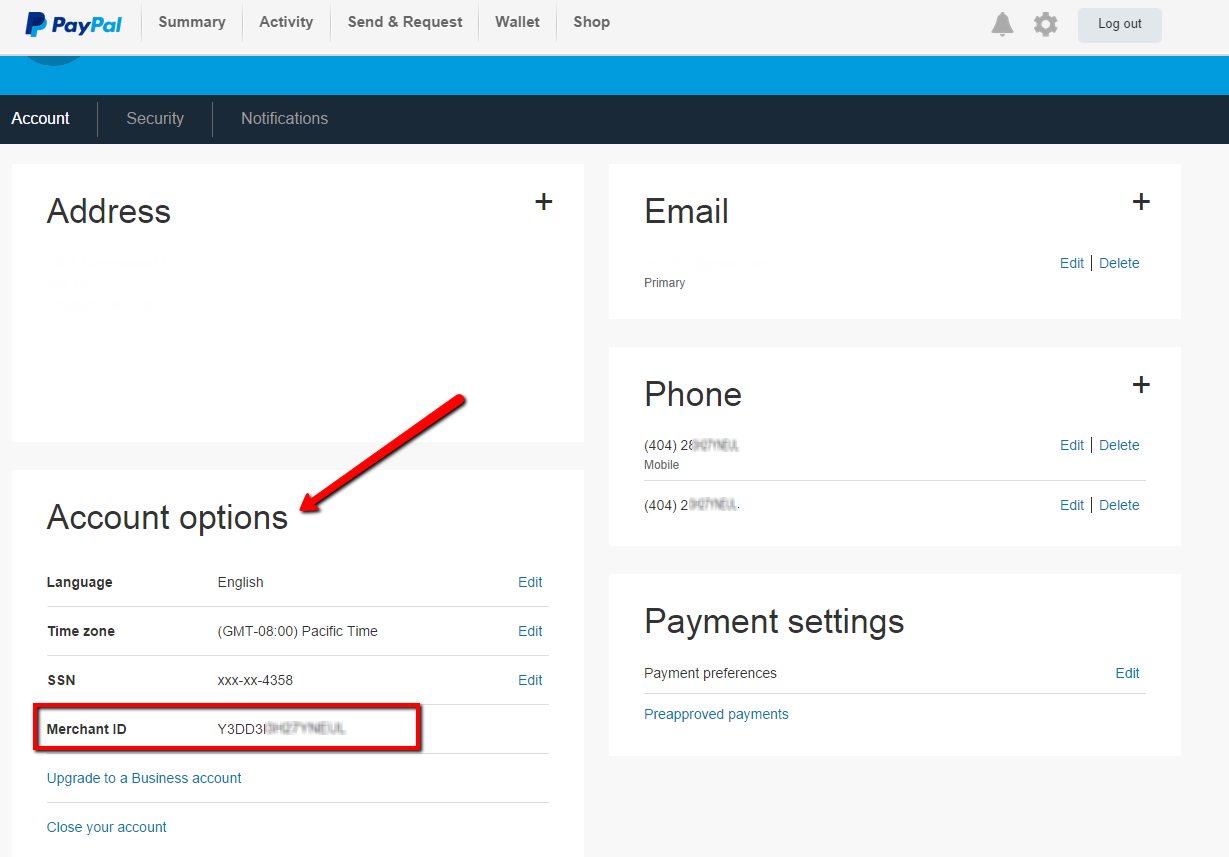
Highlight your Merchant ID and right click to copy it. Back in the Setup PayPal screen in checkAppointments, paste the Merchant Account ID into the box under Step 3:

You have a few options under step 4. You can check the box to say that "Payment is Required". This means that anyone who books a service or class where you've indicated there's a price for it will be directed to PayPal immediately after booking to pay for the service. If they are booking a free service or a service where you've not indicated there's a price for it, they will not get the PayPal link but just an email confirmation. The client has a 30 minute window to pay for the service before his/her appointment is voided. This voided appointment will show up in your "Cancelled Appointments" Lists and Reports.
There's also the option to add a redirect url so that after they pay through PayPal they can be redirected to a specific site. You can put a link back to your website or maybe a thank you page that you've set up.
After you've entered the Merchant Account ID and selected whether Payment is or isn't required, hit the "Save" button at the bottom to commit your changes.
Want to customize the message that people see when Payment is required? You can find that documentation here.