1. Going through the Setup Wizard
The Setup Wizard exists to help you get your account going by adding some of the basic required information. This tutorial also exists as a video presentation:
If this video doesn't play on this page, go to this link to watch it: http://ml.vu/13Rh76E
Setting up your account, text instructions:
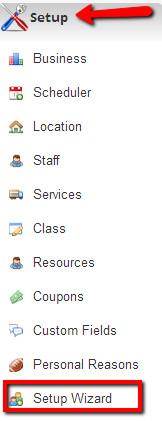
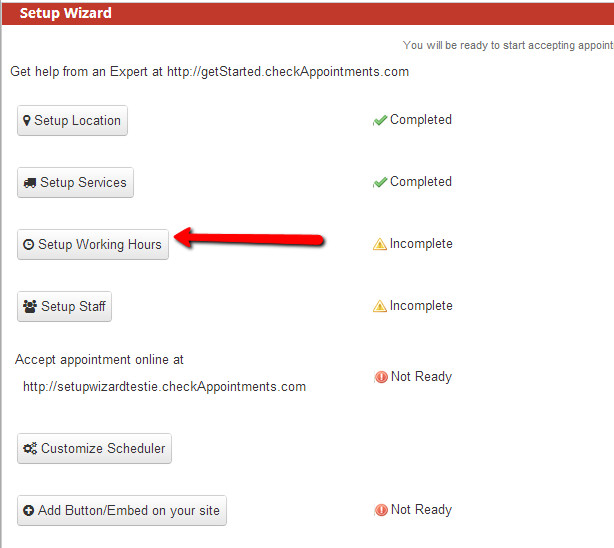
You'll be presented with the Setup Wizard as soon as you login and can always find it again later by going to Setup->Setup Wizard:
When you first login, you'll see a bunch of Incomplete marks on the Setup Wizard telling you the steps you still need to take to setup your account:
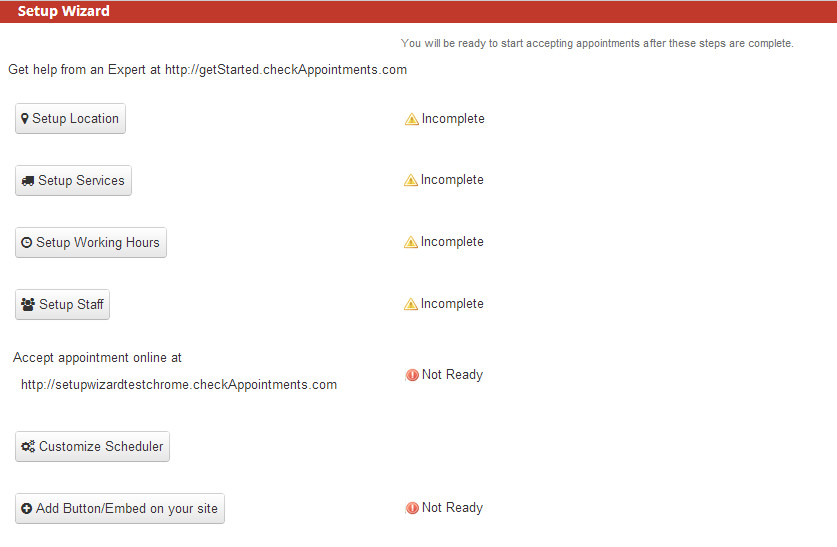
Start by clicking Setup Location. You'll see that there's a default location already plugged in called "My Office" which you can change the name of and add address details. You'll configure working hours for this location later:
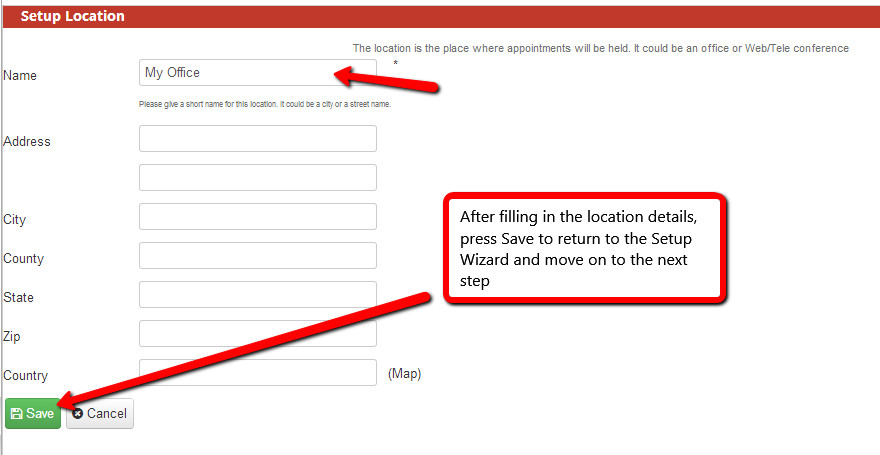
After pressing Save, you'll be kicked back into the Setup Wizard Screen where you'll see that there's now a "Completed" mark next to Setup Location. If you want to add a second, third, fourth, etc. location, I'd recommend doing so after you go through the Setup Wizard (documentation on adding another location after going through the setup wizard is available here). Next, select Setup Services to enter at least one of your services or classes:

In the Setup Services screen, first enter the name of the Service or Class and set the duration. Then choose whether it is going to be a Service or a Class. If you choose Service, you have the option of adding a buffer time to the beginning and/or the end of the service to give you time to finish paperwork or prepare for the next appointment. Once you finish filling out the details, press "Save" to return to the Setup Wizard.
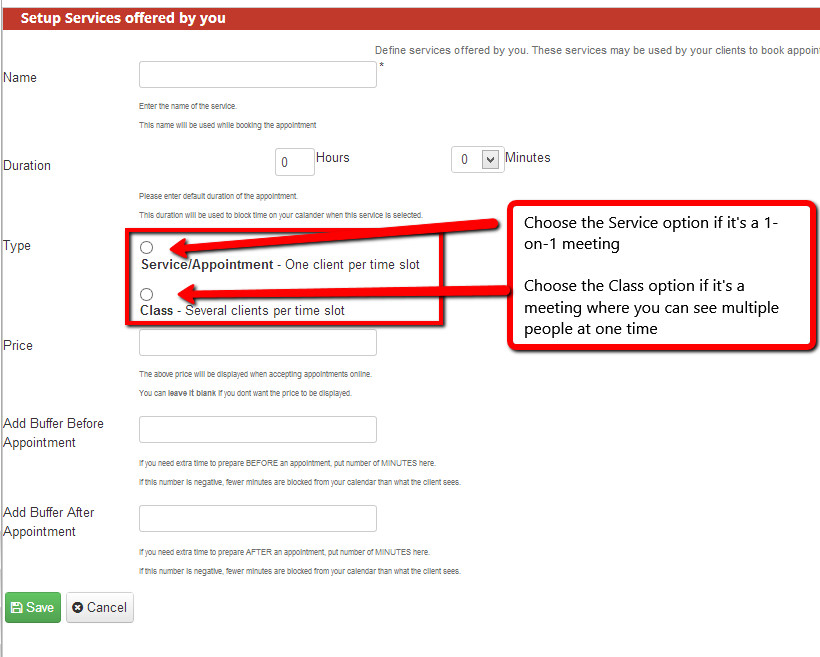
You'll notice when you return to the Setup Wizard that now Setup Services also has the completed mark next to it. Now you'll want to click "Setup Working Hours" and add your personal working hours and any other Staff who will be on the account:
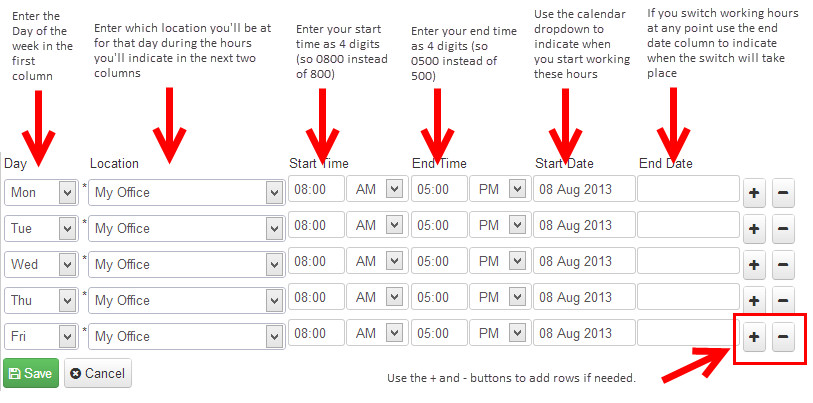
Once in Setup Working Hours, click on your name:

Customize your working hours in the grid provided:
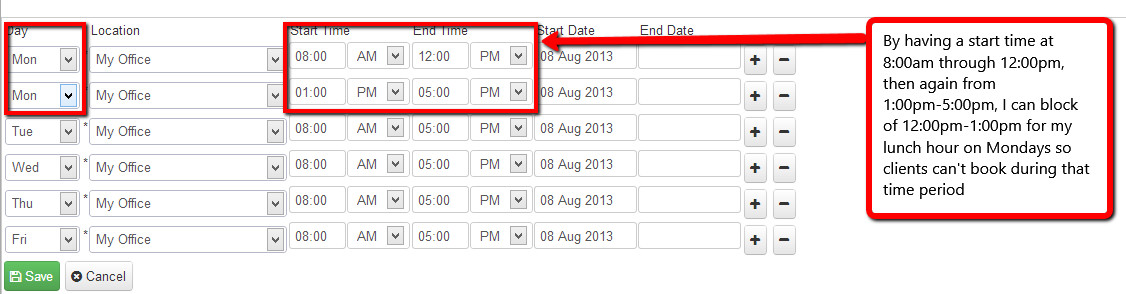
If you want to add a period that you take lunch every day, add a row using the + sign on the right hand side and use the start and end times to wrap around your lunch hour as seen in the screenshot below:
Press "Save" when you are done setting up your working hours and you'll return to the Staff screen. From here you can "Add New Staff" without needing to go back to the Setup Wizard. If you have another person in your organization who will be taking appointments, press the "Add New Staff" button instead of the "Done with Working Hours". Selecting Done with Working Hours will kick you back to the Setup Wizard screen.
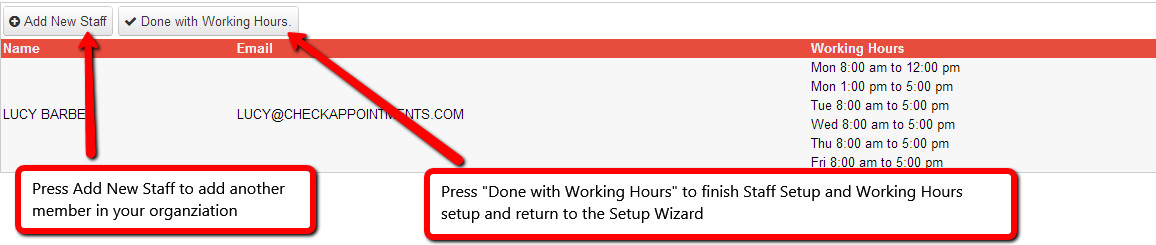
If you press "Add New Staff" you'll go to the Staff Setup screen to add that staff member and customize his/her working hours:

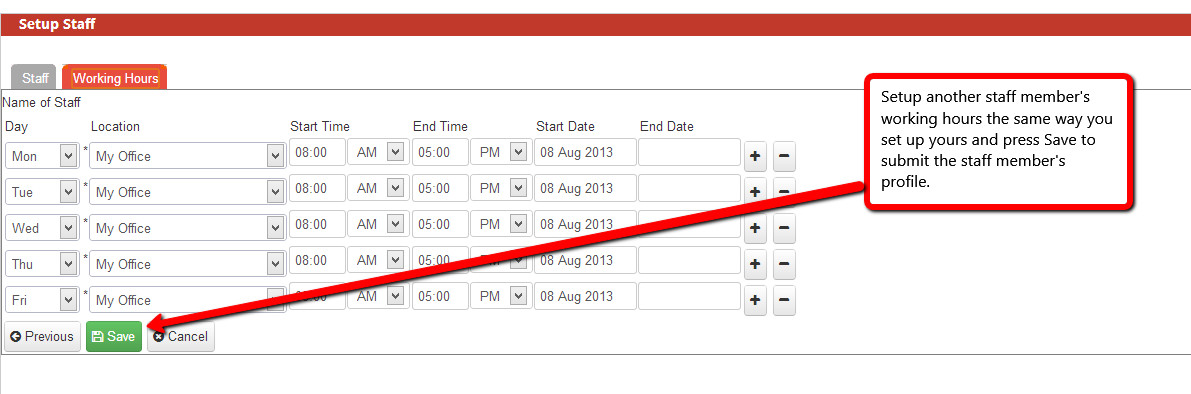
Once you press save, you'll go back to the Staff screen. Add another staff member if you need to or press "Done with Working Hours" to return to the completed Setup Wizard. Now your Setup Wizard will show everything as completed and that your scheduler and button are ready to use:
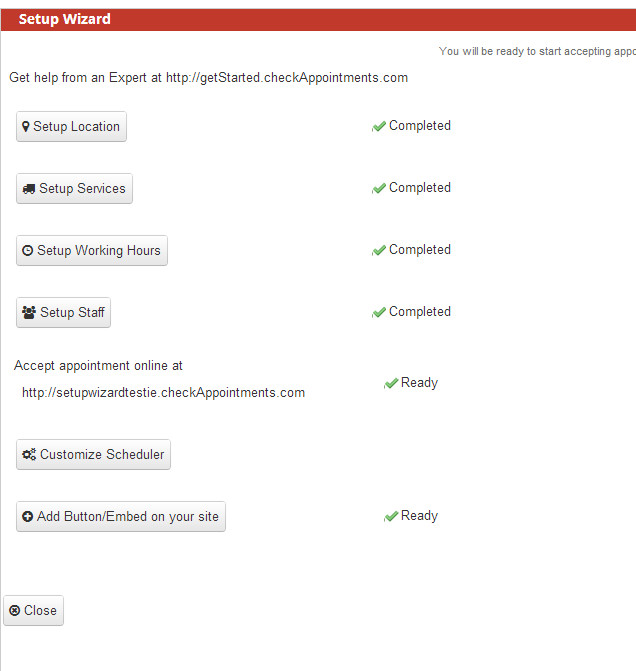
Find the documentation on customizing your scheduler available here and information about embedding it on your site here.